
Barn Board and Fireplace
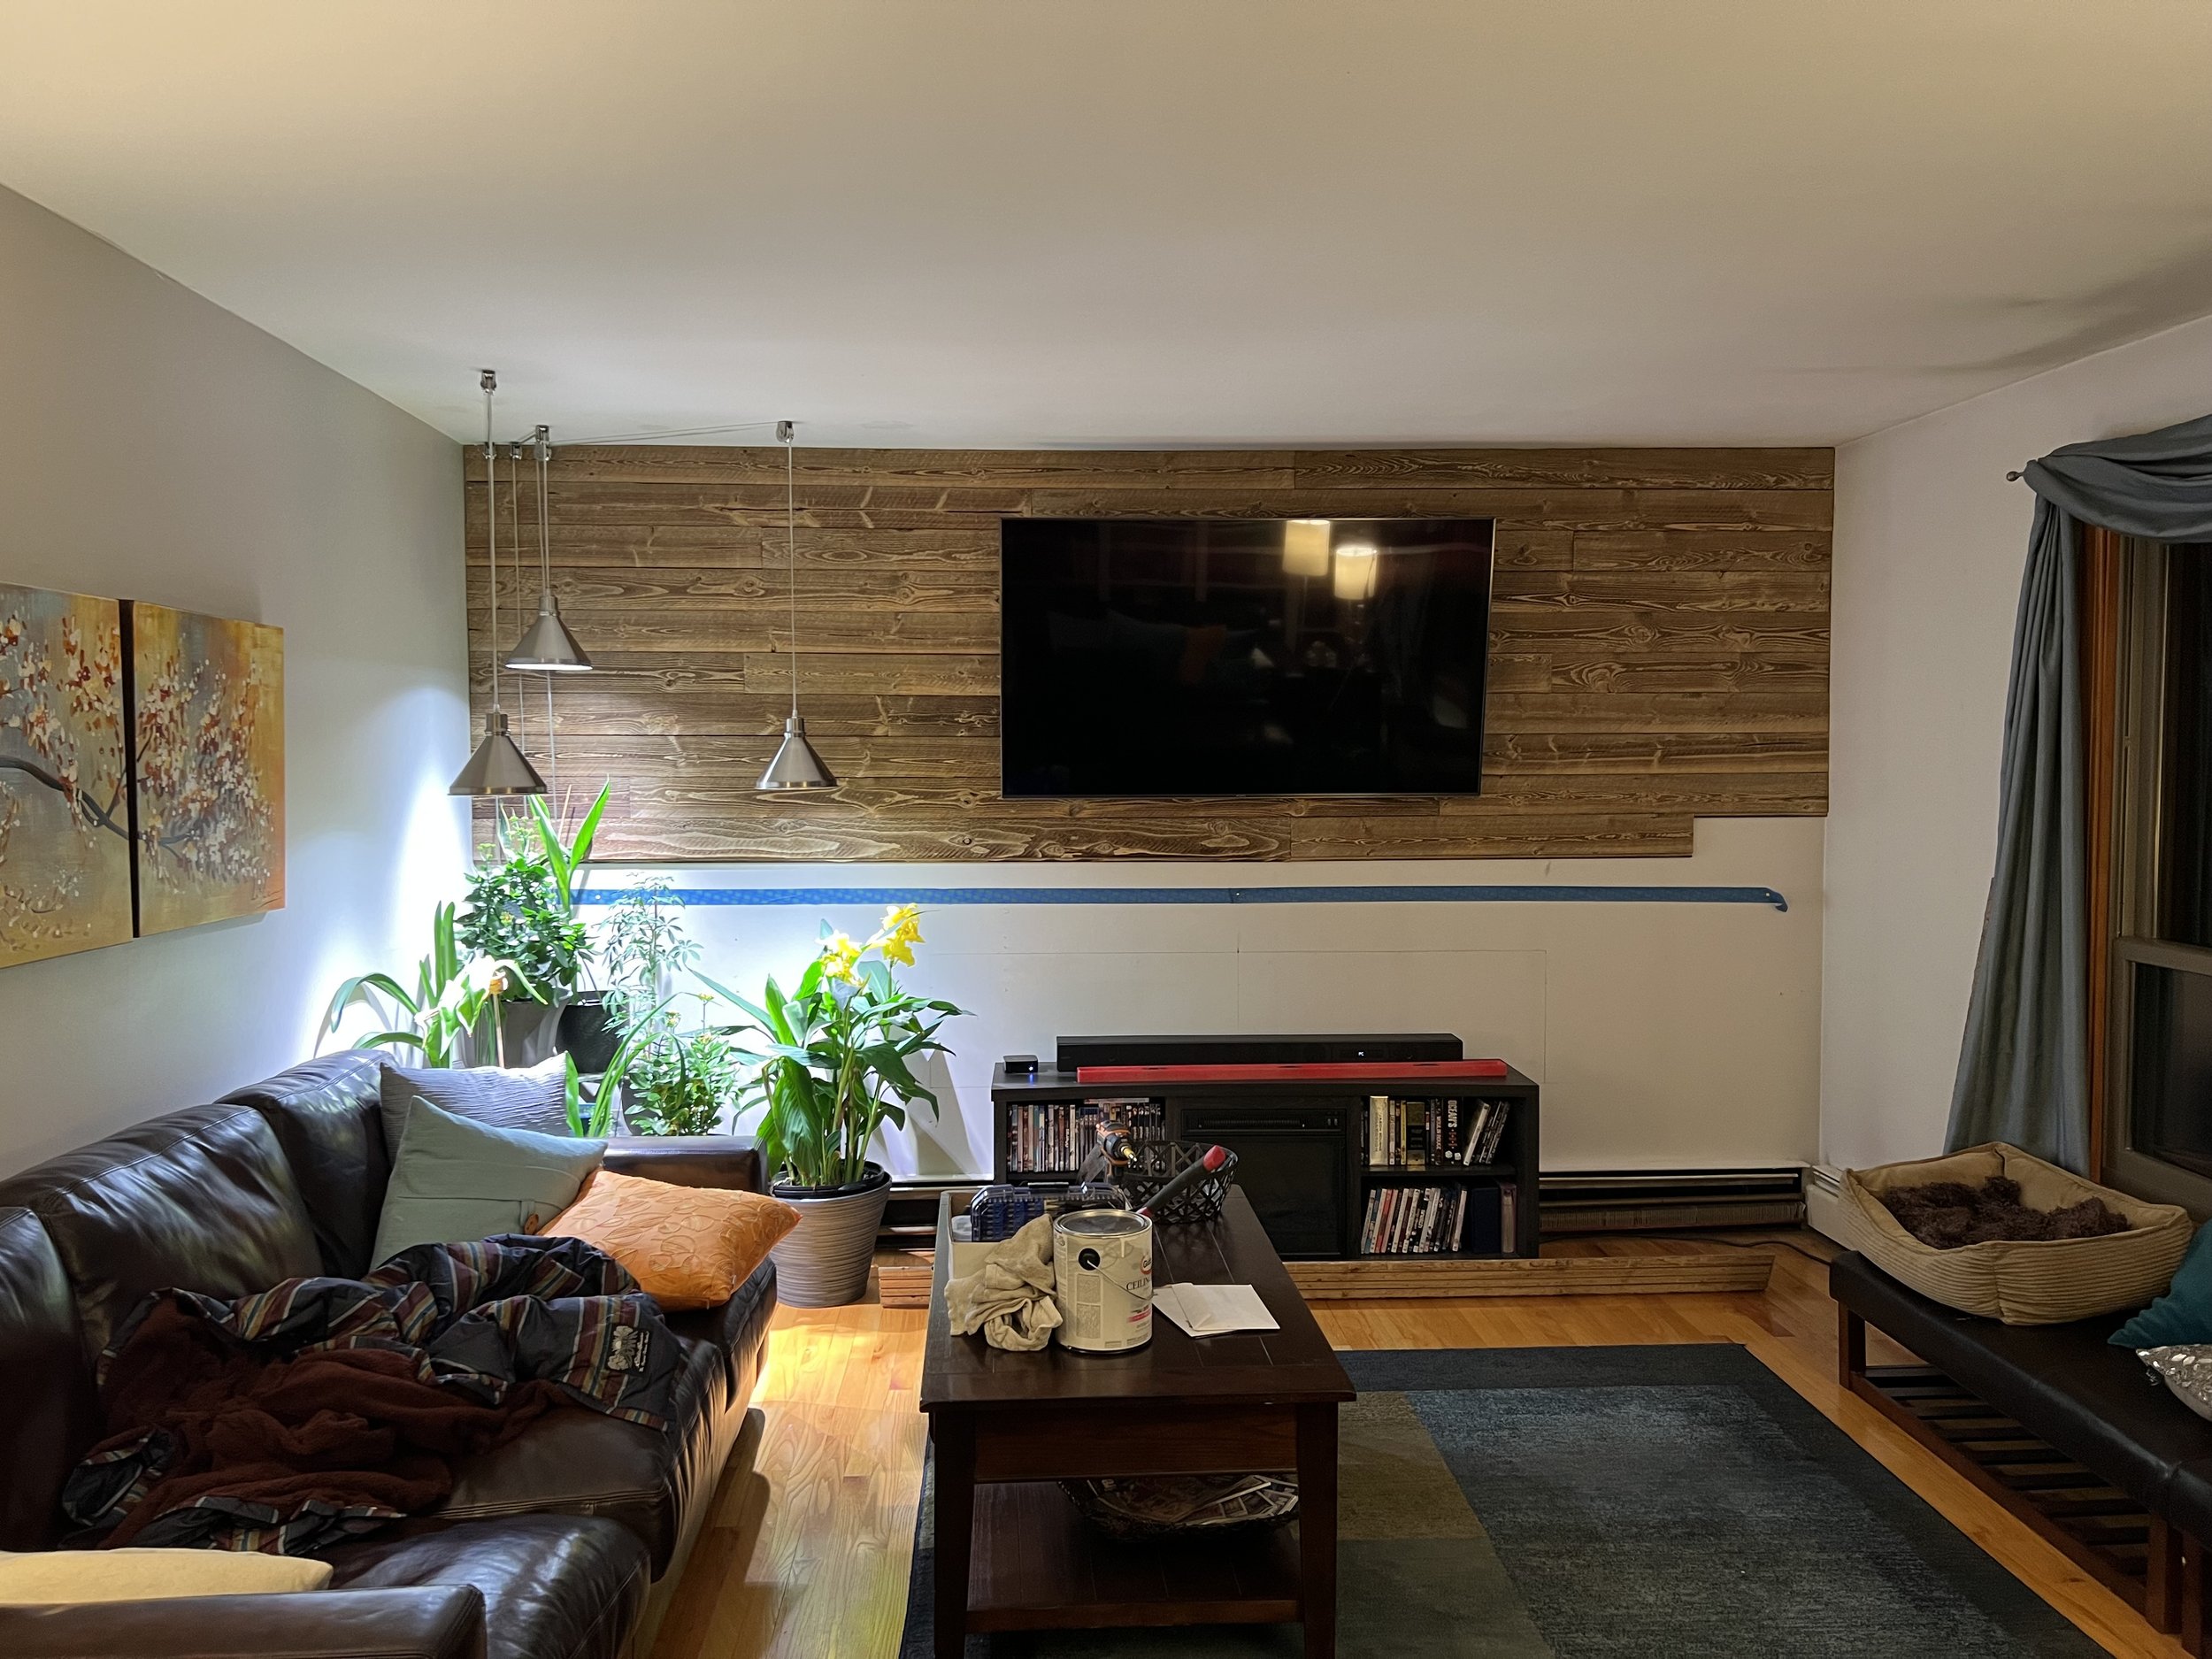
A barn board feature wall and electric fireplace adds warm ambiance to cold New Hampshire winters.
I knew as soon as I saw the living room that it needed a fireplace. I went through a few iterations, and ultimately decided to forego the lofty daydream of vaulted ceiling and skylights in favor of saving for early retirement and avoiding the glare on the TV.


What I didn’t know what what a pain in the butt it would be to vent it. The carport is just beyond this wall, and there are windows to the side, so the only solution would have been to punch a new chimney through my new-ish 50-year warranty roof. I’d really rather not. So: electric.
Leveling And Re-Leveling
Ugh, this was a pain. Of course my ceiling is not level… that would be too easy. Working above my head and on a stepladder, holding an 8-foot board and the level with one hand and the drill and screw in the other proved to be challenging. When the top row seemed to be level and straight, the second row proved that it wasn’t. Level actually turned out to be about 3/4” off from the slope of my ceiling.


Pull it down. Rip at an angle. Put it up again. And again. CRAP. Again. Well, close enough. Barn board isn’t supposed to be perfect.

I knew roughly the size of the fireplace I wanted, but needed to decide on the exact model before framing out the base cabinet.
Shopping and Procrastinating
Most electric fireplaces look like two-dimensional cartoon renderings of the Pits of Hades. Typical New Englanders use fire in their homes for survival… you know, to prevent us from having to climb inside the carcass of a newly-dead tauntaun. The idea of paying decent coin just to have it look pretty is absurd.

Dimplex IgniteXL

Modern Flames Spectrum Slimline
The selection of electric fireplaces is minimal. The selection of realistic-looking electric fireplaces is non-existent. And then I began my online obsession with Trevor.
Blazing Embers
Let me introduce you to Trevor’s YouTube channel. If you know me, you know I don't give a rats ass about online personalities or influencers or anyone else telling me what I should buy and how I should decorate. But Trevor’s videos offer up-close and in-depth looks at the features and aesthetics of the fireplaces, which is especially important because his shop - Embers Living - is thousands of miles away.
Modern Flames Orion Slim
Well, this one does the trick: the Orion by Modern Flames. It’s got a high-definition display combined with three-dimensional base (log & glass) media that combine to make a darn good looking fake fire. There are sparks and smoke and crackling noises, all without the actual bother of firewood, backdrafting, and cleaning out ashes. I opted for the Slim version, since I don’t need a multi-sided display, I benefit from having the black bezel cover the cut edges of the barn board, it’s not as deep, and it’s a decent amount cheaper.
I debated flying to Denver to see the units in person, since I know how misleading marketing videos can be. But after talking on the phone with a super-helpful employee (who even took a few additional videos for me), I bit the bullet. Also, it turns out that Independence Day is a good time of year to look for sales on fireplaces. It arrived in just a couple of days.

Base Cabinet
Now that I’d bought the fireplace insert, I could start work on the frame. I treated myself to a laser level, and was delighted to see that my prior work wasn’t half bad.
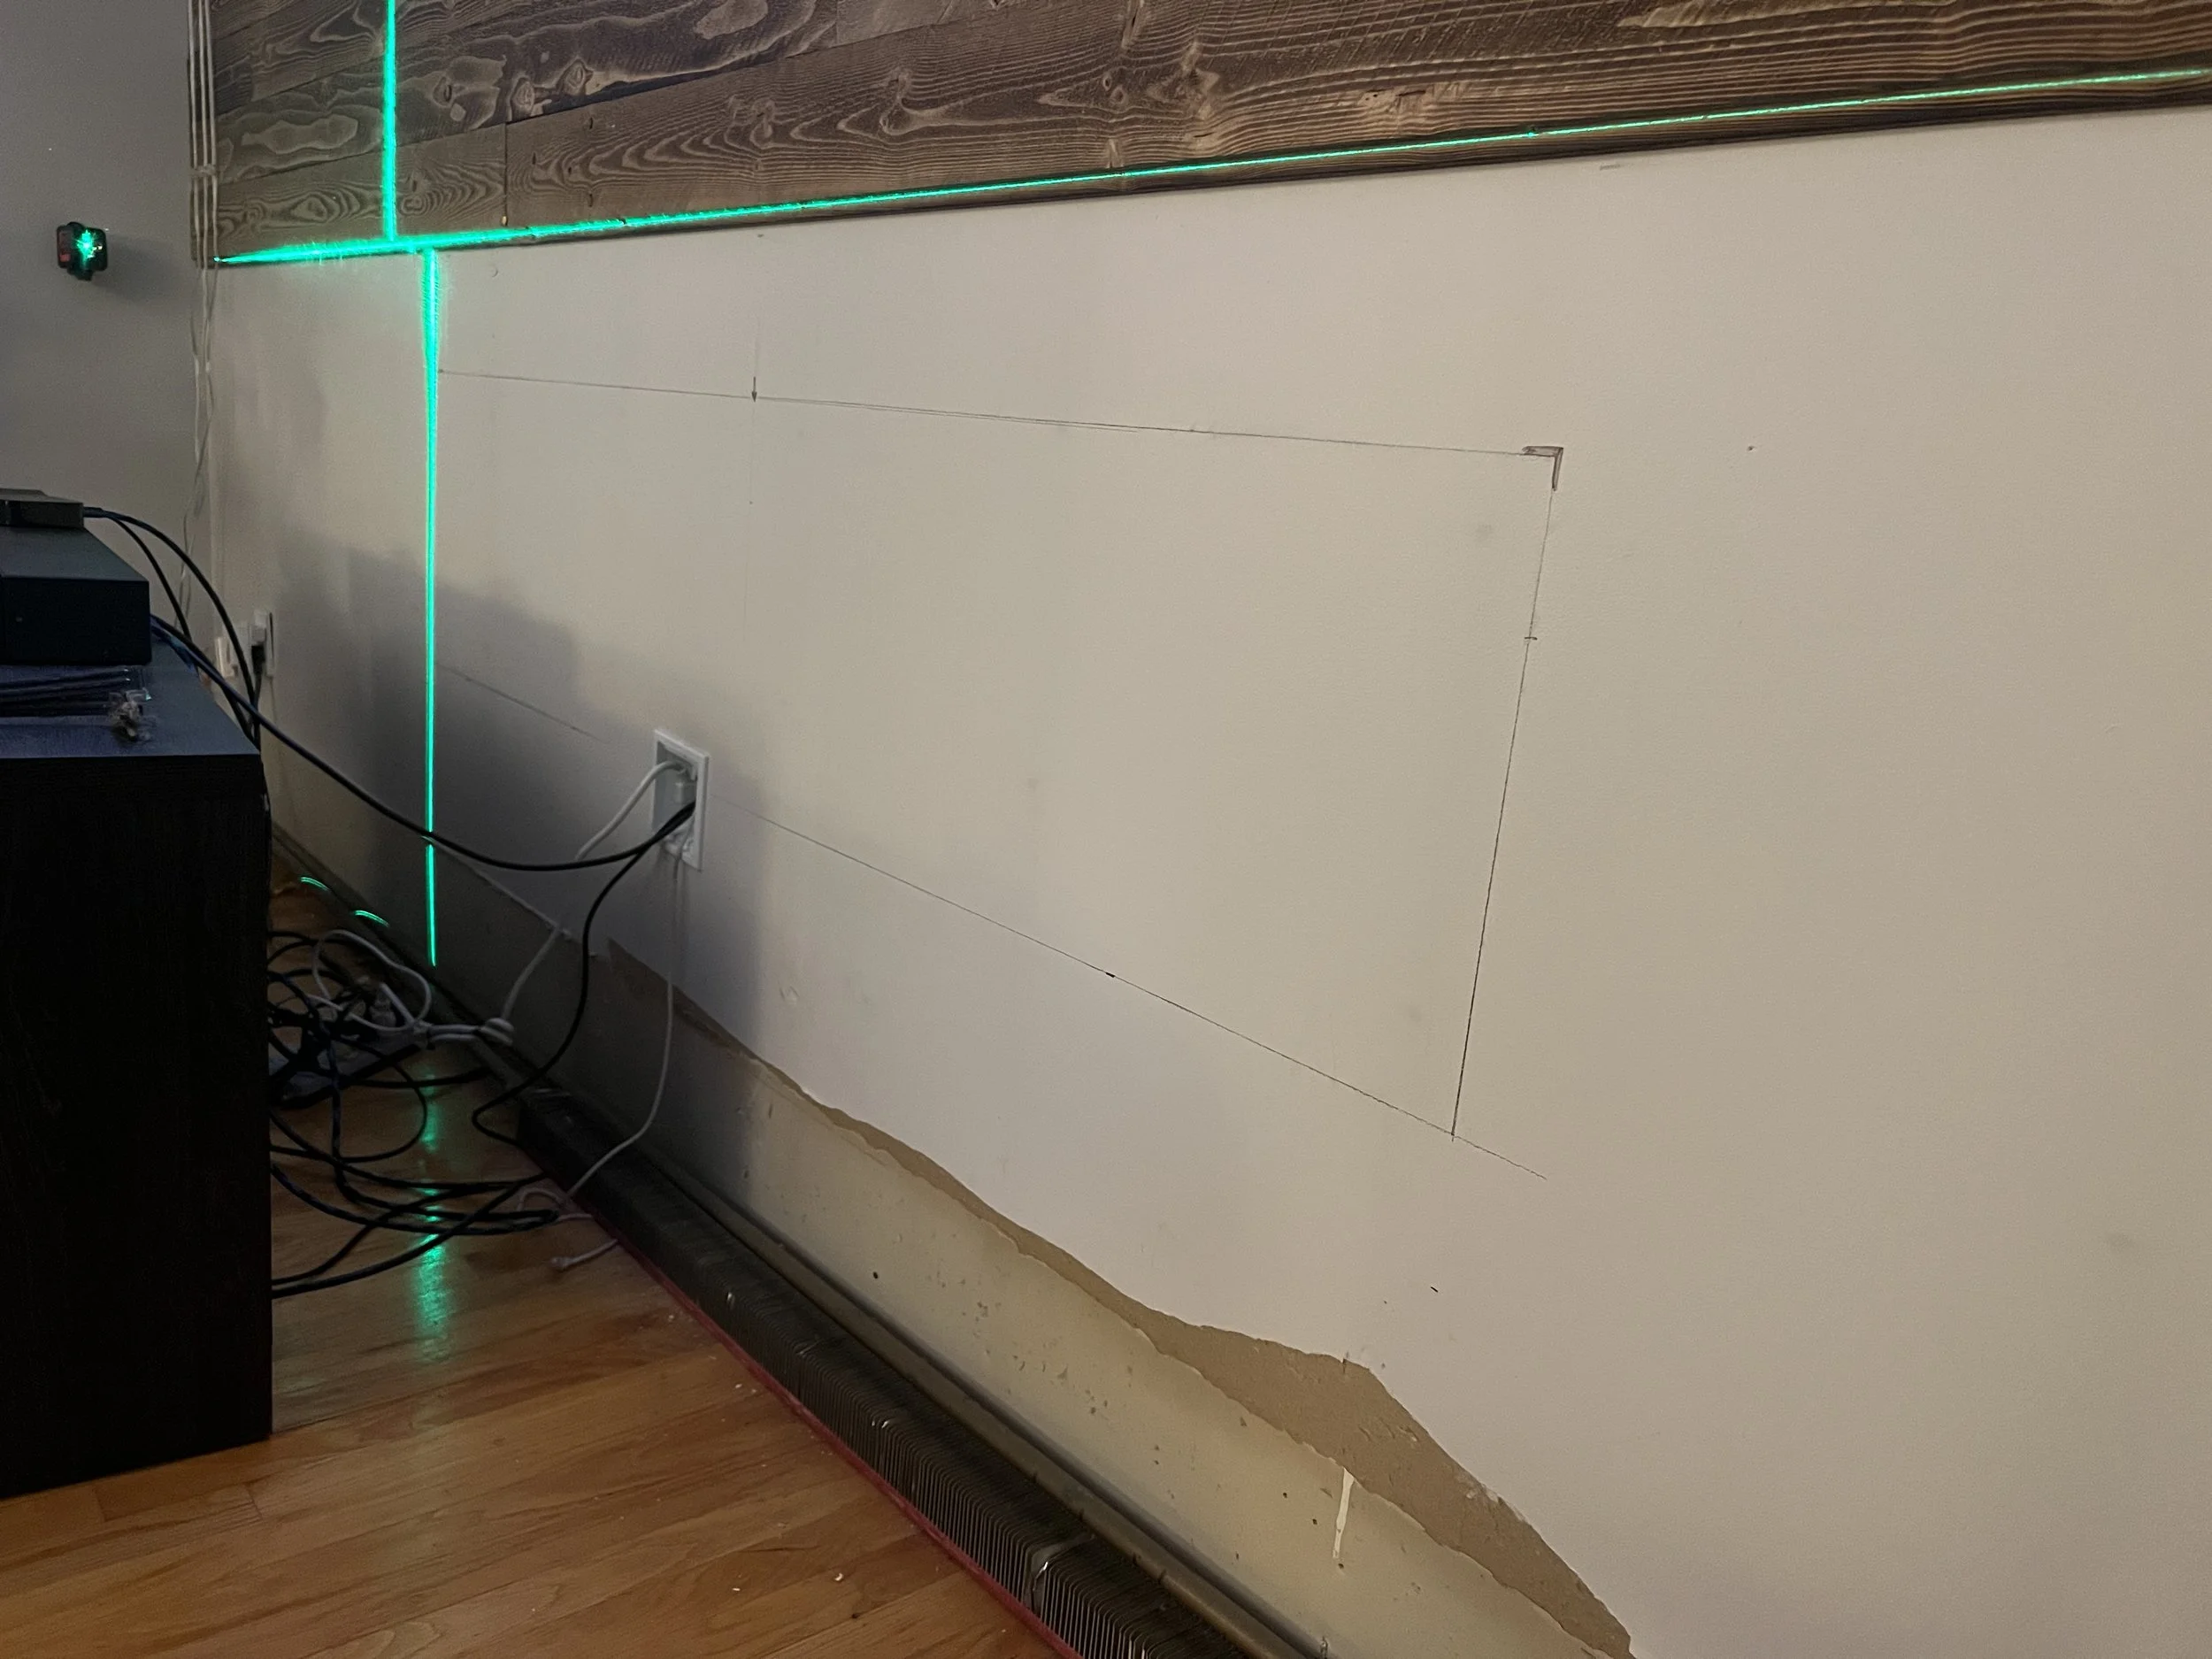
I built the frame intentionally off-center, to account for the asymmetry of my living room. I also planned to create a vent at the bottom with insulation preventing the baseboard heat from rising up into the cabinet. I ended up not needing to vent it (more on that when I explain the demise of my oil boiler), so I left the bubble insulation and auto-grille mesh in place, but covered by barn board. It’ll be a nice mystery for the next homeowner to solve if they ever open up the cabinet.


Nearly Done
My air conditioner is on full-blast, and I’m sitting in front of the fire. I love it already.

Mantle Plans
My initial plan was to get custom-cut soapstone blocks, 18” wide, 13” deep, and 1.5” thick. Heavy, but not so big I can’t lift them up to reach the electrical cords inside. I built my fireplace frame with blocks every 18” to make sure the stone is supported on three sides. They can be cut with such a precise square corner that I can set them in place touching, and not have to grout the cracks.
I might still do stone someday. But with other budget priorities, I figured I’d get a placeholder material so at least my plants have a place to sit.
I stopped by a local lumber yard that carries beefy rough cut boards. After a couple coats of semi-transparent stain, the board set in place, and now I love it so much it might live there forever.


Farmhouse Kitchen example from the showcase of Vermont Soapstone Company.


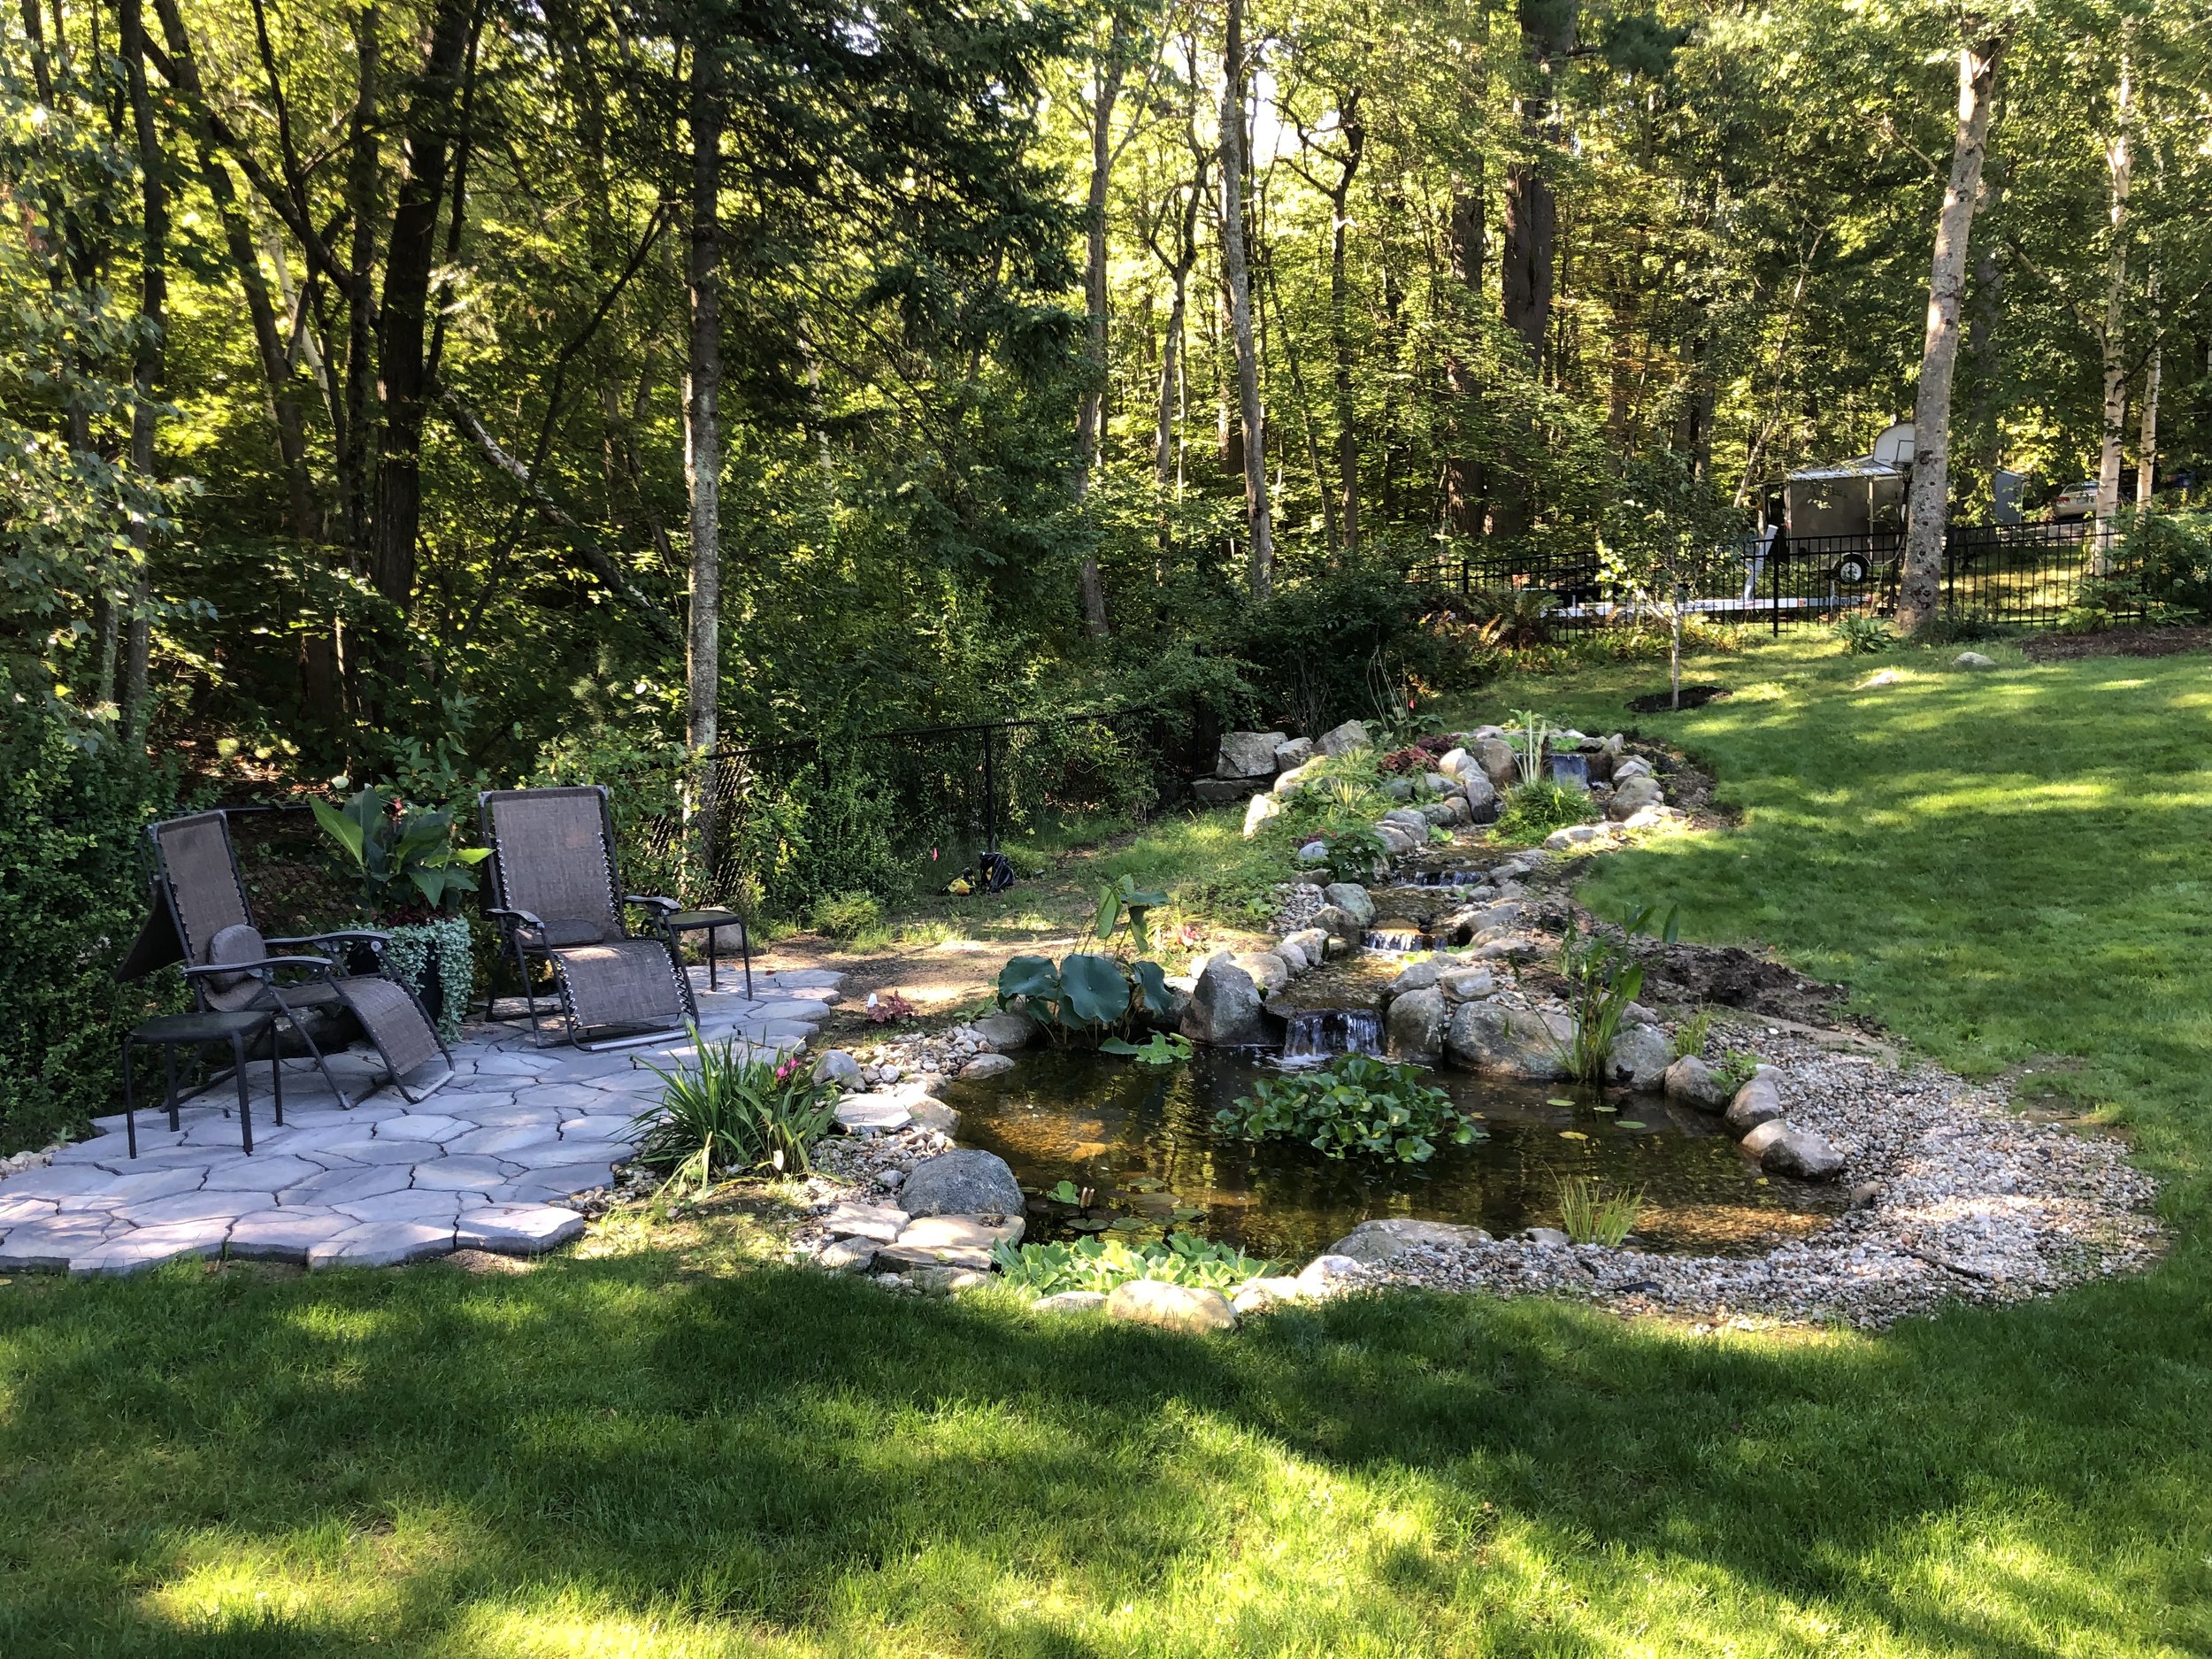
Stream Finishing Part 3: Pond Patio
Once the pond was installed, I realized there would be a wide space between it and the fence… much more space than warranted by a lovely garden backdrop. I decided to create a seating area.
Tossing pavers down on the dirt solved the immediate problem of the mud pit left behind by the construction crew, and prevented the area from becoming overrun by weeds. As the season progressed, I considered it quite a successful proof of concept.

Now for the real deal.
My first patio experiment back in 2016 was decent enough, but I’m already mad about the shifting pavers and endless weeds. I suppose it’s time to learn how to do it the RIGHT way… if it goes well, maybe I’ll re-do the first patio to match. Besides, I like these pavers better than my home-poured ones.
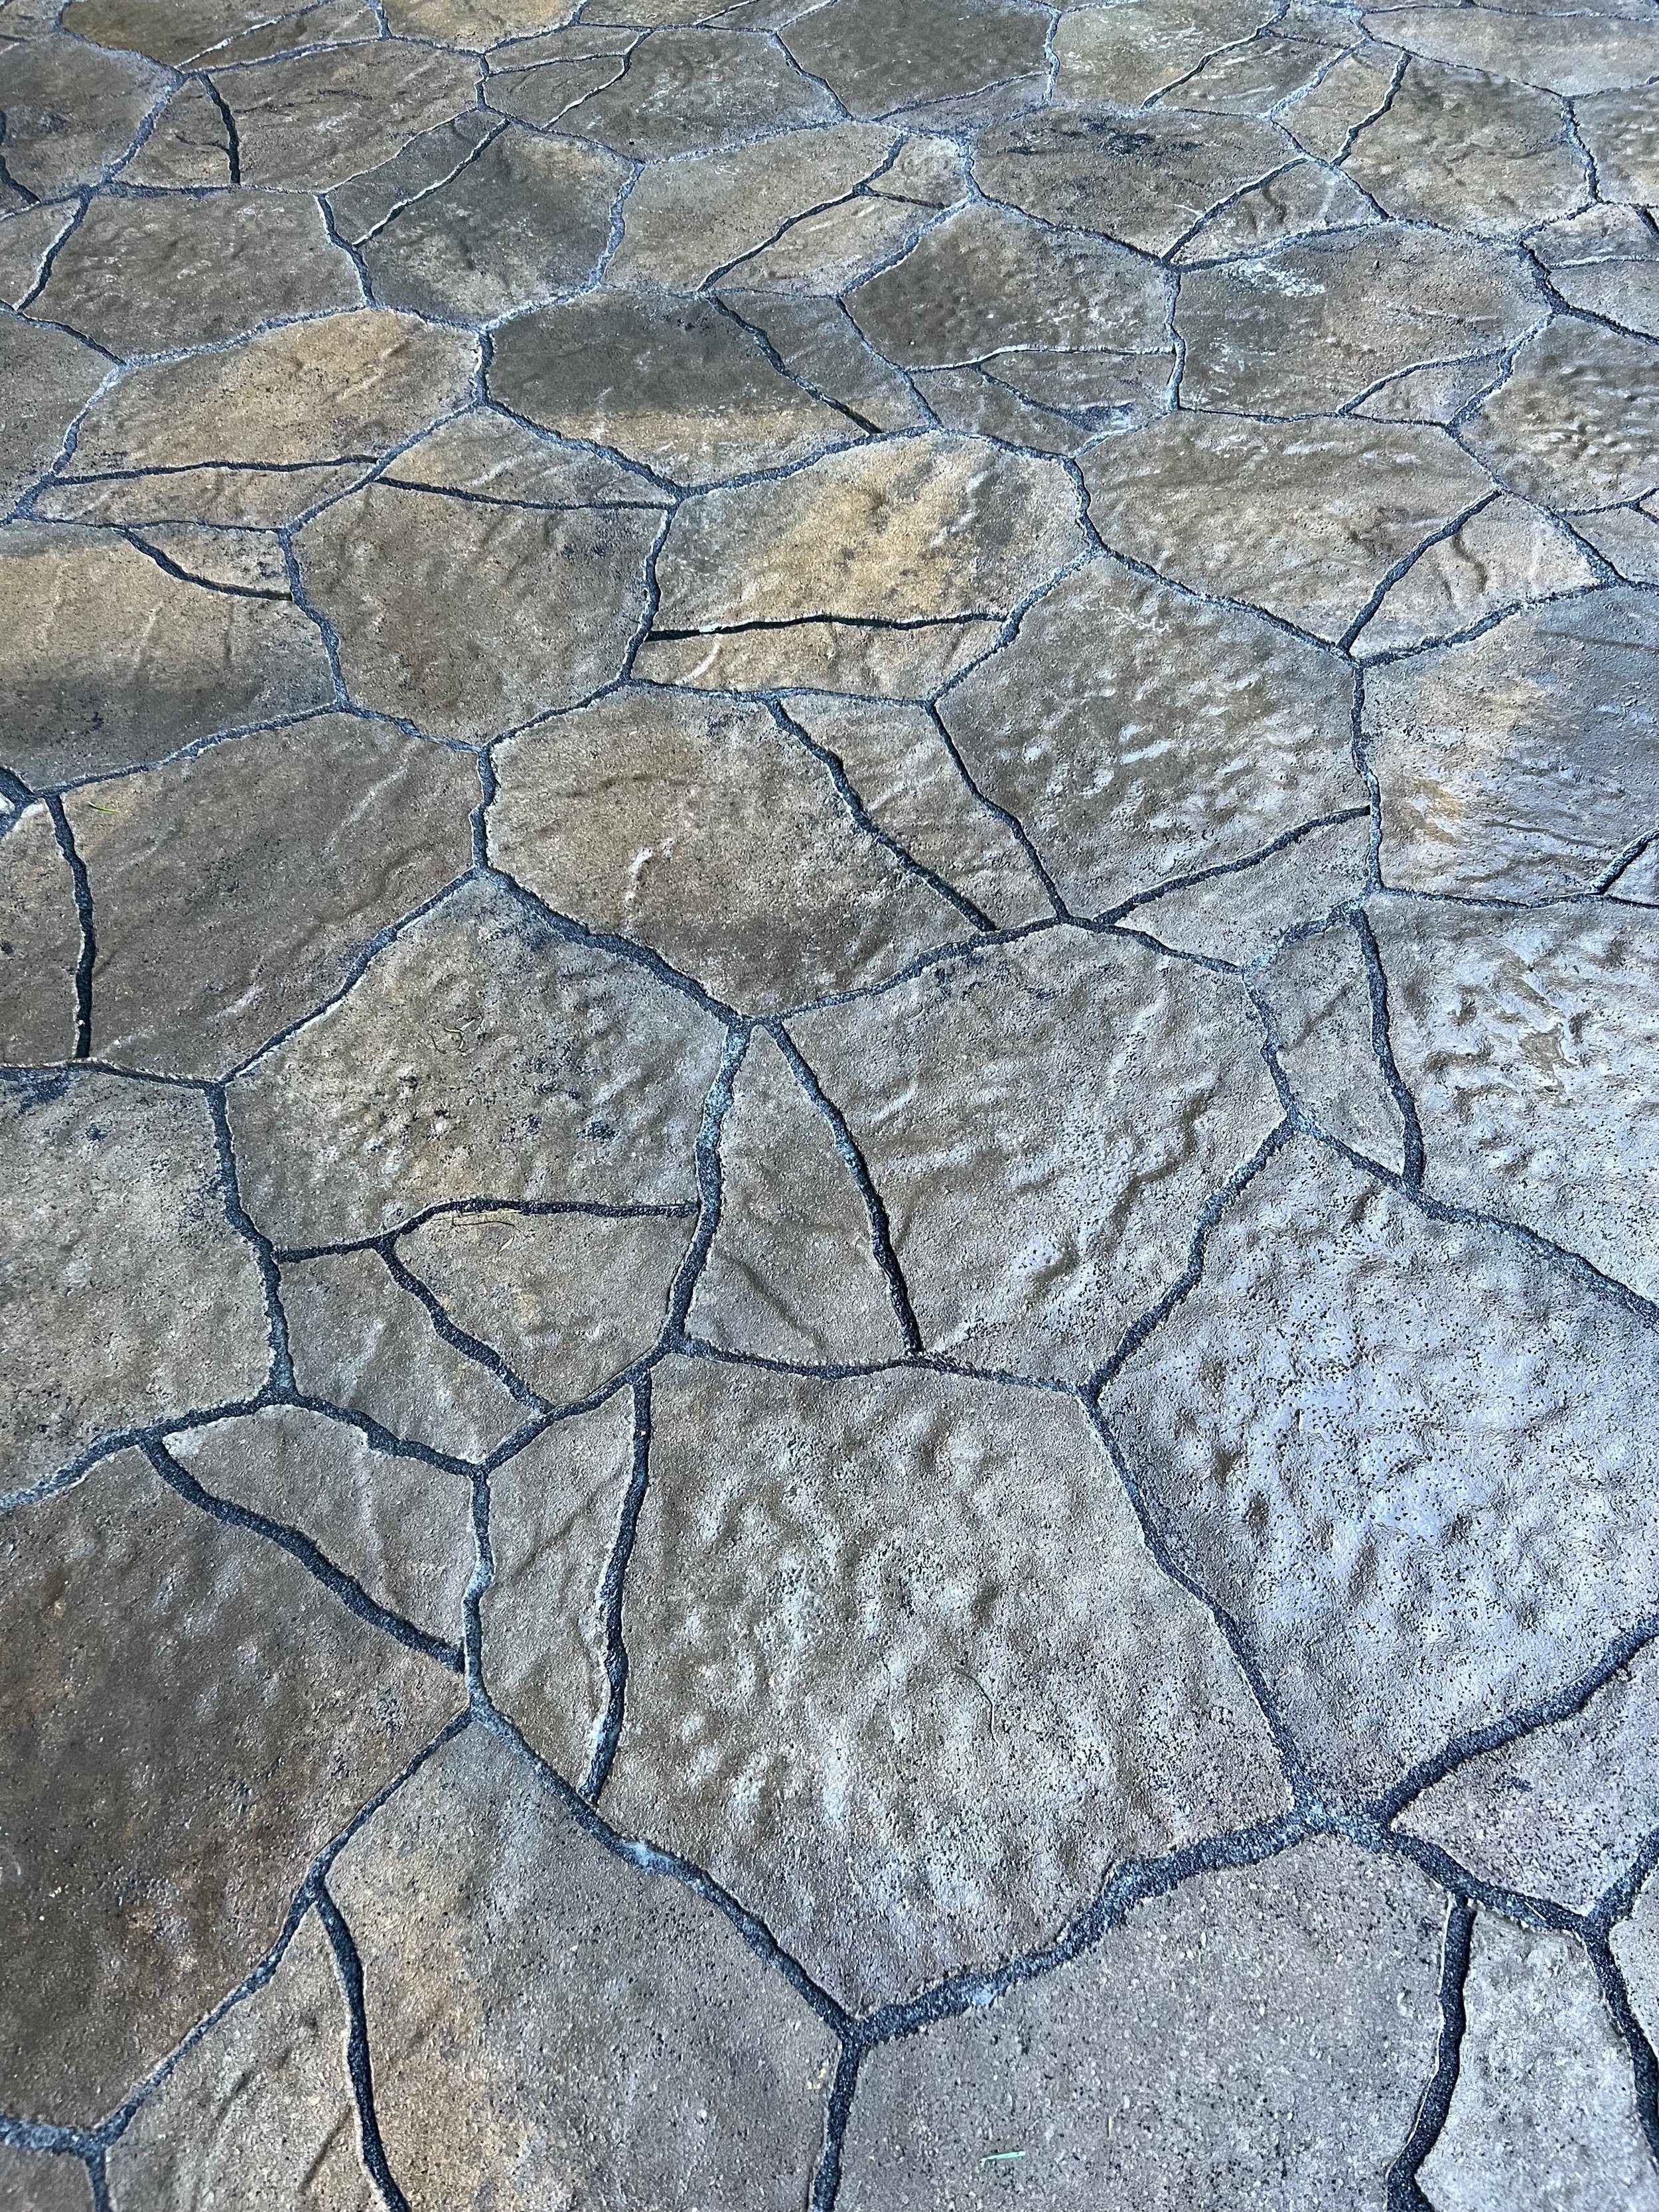
Belgard Portland 21-in L x 15-in W x 2-in H Silex Concrete Patio Stone
The only color in stock at Lowe’s was a grey-ish ‘Silex’, so I also bought some brown concrete stain to brush over the blocks.


The ground is hard-packed from having the excavator drive around on it for a few weeks, so I’m not too worried about renting a compactor. But I will start with landscape fabric, followed by leveling sand and paver base panels. They’re kind of expensive, but I expect to get a more perfect finished product and need less sand.

Pavers placed into the mud needed to be lifted and cleaned off.

With paver base leveled and landscape fabric down, it’s time for smooth sand, underlayment panels, and pavers.

Taking shape

Irregular edge blends into the gravel and stone edge of the pond.
Alliance Gator Maxx G2 Intelligent Polymeric Sand for Paver and Natural Stone Joints UP to 4”(Diamond Black) 50 Ib Bag

Black polymeric sand

Patio, planters, and chaise lounges… Maddox approves!


Taking a well-deserved rest.
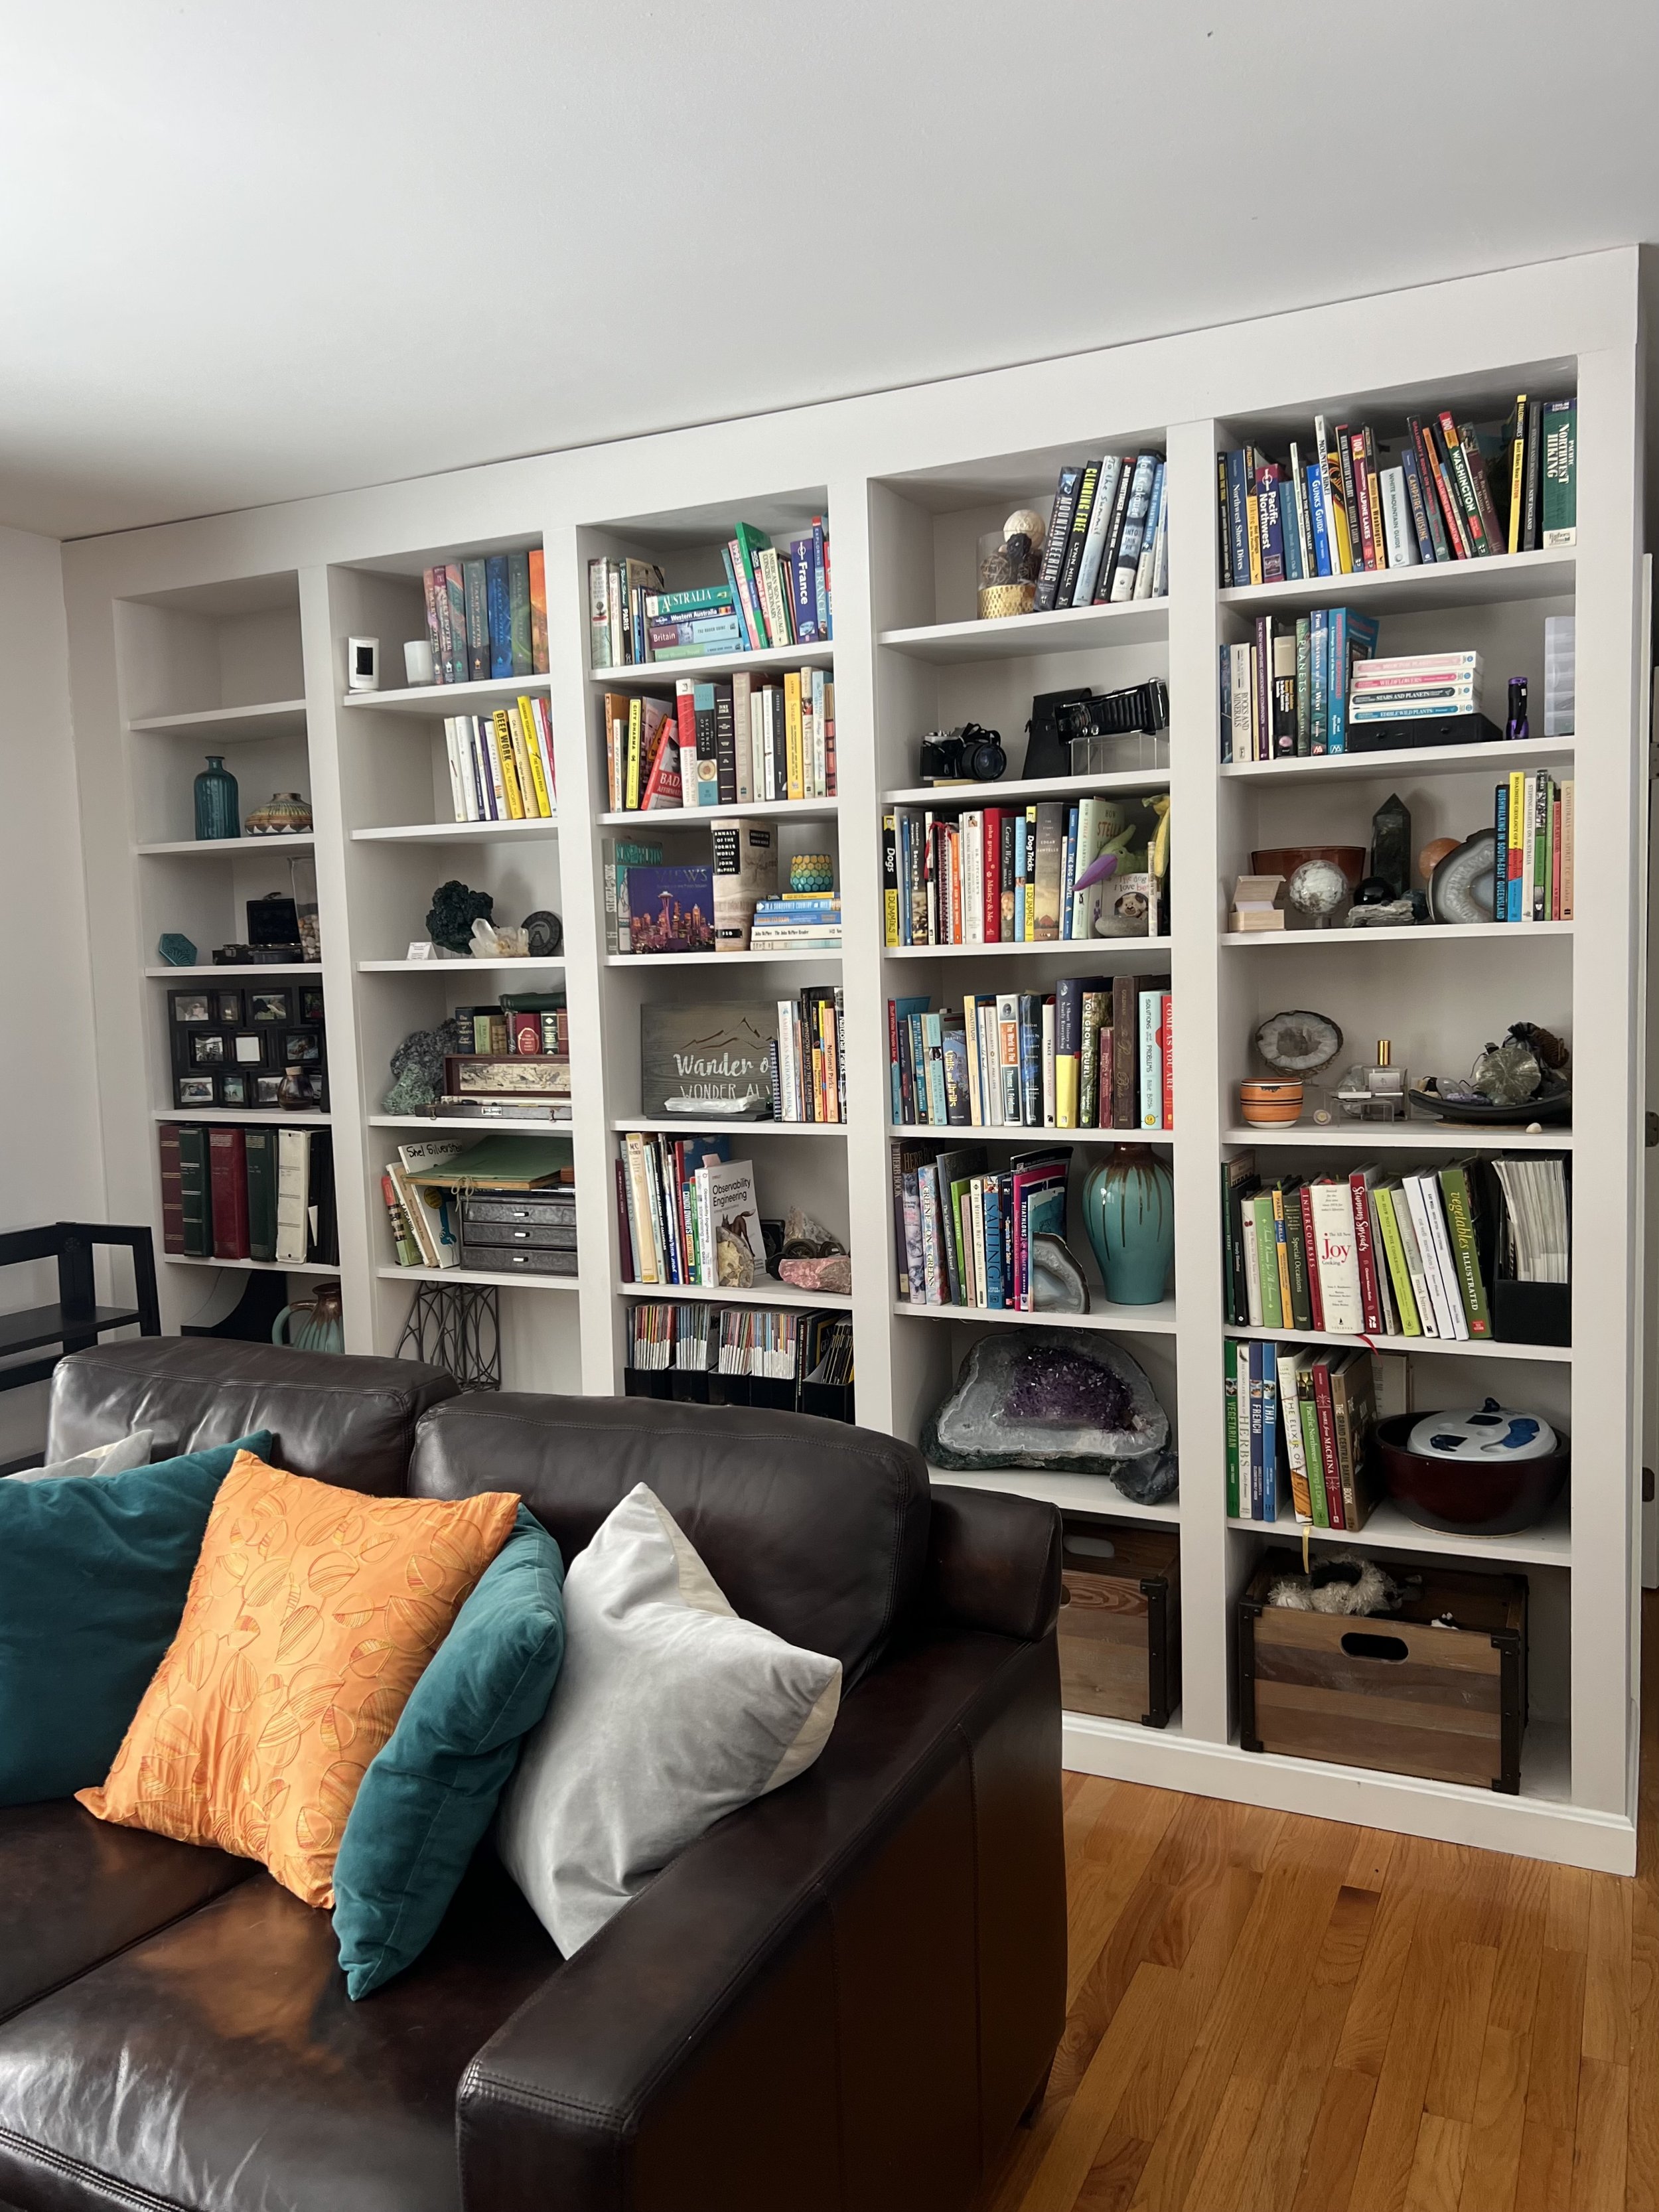
Living Room Bookshelf Wall
Floor-to-ceiling built-ins offer display storage and tighten up the expanse from love seat to TV.
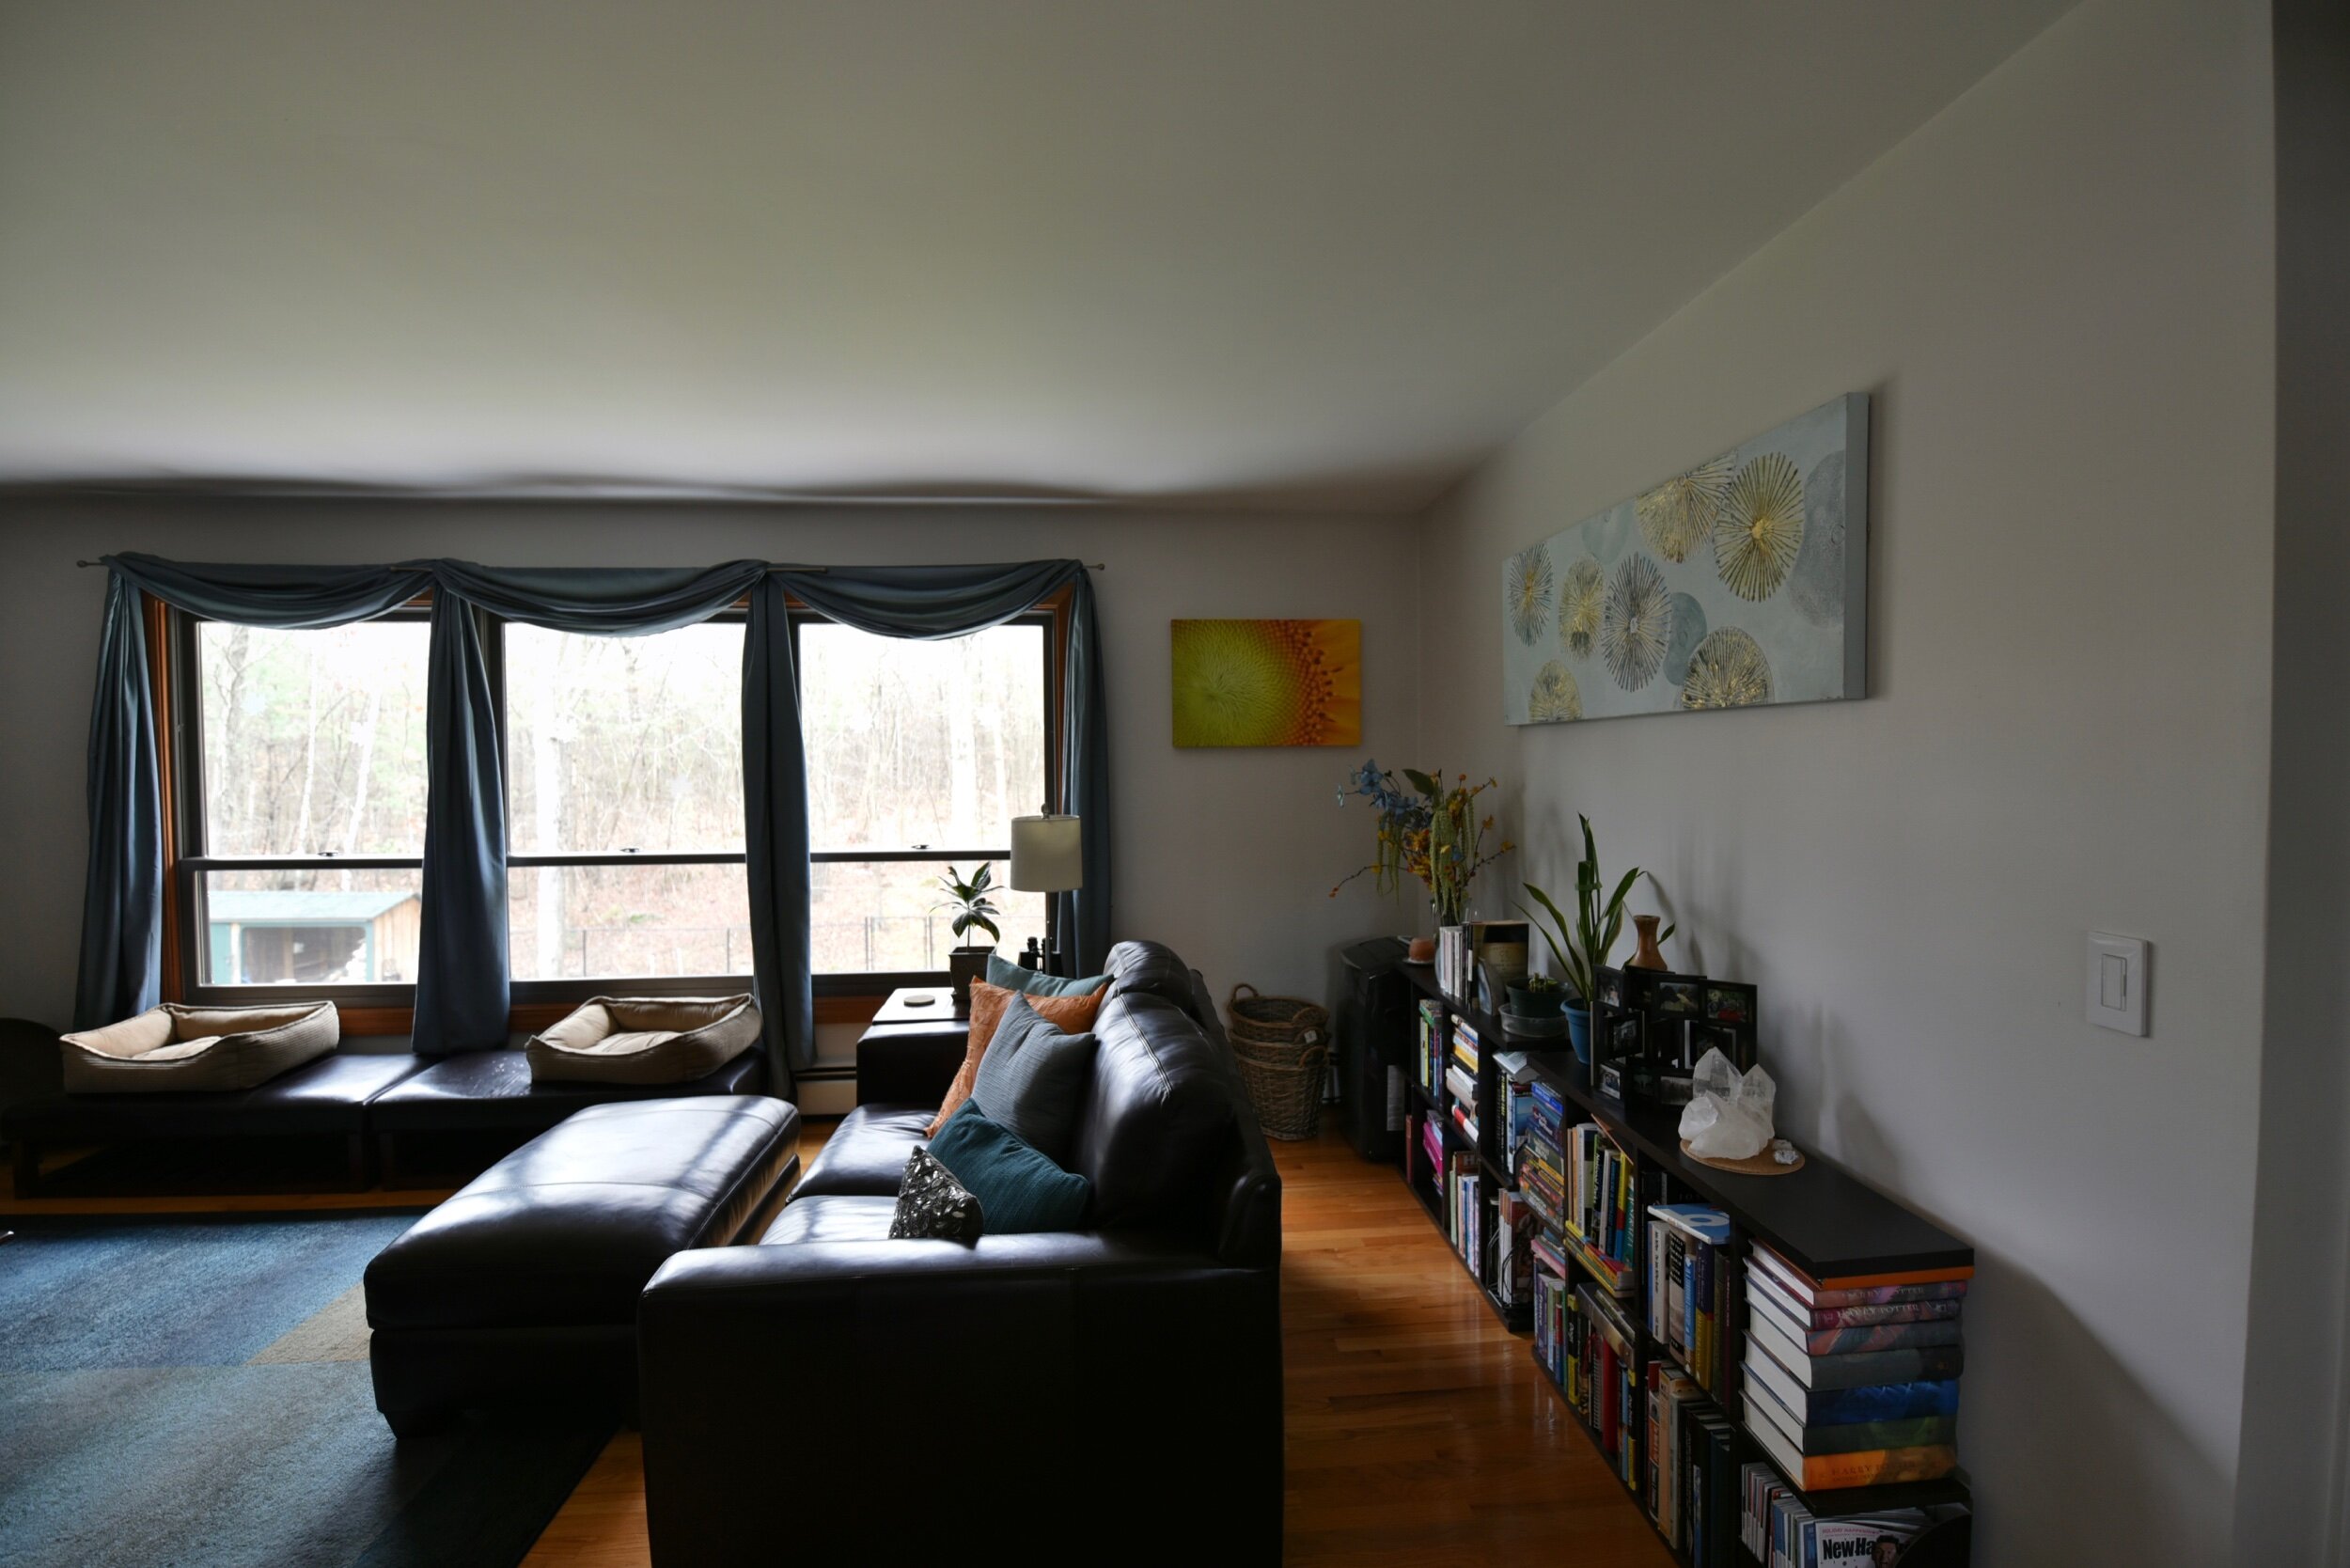
My long living room begged for a floating love seat to shrink the TV-viewing distance, and I was left with a dead zone. The particle-board bookshelves that fit perfectly under the windows in my condo served the purpose in my new living room… until they didn’t. Stacks of books grew up the wall, just waiting to slide onto the floor. Time for a permanent solution.
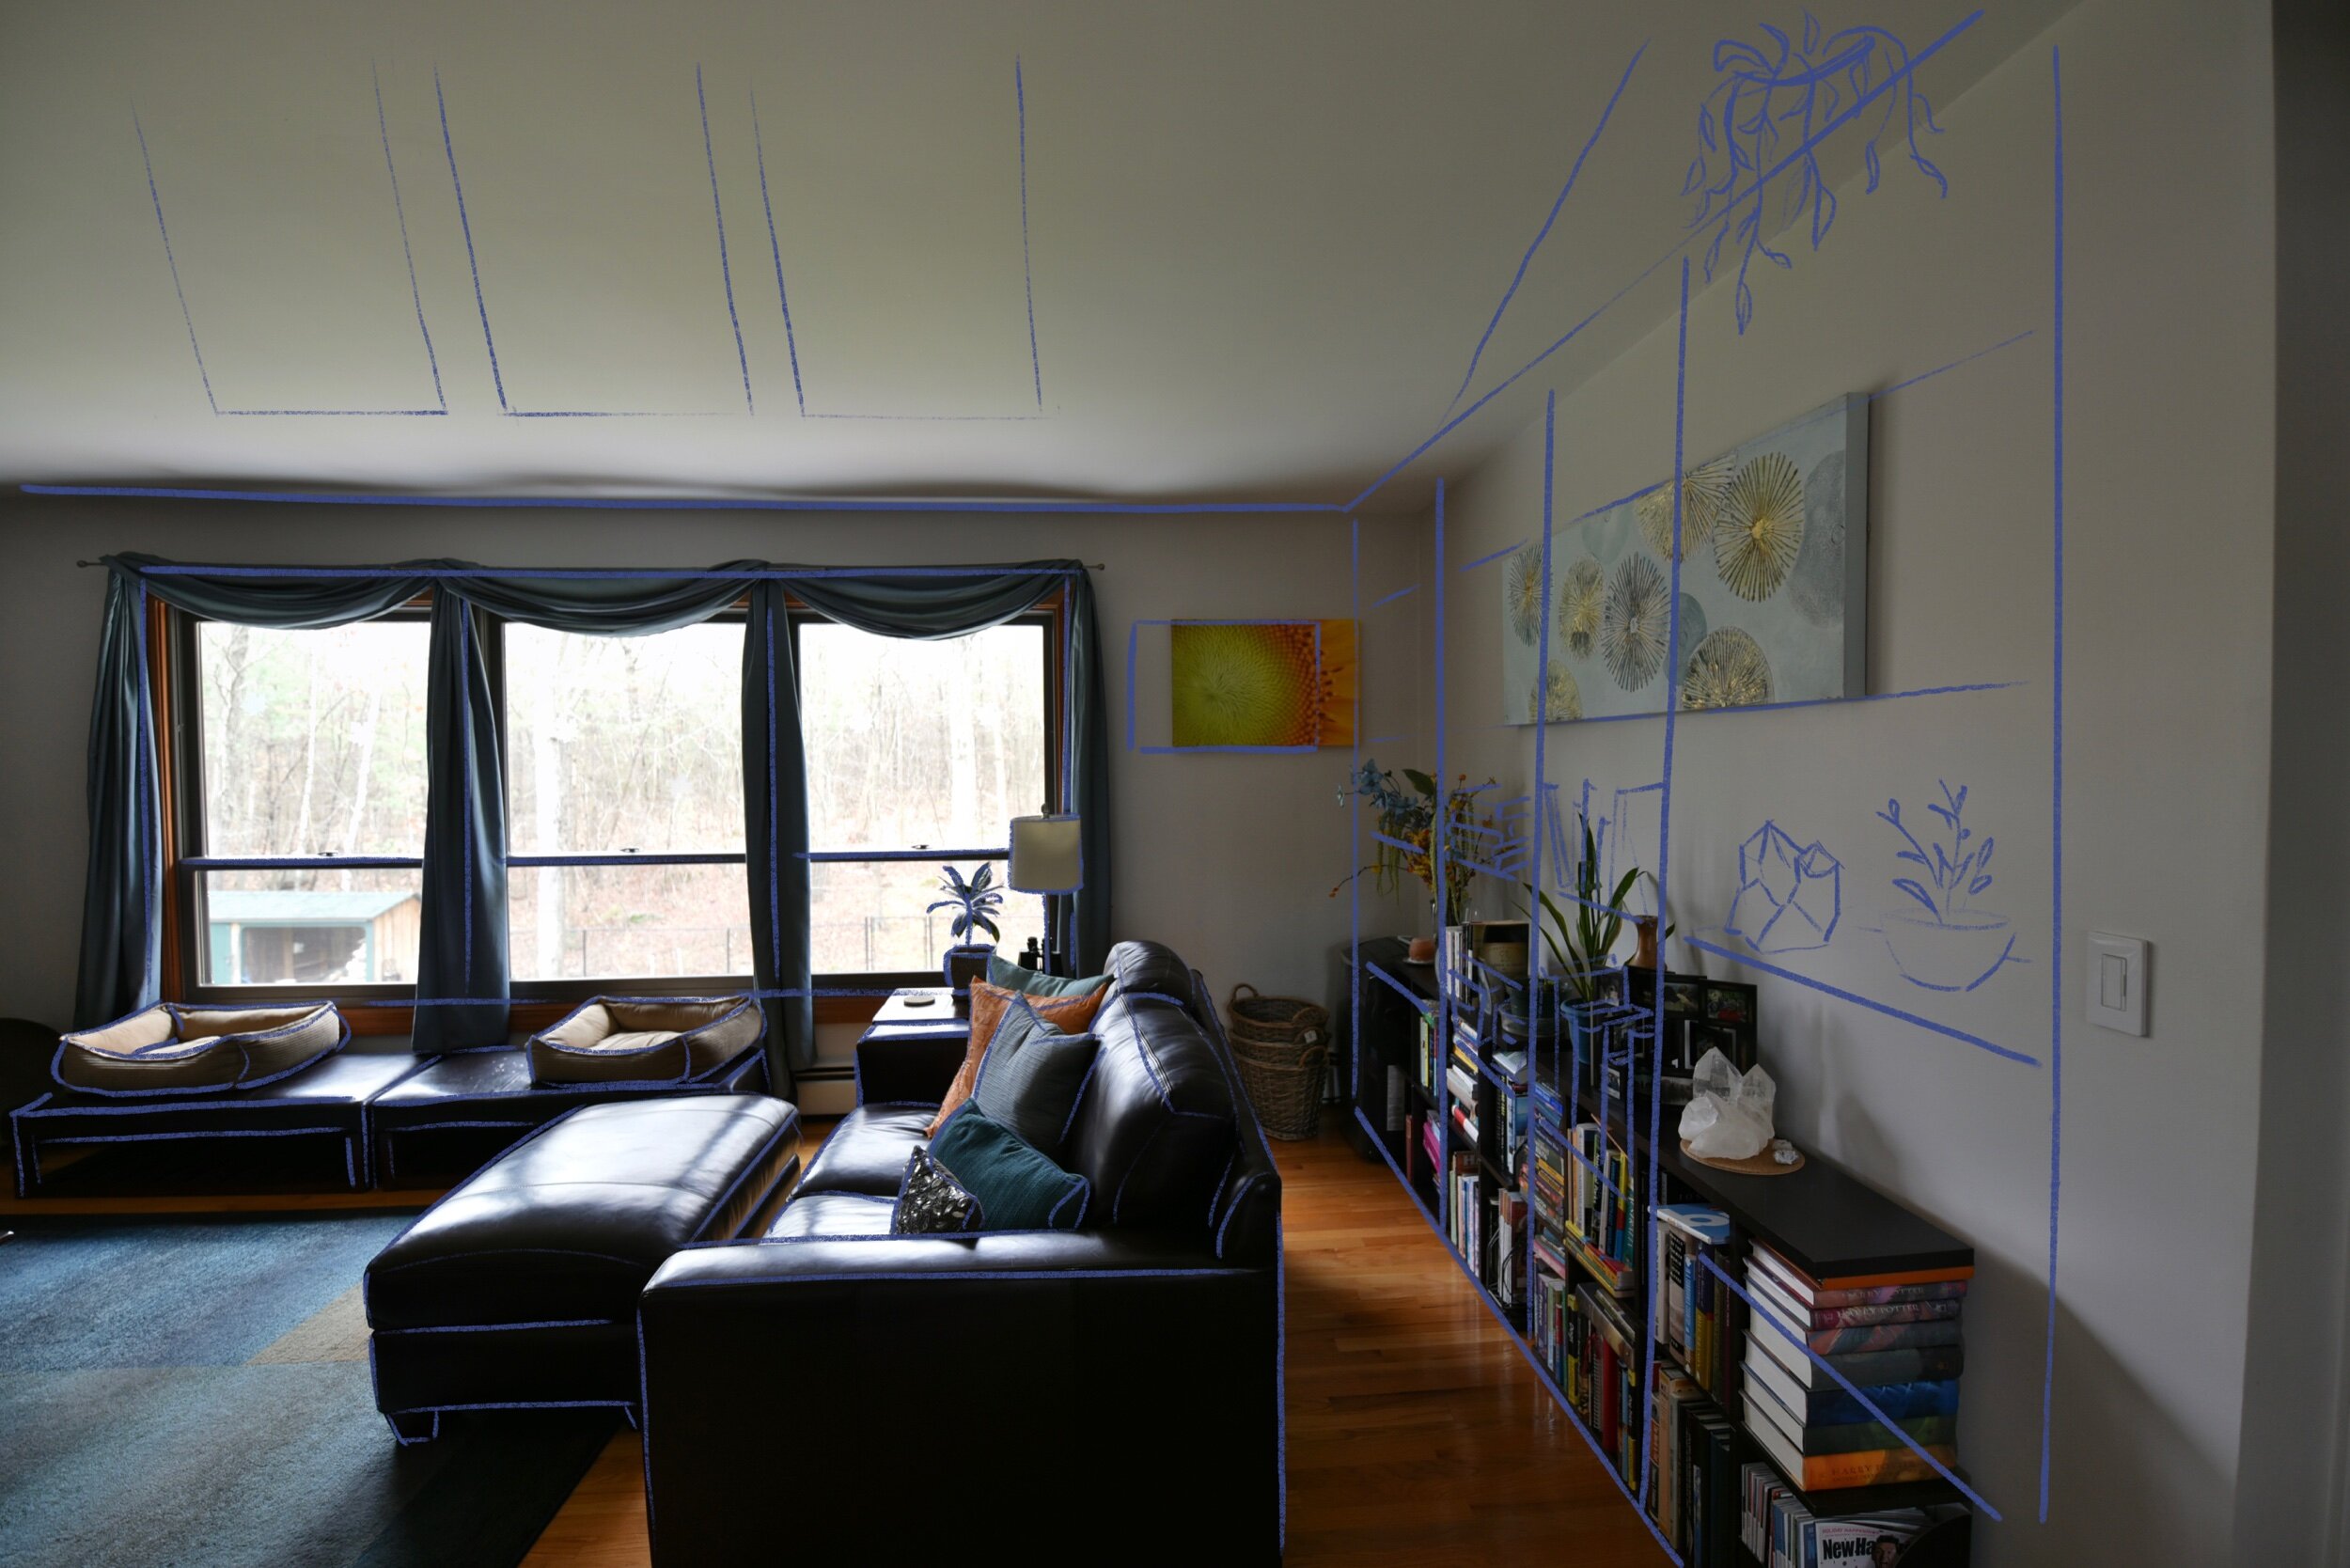
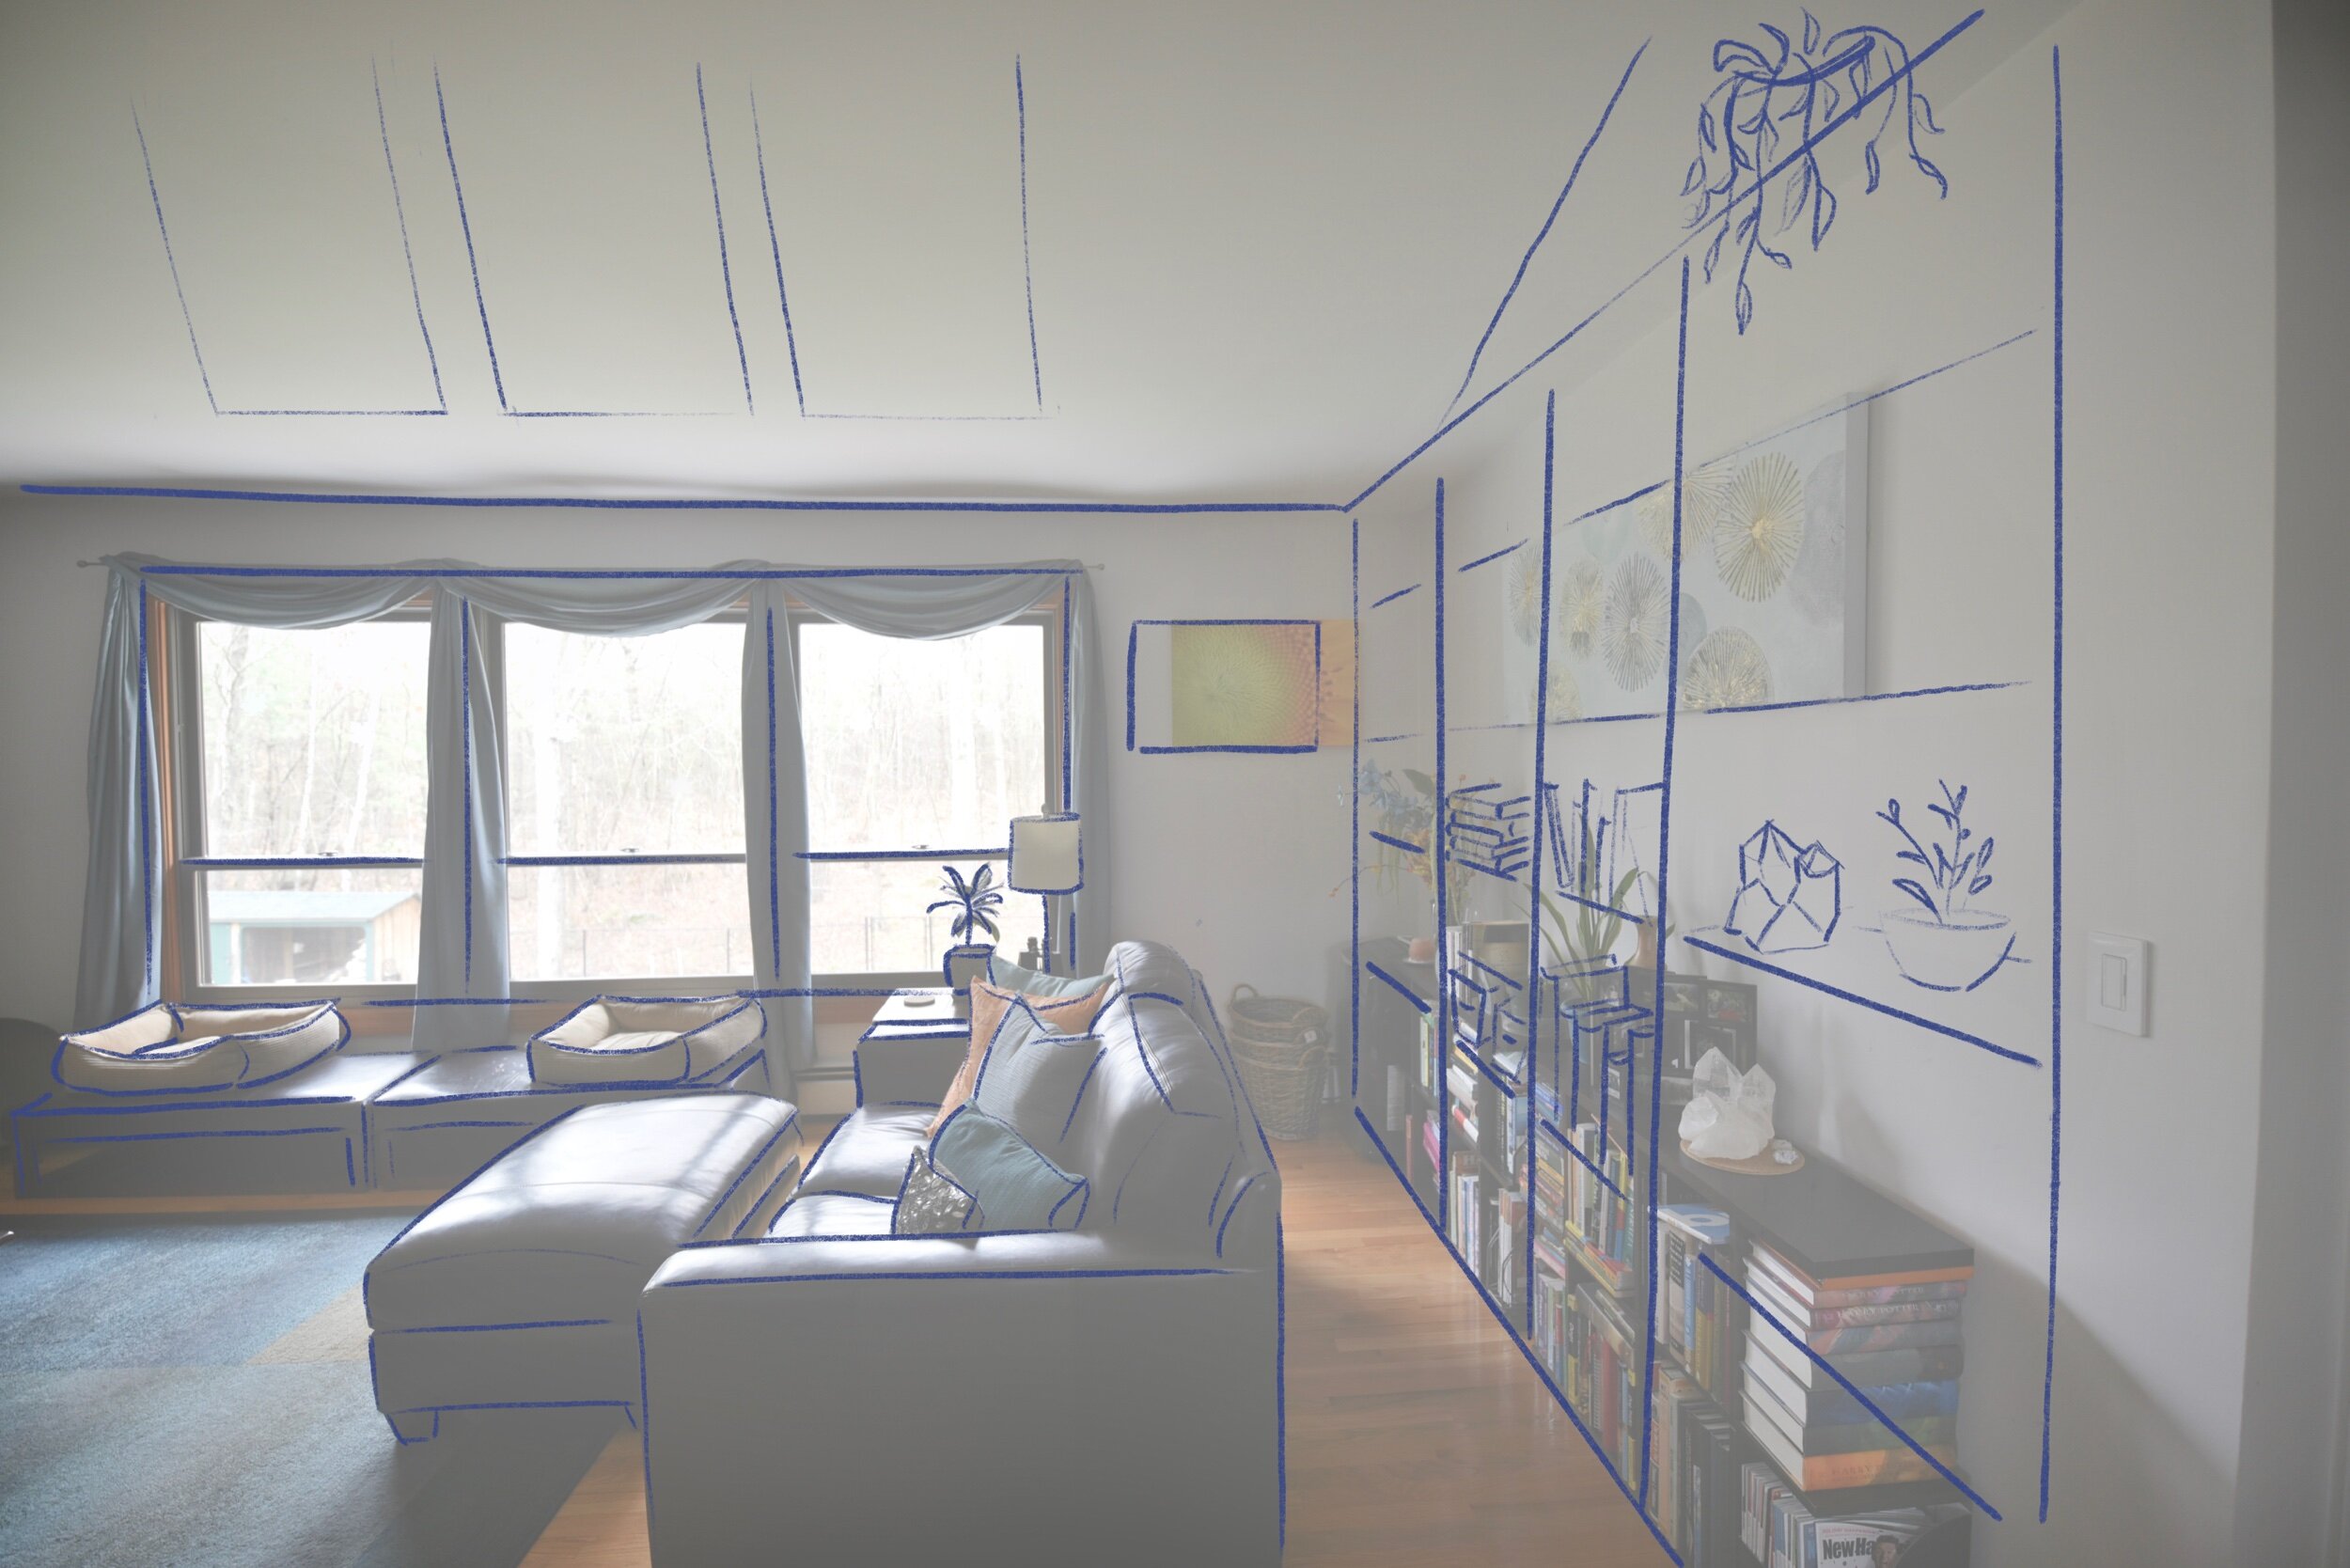
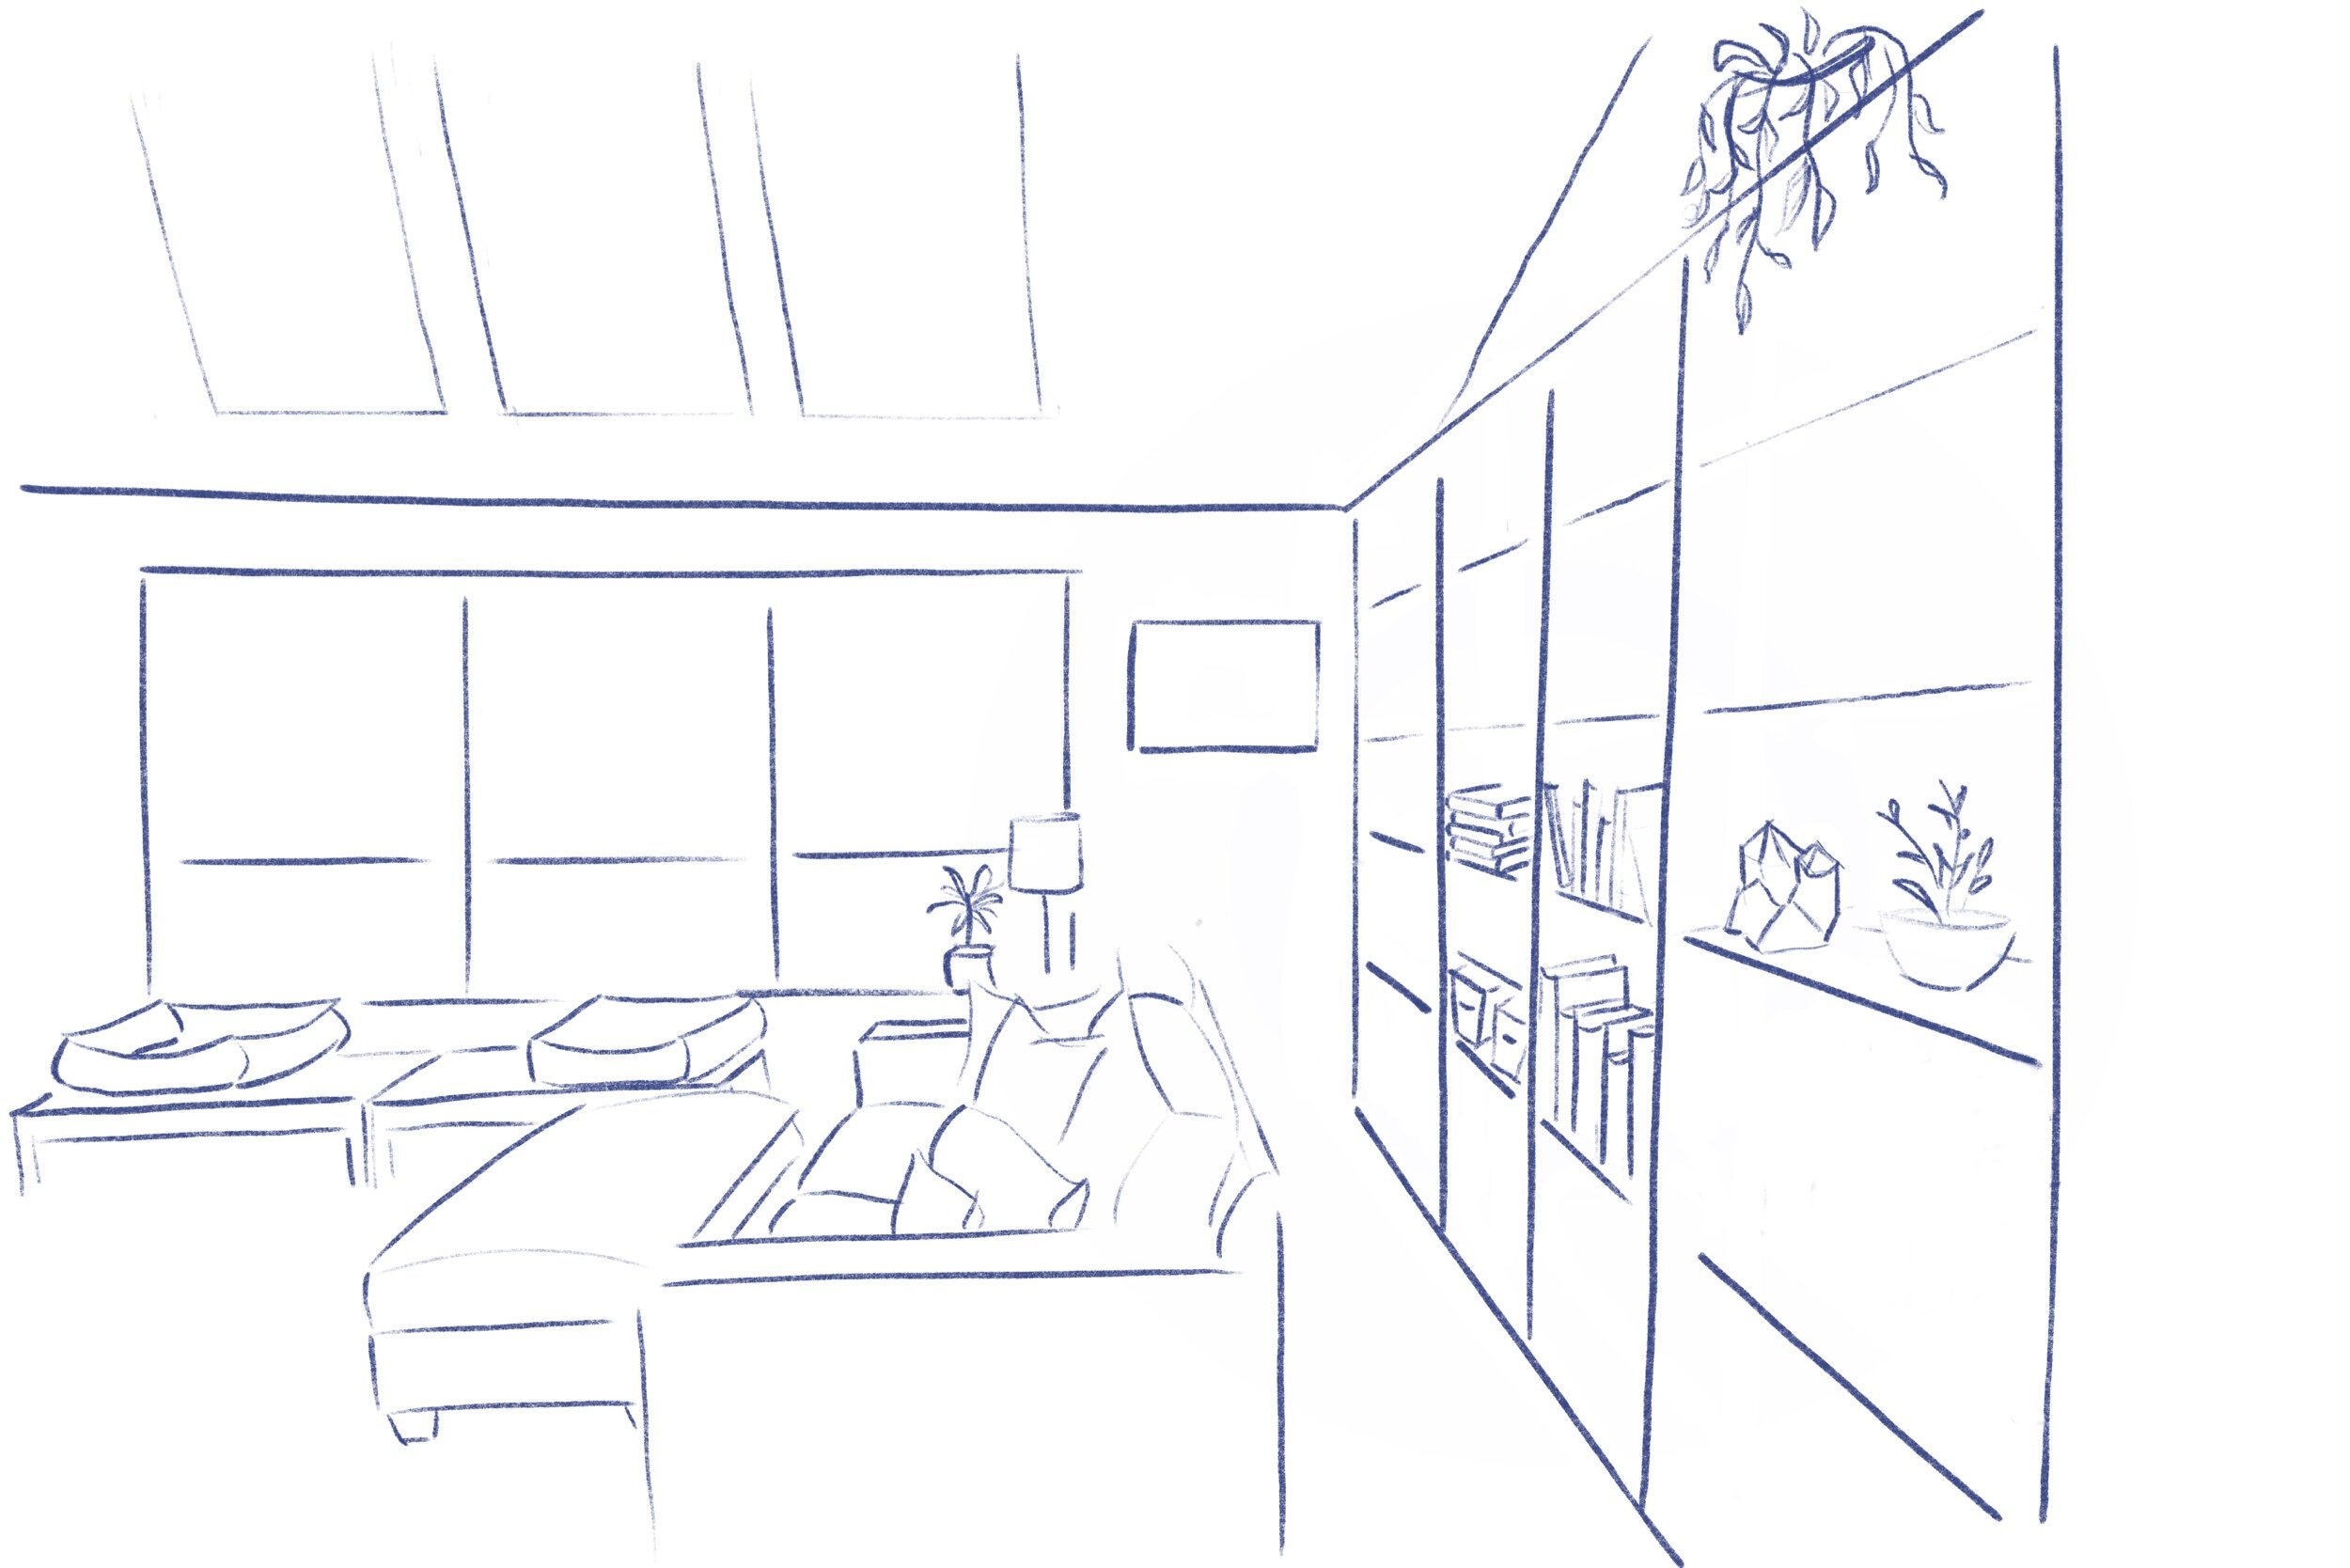
Mockup
The back wall of the living room with sketch overlay of floor-to-ceiling bookshelves. (Also sketched is the fantasy vaulted ceiling with skylights, but that’s a project for another time.)
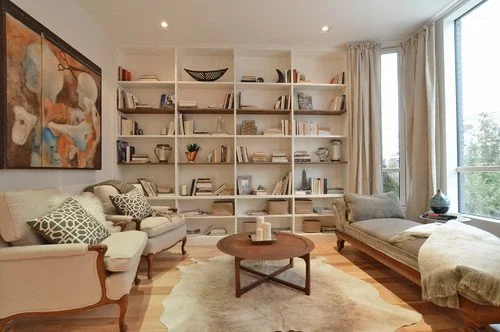
Inspiration Photos
Ideas that might work… keeping it simple, so the shelves disappear and allow the contents to be featured. I like the idea of lighting, but not enough to wire every shelf.
Tutorials
I’m not blazing new trail here, so I looked online to find tutorials. Here are some of the ones I leaned on:
The Family Handyman: How to Build a Built-in Bookcase - I used this design for the boxed vertical supports, since the thickness gives the unit more substance. It also gives me space at the top to add picture lights.
Darbin Orvar: Built-in Bookcases and Cabinet Construction (part 1 and part 2) - I’ll use her approach of using the pocket hole jig to attach the shelves.


3D Model
I decided I wanted uniform, fixed shelves with picture lights across the top. I used Home Designer Suite to create the design. The wall is 126” wide. I’m planning on five 24-inch-wide sections, with the extra few inches used to accommodate the radiator and wiring on the left.
Side note: I had originally planned on installing a picture light at the top of each column. However, my chosen fixtures jumped in price by $50 each, so I reconsidered. Now that I see the completed project, I like it better without.


Getting Started
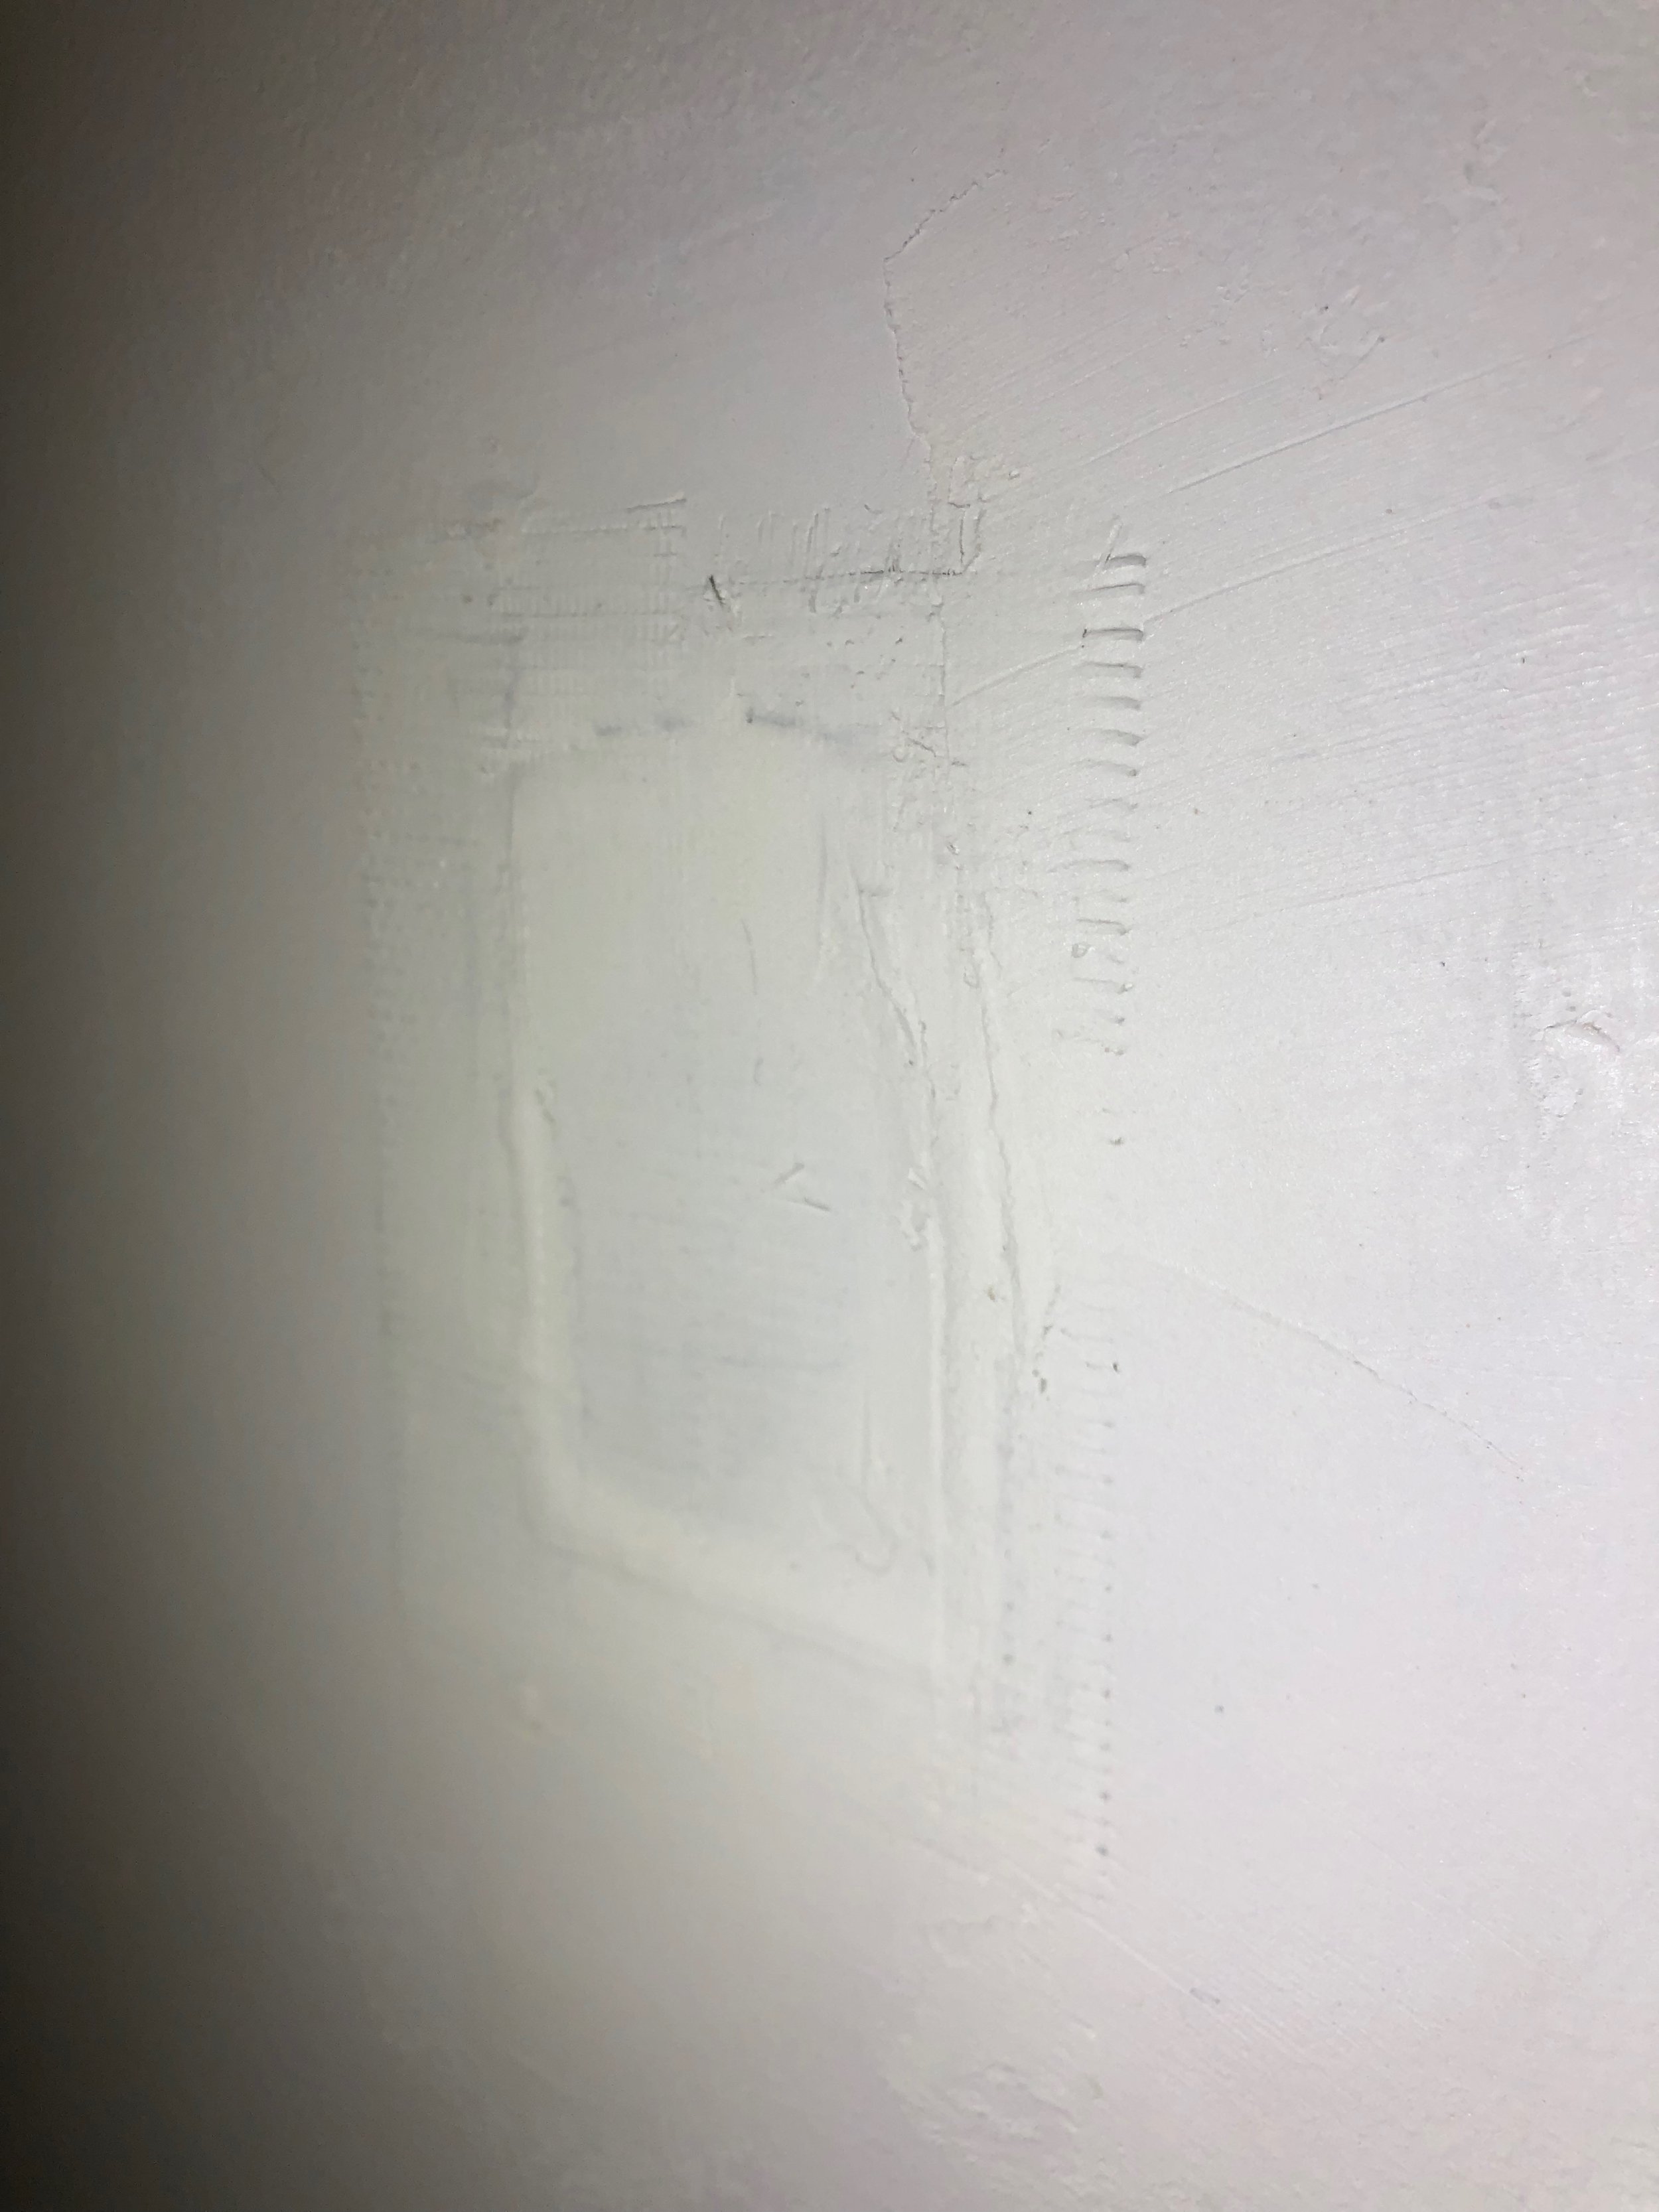
To prep the wall, I needed to remove the floor moulding and move the existing light switch to the inside of the stairwell. If I’d known how easy this part was, I’d have moved the switch years ago.


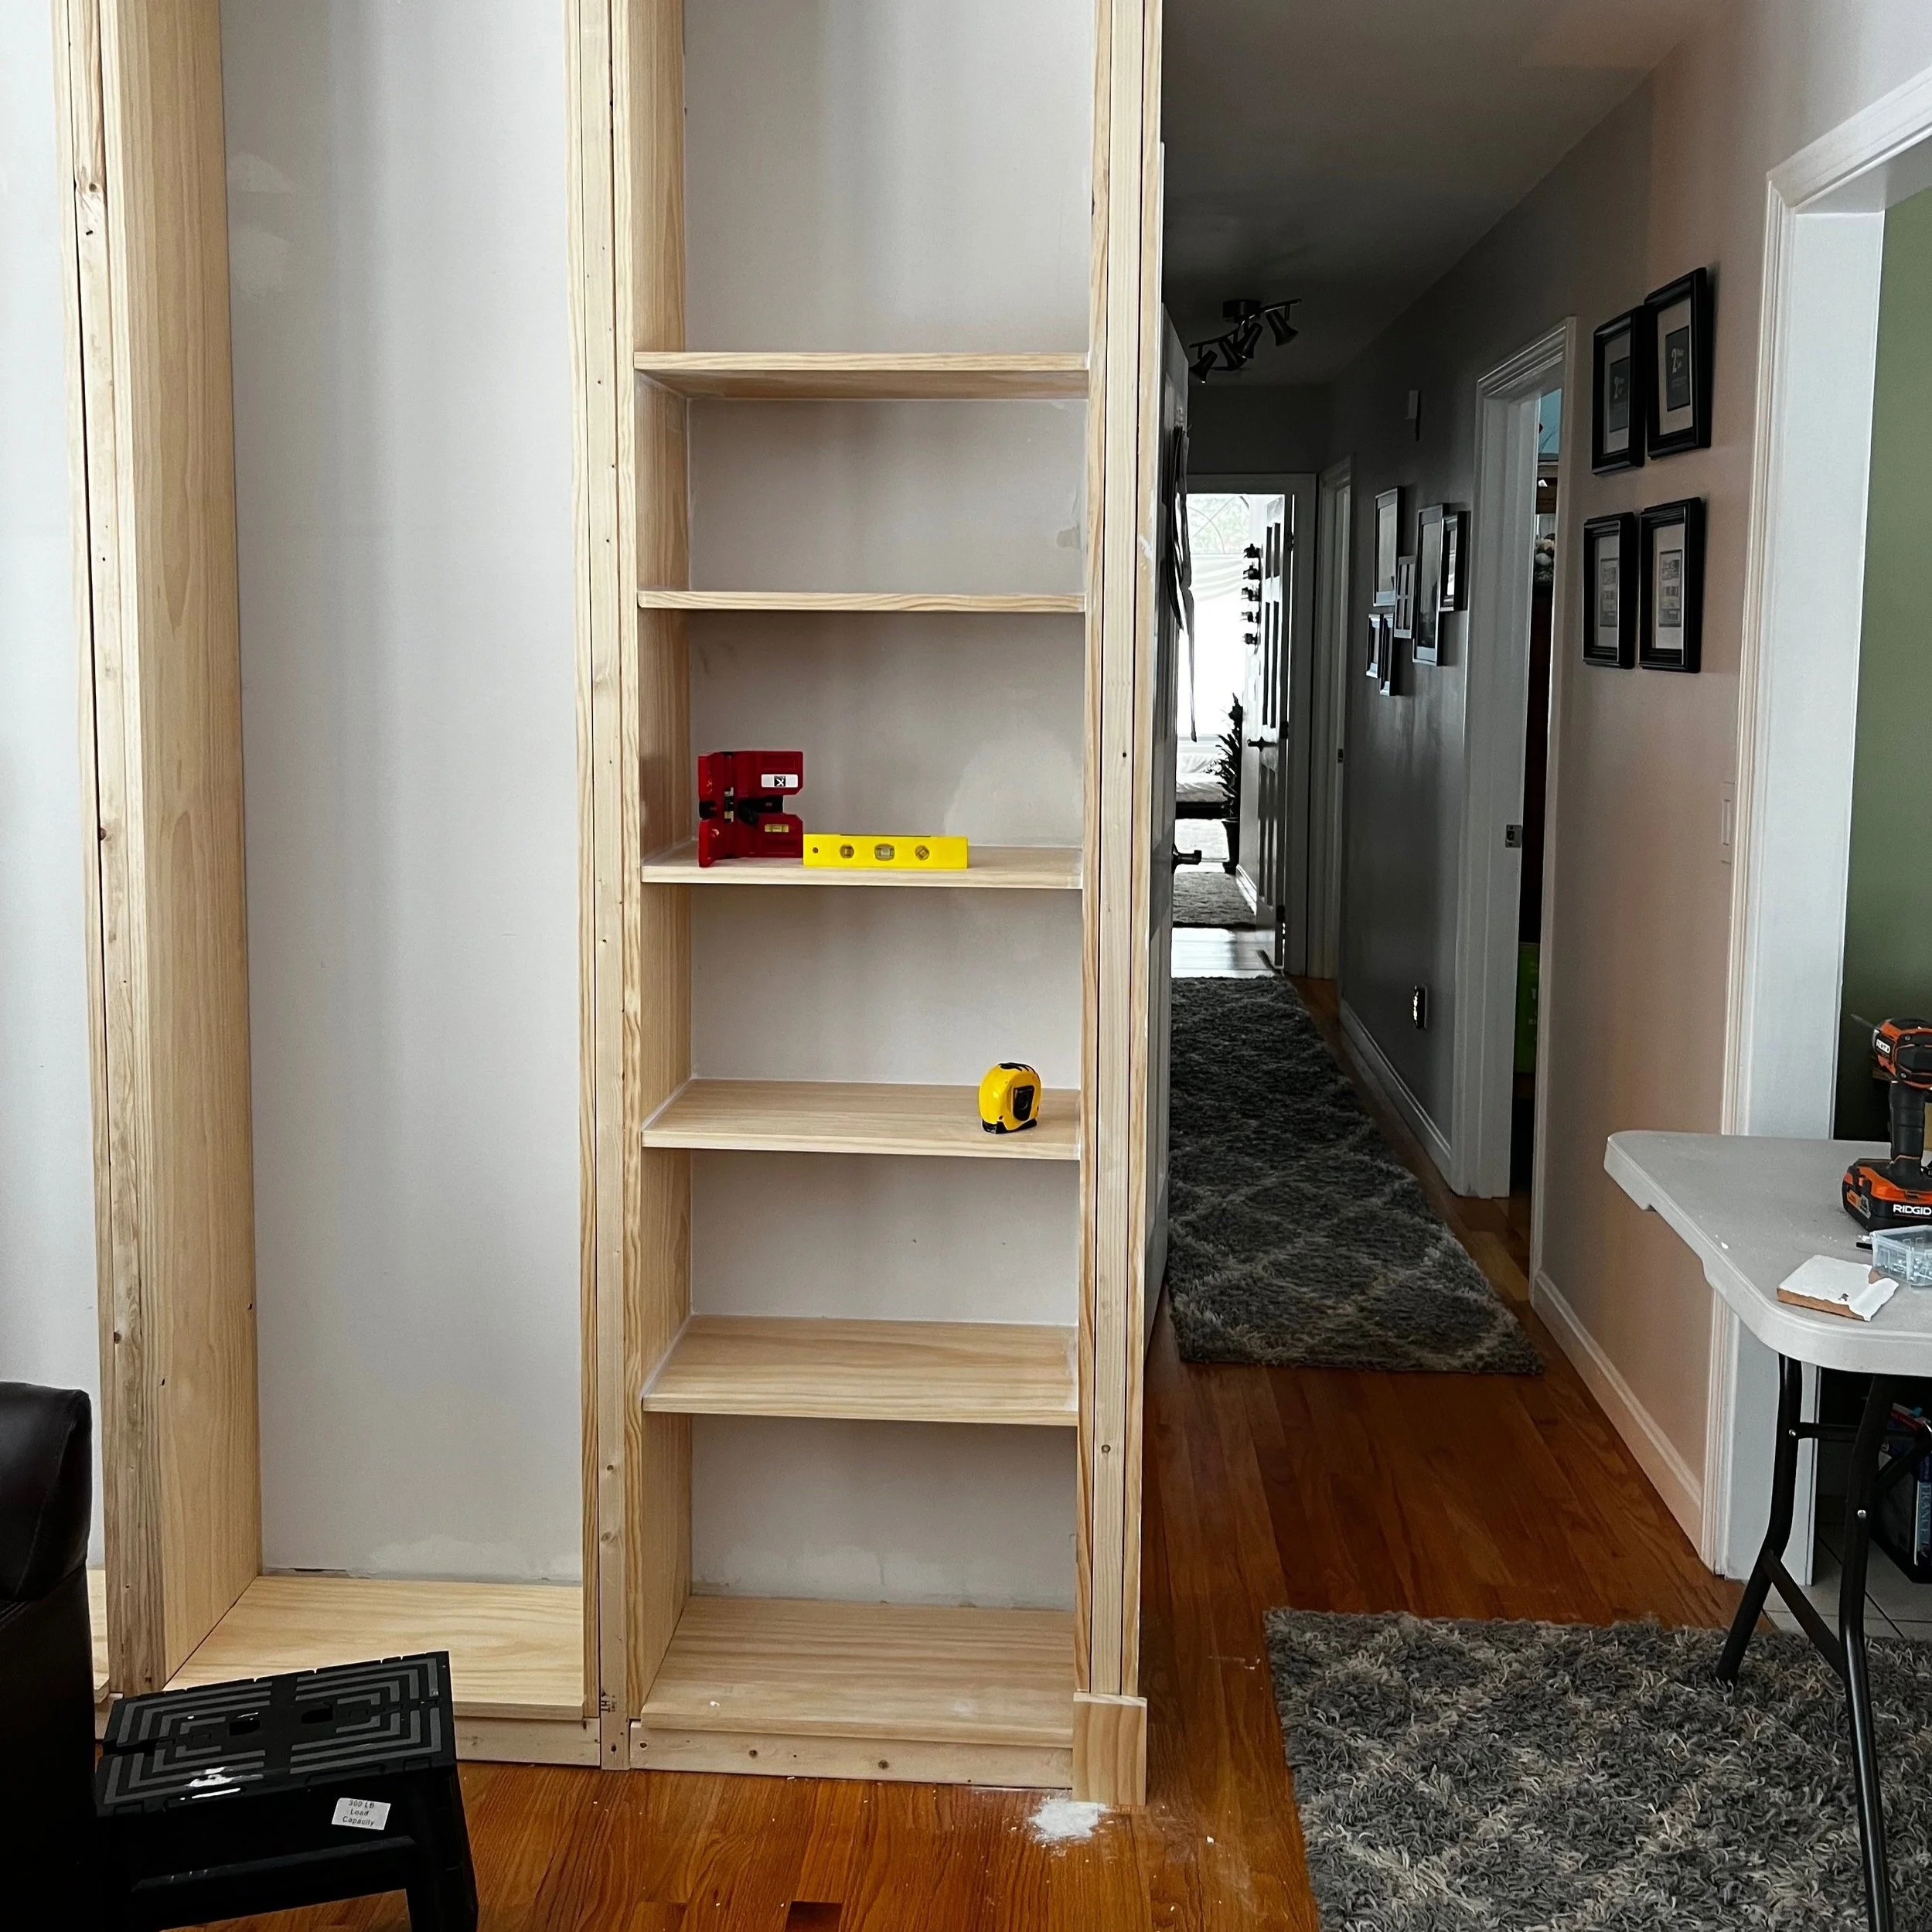
Since my vertical supports do not align with the wall studs, I installed a header board where the ceiling meets the wall. From there, I screwed in the vertical support spacers at 24” intervals.
I built up a platform to raise the bottom shelf up off the floor. The bottom shelf needed to be at least as high as the top of the floor moulding. I then started making sandwiches of the 2x2” supports and the 1x12” select pine boards, and screwing them to the pieces already attached to the wall.


Next: Shelves and shelves and shelves. Forty, to be exact… cut from 1x12” select pine boards and pre-drilled using a pocket-hole jig. Measured and leveled and squared again and again and again. Once they were perfectly aligned, I spackled the holes.
From bottom to top, the spacing measures 15”, 12”, 12”, 12”, 10”, 10”, 10”.


I mudded over the exposed end using joint compound, going slowly with thin layers to avoid cracking and sinking. I sanded between each layer, creating a nightmare of dust in my house… but I’m hoping it’ll be worth it. I added plain vertical trim to hide the sandwich-edge of each vertical support, and a horizontal piece across the top. The bottom will get floor moulding to match the rest of the house.
At this point I also got antsy to start painting. I know, I know… probably a bit premature. But it was fun to start seeing my vision appear. It also helped me see where I needed additional caulk to make up for my less-than-perfect carpentry skills.
I later heard the quote: Do your best, and caulk the rest!


It’s really starting to take shape now that it’s painted with Behr’s Crème de la Crème to match the living room, and loaded with a bunch of my books and knickknacks. I added rustic crates from Plow & Hearth to collect other odds and ends. I’ll have to wait until lumber is back in stock before I can finish the last of the shelves, but for now I’m quite pleased with how it came out.
Next up: clean up the gap where the shelves meet the ceiling, and elsewhere in the room where the ceiling joints have cracked and warped… which of course will lead to a ceiling re-paint!

Basement Floors, Basement Floods
I’ve been thinking about replacing the wall-to-wall carpet in the basement with something that would better suit my needs… primarily, the ability to get dirty. And let’s face it… peed on. Now, before you think I’ve created some den of kink in my basement, let me clarify: it’s a workout space for me, and a play space for the dogs. Sometimes the little fur babies get so excited they just can’t control themselves. And sometimes the older fur babies decide they love it here, and claim it as their own. Either way, pee happens. Carpet is a bad idea.
So I browsed. I ordered samples. I measured and calculated and drew diagrams and 3-D mockups. But mostly, I procrastinated.

The ‘Romper Room’ area is getting carpet removed, and rubber flooring installed.
Rubber is exactly what I need. Shock absorbing and easy to clean, this will create a perfect exercise floor for humans and canines alike. It’s easy enough to install myself… just a straight edge and razor to shape the pieces around corners. No glue required.


So while I was in the midst of all that procrastination, the basement flooded because the refrigerator water-dispenser line disconnected itself and streamed down the wall all night long. It’s just water… not sewage or oil or anything gross. But still, it’s annoying. The rug pad was glued down to the concrete, and (to its credit) had a moisture barrier on the top side. While this is a great feature for preventing spills and accidents from seeping down into the pad, it is the opposite of helpful when the basement flood soaks up from below. The pad was the consistency of wet cake. Out it went.
Also, I ordered a freeze/flood sensor. It might not stop water from ever touching my basement again, but at least I’ll be able to react faster next time.


Yeah, okay… so, I could have bought new rug pad for the soaked corner, and set up the basement with dehumidifiers and fans and smoothed the carpet back out. But where’s the fun in that? Out came the utility knife. Out went the soggy carpet.
The new flooring is 70% black recycled rubber and 30% colored virgin rubber. My 154 rubber floor tiles saved 62 tires from ending up in landfills. YAY! 🌎 ♻️

This is what 1100 pounds of rubber looks like. These tiles are HEAVY!

The first corner.
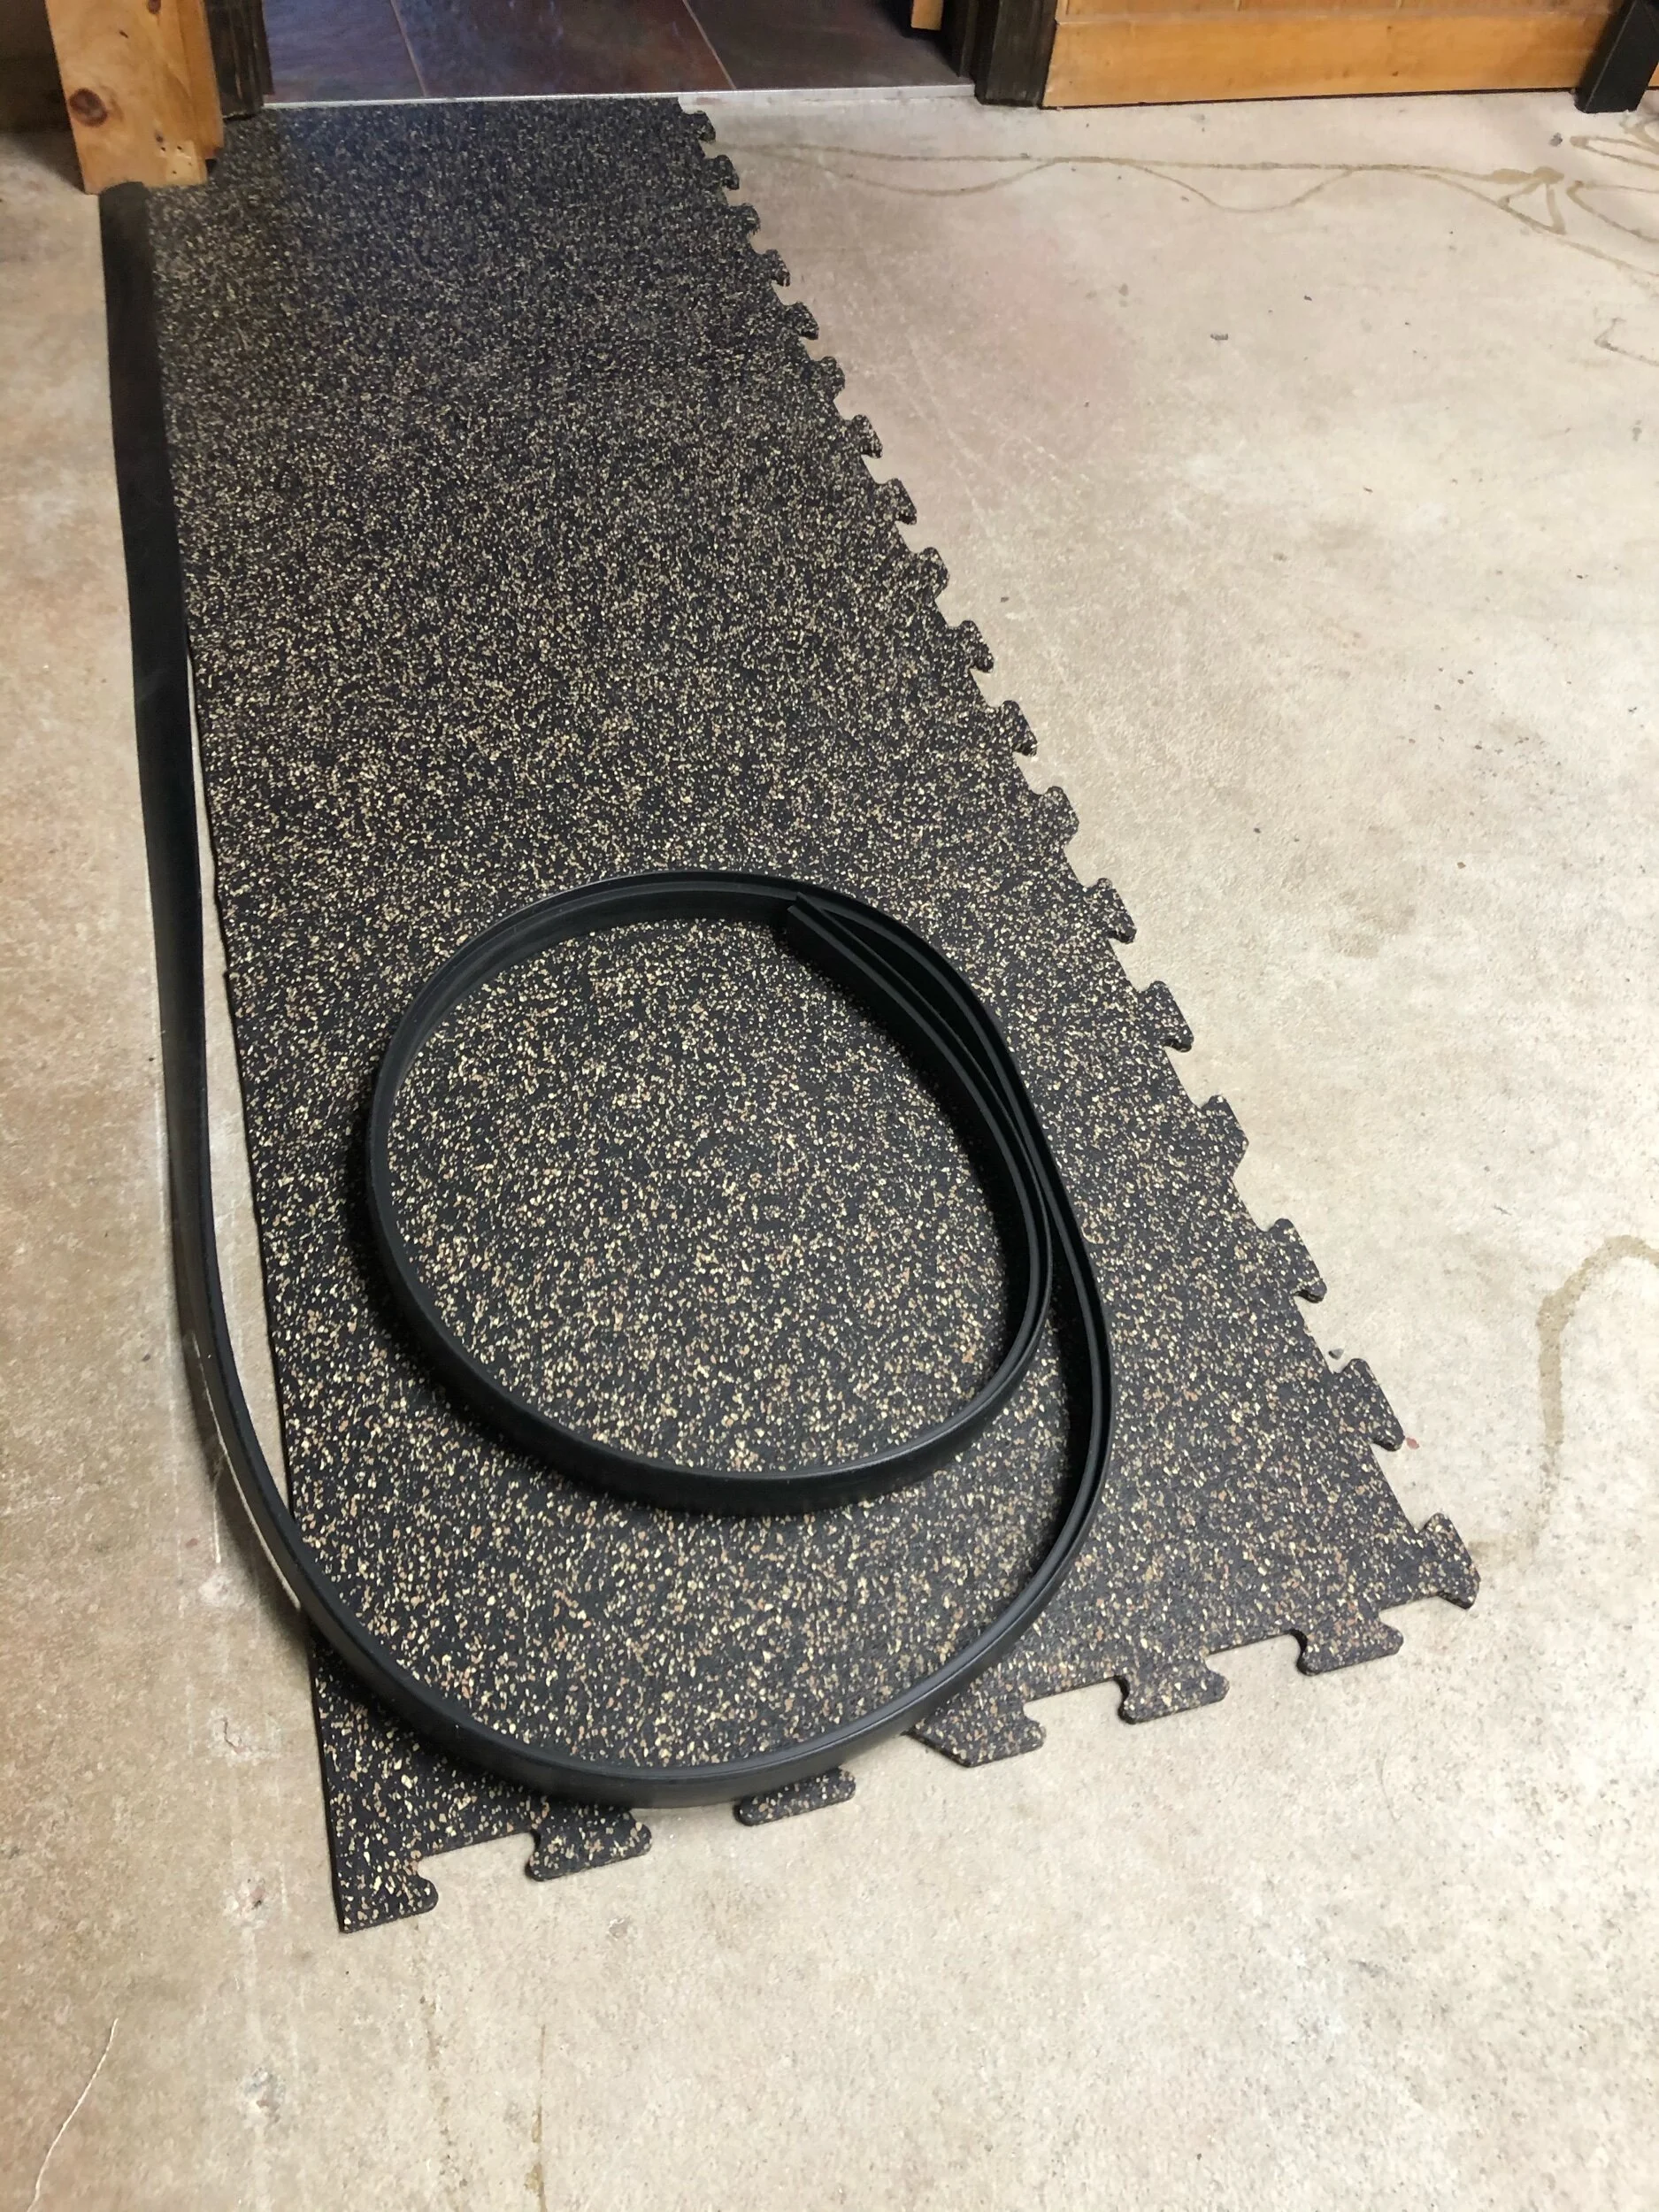
Laying down the edge to the workshop, with a step-down transition strip to keep it from lifting, and prevent people from tripping.

First day’s effort: 16 tiles. Only 138 more to go!

40 down, 114 to go. I fought with buckling and gaps for quite a while today trying to insist that my basement is square and my measurements are perfect. In the end, it’s easier just to trim another 1/4” off the tile and call it good.

Making progress! Time to move all the junk over to the completed side.

So close… at this point the OCD is kicking in, and I’ll be done in no time.

DONE! I have 14 tiles left over, which will be plenty to fill in the side closet when the oil tank gets pulled out.
Greenhouse Part 3: Gravel & Pavers & Gadgets
Now that the greenhouse is assembled, I'm anxious to get it decked out with good drainage flooring and other fun toys.
Now that the greenhouse is assembled (go see that post), I'm anxious to get it decked out with good drainage flooring and other fun toys.
I figured I'd need about a yard an a half of pea gravel, so of course I ordered two. And a pile of pavers. I've probably used less than half of the pea gravel... but I plan to use it outside the greenhouse as well, so I figured I'll see how far it goes and then top up the greenhouse floor with whatever I have left.

More bells & whistles...

Automatic vent openers

Fold-out potting bench with running water

Bushel basket from the local farm stand to hold all my veggies and herbs, plus suction cup hangers to stow my hat & apron.

Bins for potting soil, composted manure, seed-starting medium, and whatever else.

Wireless thermometer


Kitchen Demolition and Appliances
Cutting out the wall separating the dining room from the kitchen gives the refrigerator door to open. With the wall gone, the light switch needed to move to a different wall.


The vent from the previous microwave recirculated air back into the kitchen. I wanted the new microwave to vent out into the carport, so I needed to cut another hole in the house. Someday I'll repair the siding so it looks nicer, but for now, it'll keep the bugs out.


Connected... love the apps!


Terraced Vegetable Garden
Screen room gone, and replaced with a terraced vegetable garden built with rocks.
When the screen room came down, the scarred footprint was a nasty mix of litter, construction debris, and sand. First I cleaned the garbage and dug out the top foot of dead soil to roughly outline the steps.


Next I used local rocks (boulders, technically) to build steps. This is the granite state, after all... and I had lots of neighbors willing to contribute their rock piles. I experimented with shapes... fitting rocks together and carving into the slope. I didn't want a symmetrical staircase... I wanted something a little more natural feeling.


The sand is so loose that I used plywood pieces to hold back the steps... I'll need to find a more permanent solution, but this works for now. I also learned in the first heavy rain that the sand easily poured through the gaps between the rocks, leaving little deltas on the next level down. Learning from my neighbor Michele's garden success, I tore apart what I had already built, dug a ditch behind each rock wall and sunk a double layer of heavy plastic sheeting to keep the soil where I wanted it.

That's as far as I got in the summer of 2016, which is just as well, since I wasn't about to plant new vegetables in August. My boulder-hoisting continued in spring 2017:


Once I got the step the way I wanted it, I filled each bed with manure-rich organic garden soil and started planting. Happy garden!
