Floor Molding, Finally
I love using Christmas stay-cation to hole up in the cold weather and work on indoor home improvement projects. Instead of starting a new project, I made a list of the odds and ends that were never completed from my previous projects. You know the ones… the good-enough-for-now, I’ll-finish-it-someday sorts of chores.
Well, the dining room wallpaper came down in Nov 2014, and with it the sticker-wrapped-plastic floor molding. Two years later, I busted out the wall to make space for the new fridge. The next spring, my multi-talented arborist offered to help me fix the tile and drywall while he was here for my big tree removal project. (He later also built my pergola using local lumber!)
Even though I’m sure I’ll have to rip the molding back out when I replace the floors, I’m just sick of looking at the bottom three inches of rough unpainted drywall. Plus, now I get to buy an automatic nailer, and justify keeping the chop saw from Mom’s garage.

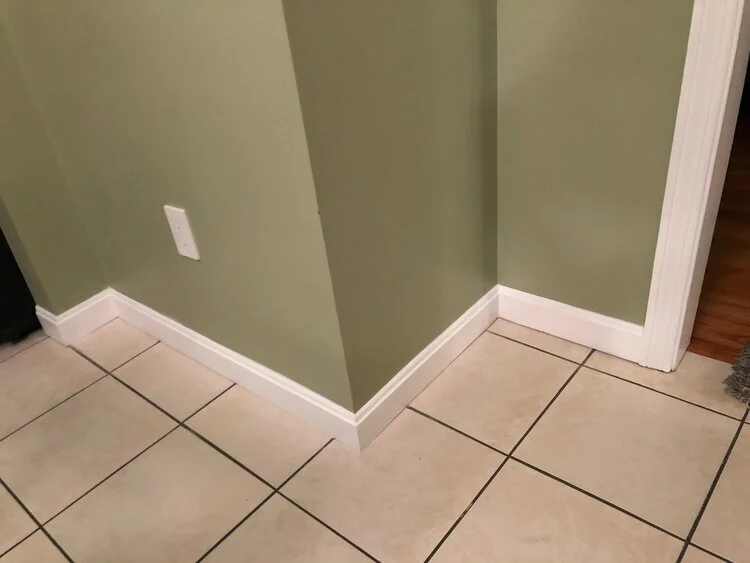
I started with the corner that’s hidden behind the bookshelf.

Not bad for a first attempt.

I’m certainly getting a lot of practice with corners.
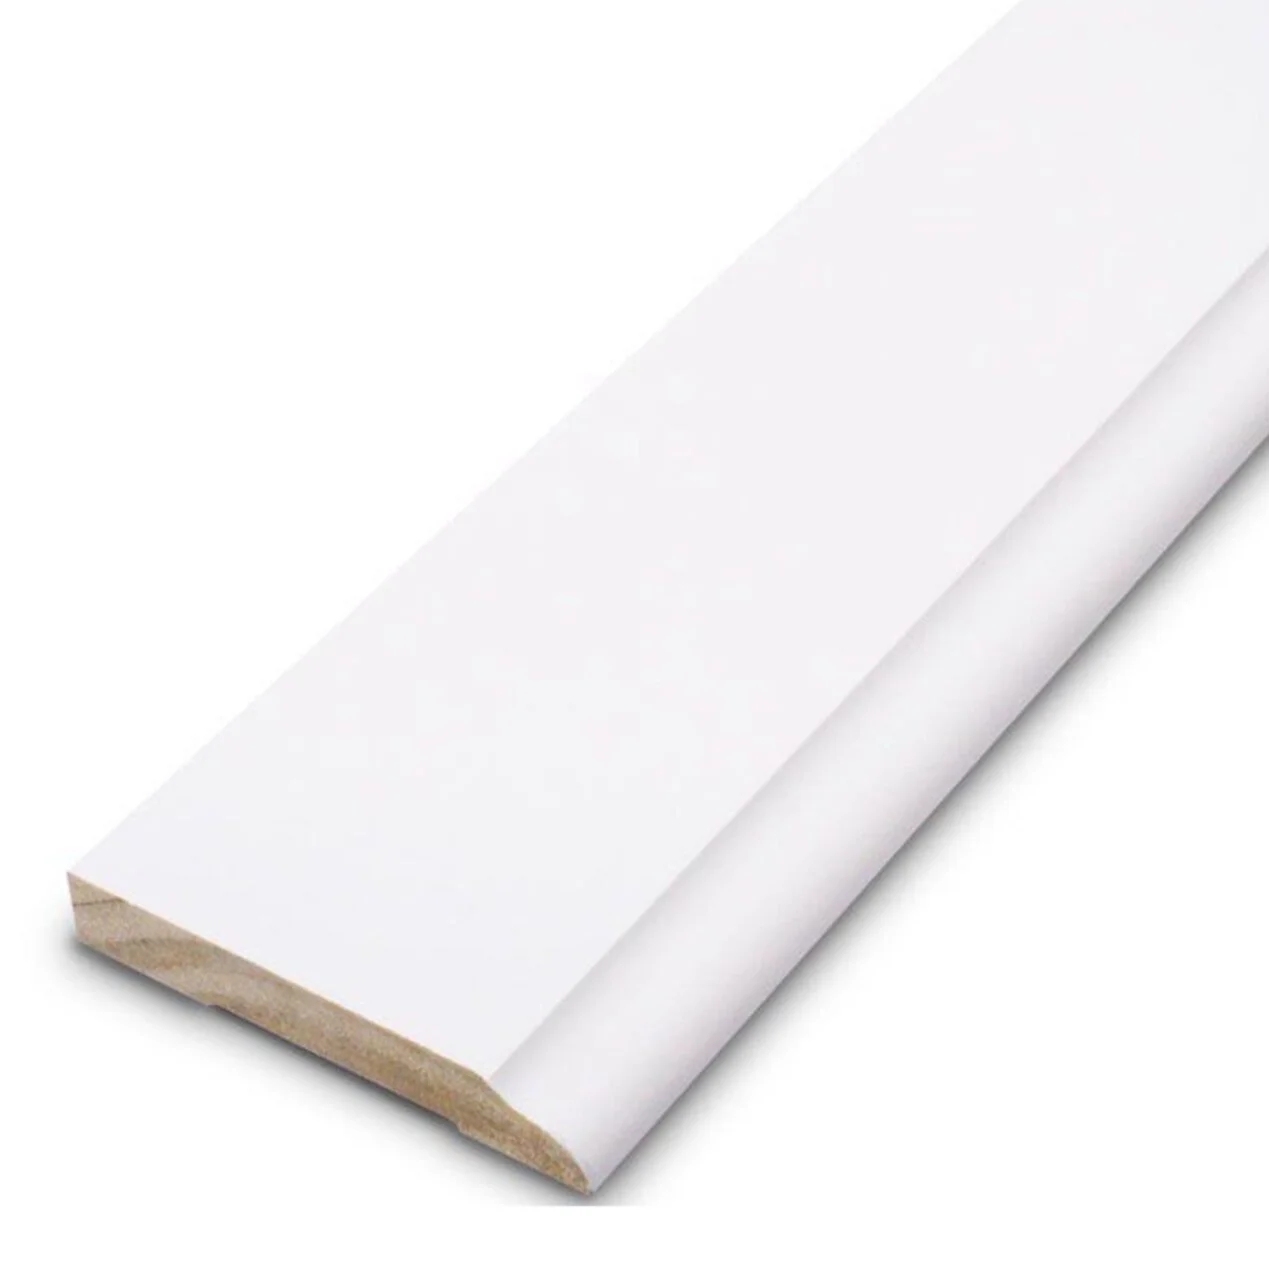
Nothing too fancy, but matches the trim in the other rooms of the house: WM 662 9/16 in. x 3 1/2 in. Pine Primed Finger-Jointed Base Molding


Patio Sealant
I knew when I filled the patio cracks with stone dust that I’d need to find a way to set the material in place. Of course, I didn’t get to it for a couple years… so weeds set in, over and over.
The first photo shows the patio with weeds coming up every crack. The second photo shows the patio (after hours of weeding) in the stages of sealing: dry pale brown unsealed stones at the left, milky white newly-applied sealant in the middle, and matte wet-look deeper brown at the right.

Bedroom Ceiling Fan
The brass-and-oak ceiling fan in my bedroom rattled when it was on, so it was almost never on. Even the ReStore wouldn’t take it… they already had a number of brass fans that no one was buying.
I also wanted to have better control of the fan speed and light brightness, so we added the Lutron Fan Control option as well.


Summer Storm
Holy cow… microburst. Time to get out the rakes and shovels and clean up the neighborhood.

Spring Seeding
Time to try out the new greenhouse! My first wave of seeds had to grow inside given that the greenhouse is not heated. But it wasn’t long before I could harden off my little baby plants and allow them to overnight in the greenhouse with heated plant mats. We had an exceptionally soggy spring, so I planted greens in seed trays too… next year I’m hoping to direct sow.


Garden Tags
I like labeling my plants… mostly so I remember what I already planted when spring rolls around and I want to stick a shovel in the ground. Some of my perennials are late to pop to the surface, and others never pop up at all. Such is life in Zone 5.
The trouble with plant tags is that they’re generally white. Or yellow. They look like litter against the thawed-but-not-yet-sprouted garden dirt.
Enter SPRAY PAINT, my new favorite medium. Combined with a white acrylic marker pen, these tags look neat and camouflaged.


Guest Bathroom Ceiling
The heavy popcorn ceiling in the guest bathroom had been painted over - heavily - with water-resistant paint. Probably Kilz, or something like it. The obnoxious concrete-like granules tore at my knuckles and refused to be scraped loose.
So, a few YouTube videos later, I decided to try my hand at coating over the popcorn with drywall compound. I was feeling pretty okay about my initial attempts. (See the smooth-ish area over the window?) Then life got in the way… and this is how it has looked ever since.

Then Rosemary showed me her beautiful newly popcorn-free ceiling. Knowing I could stare at this eyesore for a few more years, or throw a few hundred bucks at the problem and have it done in a couple days… done.
First coat… um… WAY better than my sorry attempt:

Coated, sanded, painted. Popcorn BE GONE!

Cable Tangle
Before the days of wifi came the days of cable splitters. My house had coaxial cable running everywhere. I pay for premium internet service to support my work-at-home needs (and my HD streaming habit), and it’s frustrating to have crummy signal. Luckily, I have a dog-walking neighbor who works for Comcast. He told me to suggest egress (signal leakage) and noise as possible reasons for my signal degradation.
As it turns out, the line from the telephone pole had probably been chewed by squirrels, and had water inside the casing. Once inside, the line fed to a splitter, then to another splitter, then stretched to an amplifier in the workshop area, then doubled back on itself before reaching - you guessed it - a third splitter.
Wound up with all that was a nest of telephone wire. Like, for someone (not me) who maintains a land line. Instead of feeding to a neatly-installed junction box in the wall, these wires were fed through holes drilled in the floor… this made it especially easy to rip them out.


Stairwell
Finally… the last of the wallpaper is gone. PHEW. I know that there are some modern, trendy, easy-to-remove-later wallpapers out there… but this wasn’t that. This was the kind of wallpaper that holds musty odors from 30 years ago.
To be fair, this wall paper wasn’t as terrible as all that. But it was torn in places, and very dirty. And there was an area of concealed mold on the drywall adjacent to the french doors, so I’m glad I took it down.
Okay, this ‘before’ picture is terrible, but it’s the best I could dredge up from before the wallpaper was removed. You can see how the wallpaper ends at the french doors, and the wall on the right reflects the wainscoting and paint used around the rest of the room.


Ripping the wallpaper down also tore off the skin of the drywall in areas… so, this became a skim-coating and sanding and drywall dust nightmare.


The existing paint suits the room perfectly… I think a color color would detract from the richness of the woodwork, brick, and tile. Behr’s Linen White matches the existing walls perfectly… although I do plan to freshen up the room with a new coat.
Not perfect… but good enough for now.


The old brass-and-glass wall lamp is now replaced with a simple tiffany-style sconce that matches the new ceiling light and desk lamp in the office.

