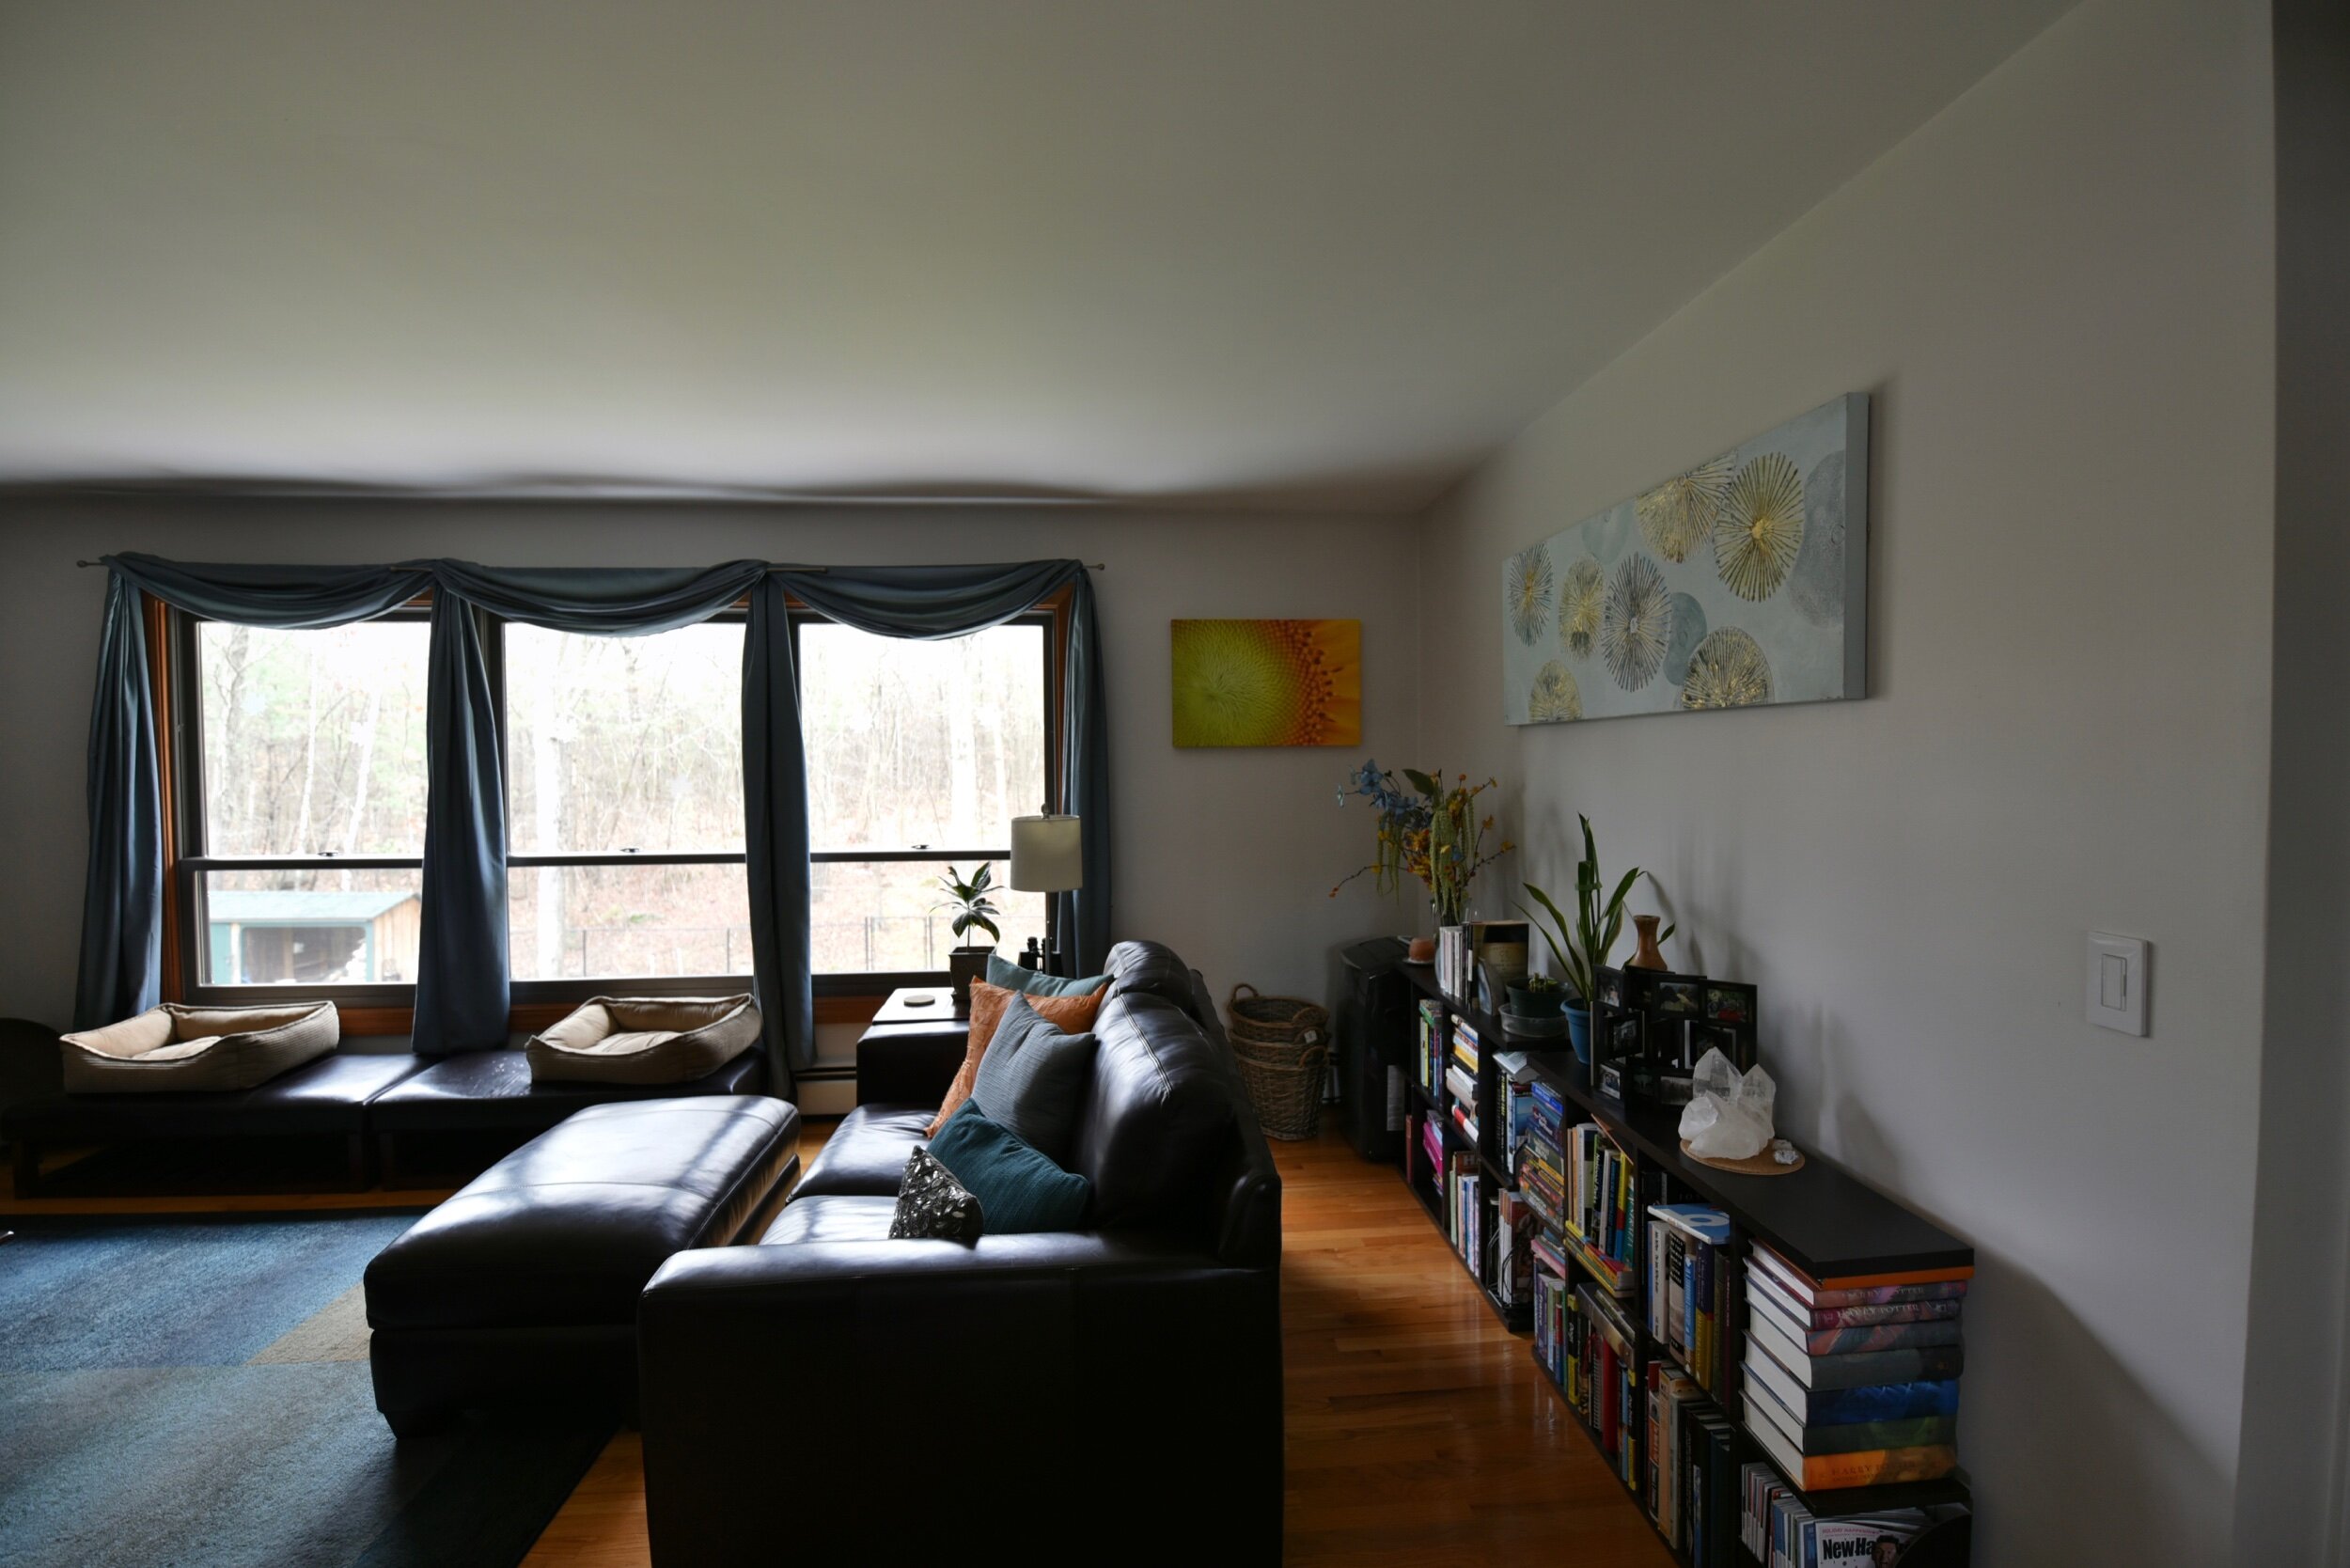
My long living room begged for a floating love seat to shrink the TV-viewing distance, and I was left with a dead zone. The particle-board bookshelves that fit perfectly under the windows in my condo served the purpose in my new living room… until they didn’t. Stacks of books grew up the wall, just waiting to slide onto the floor. Time for a permanent solution.
Mockup
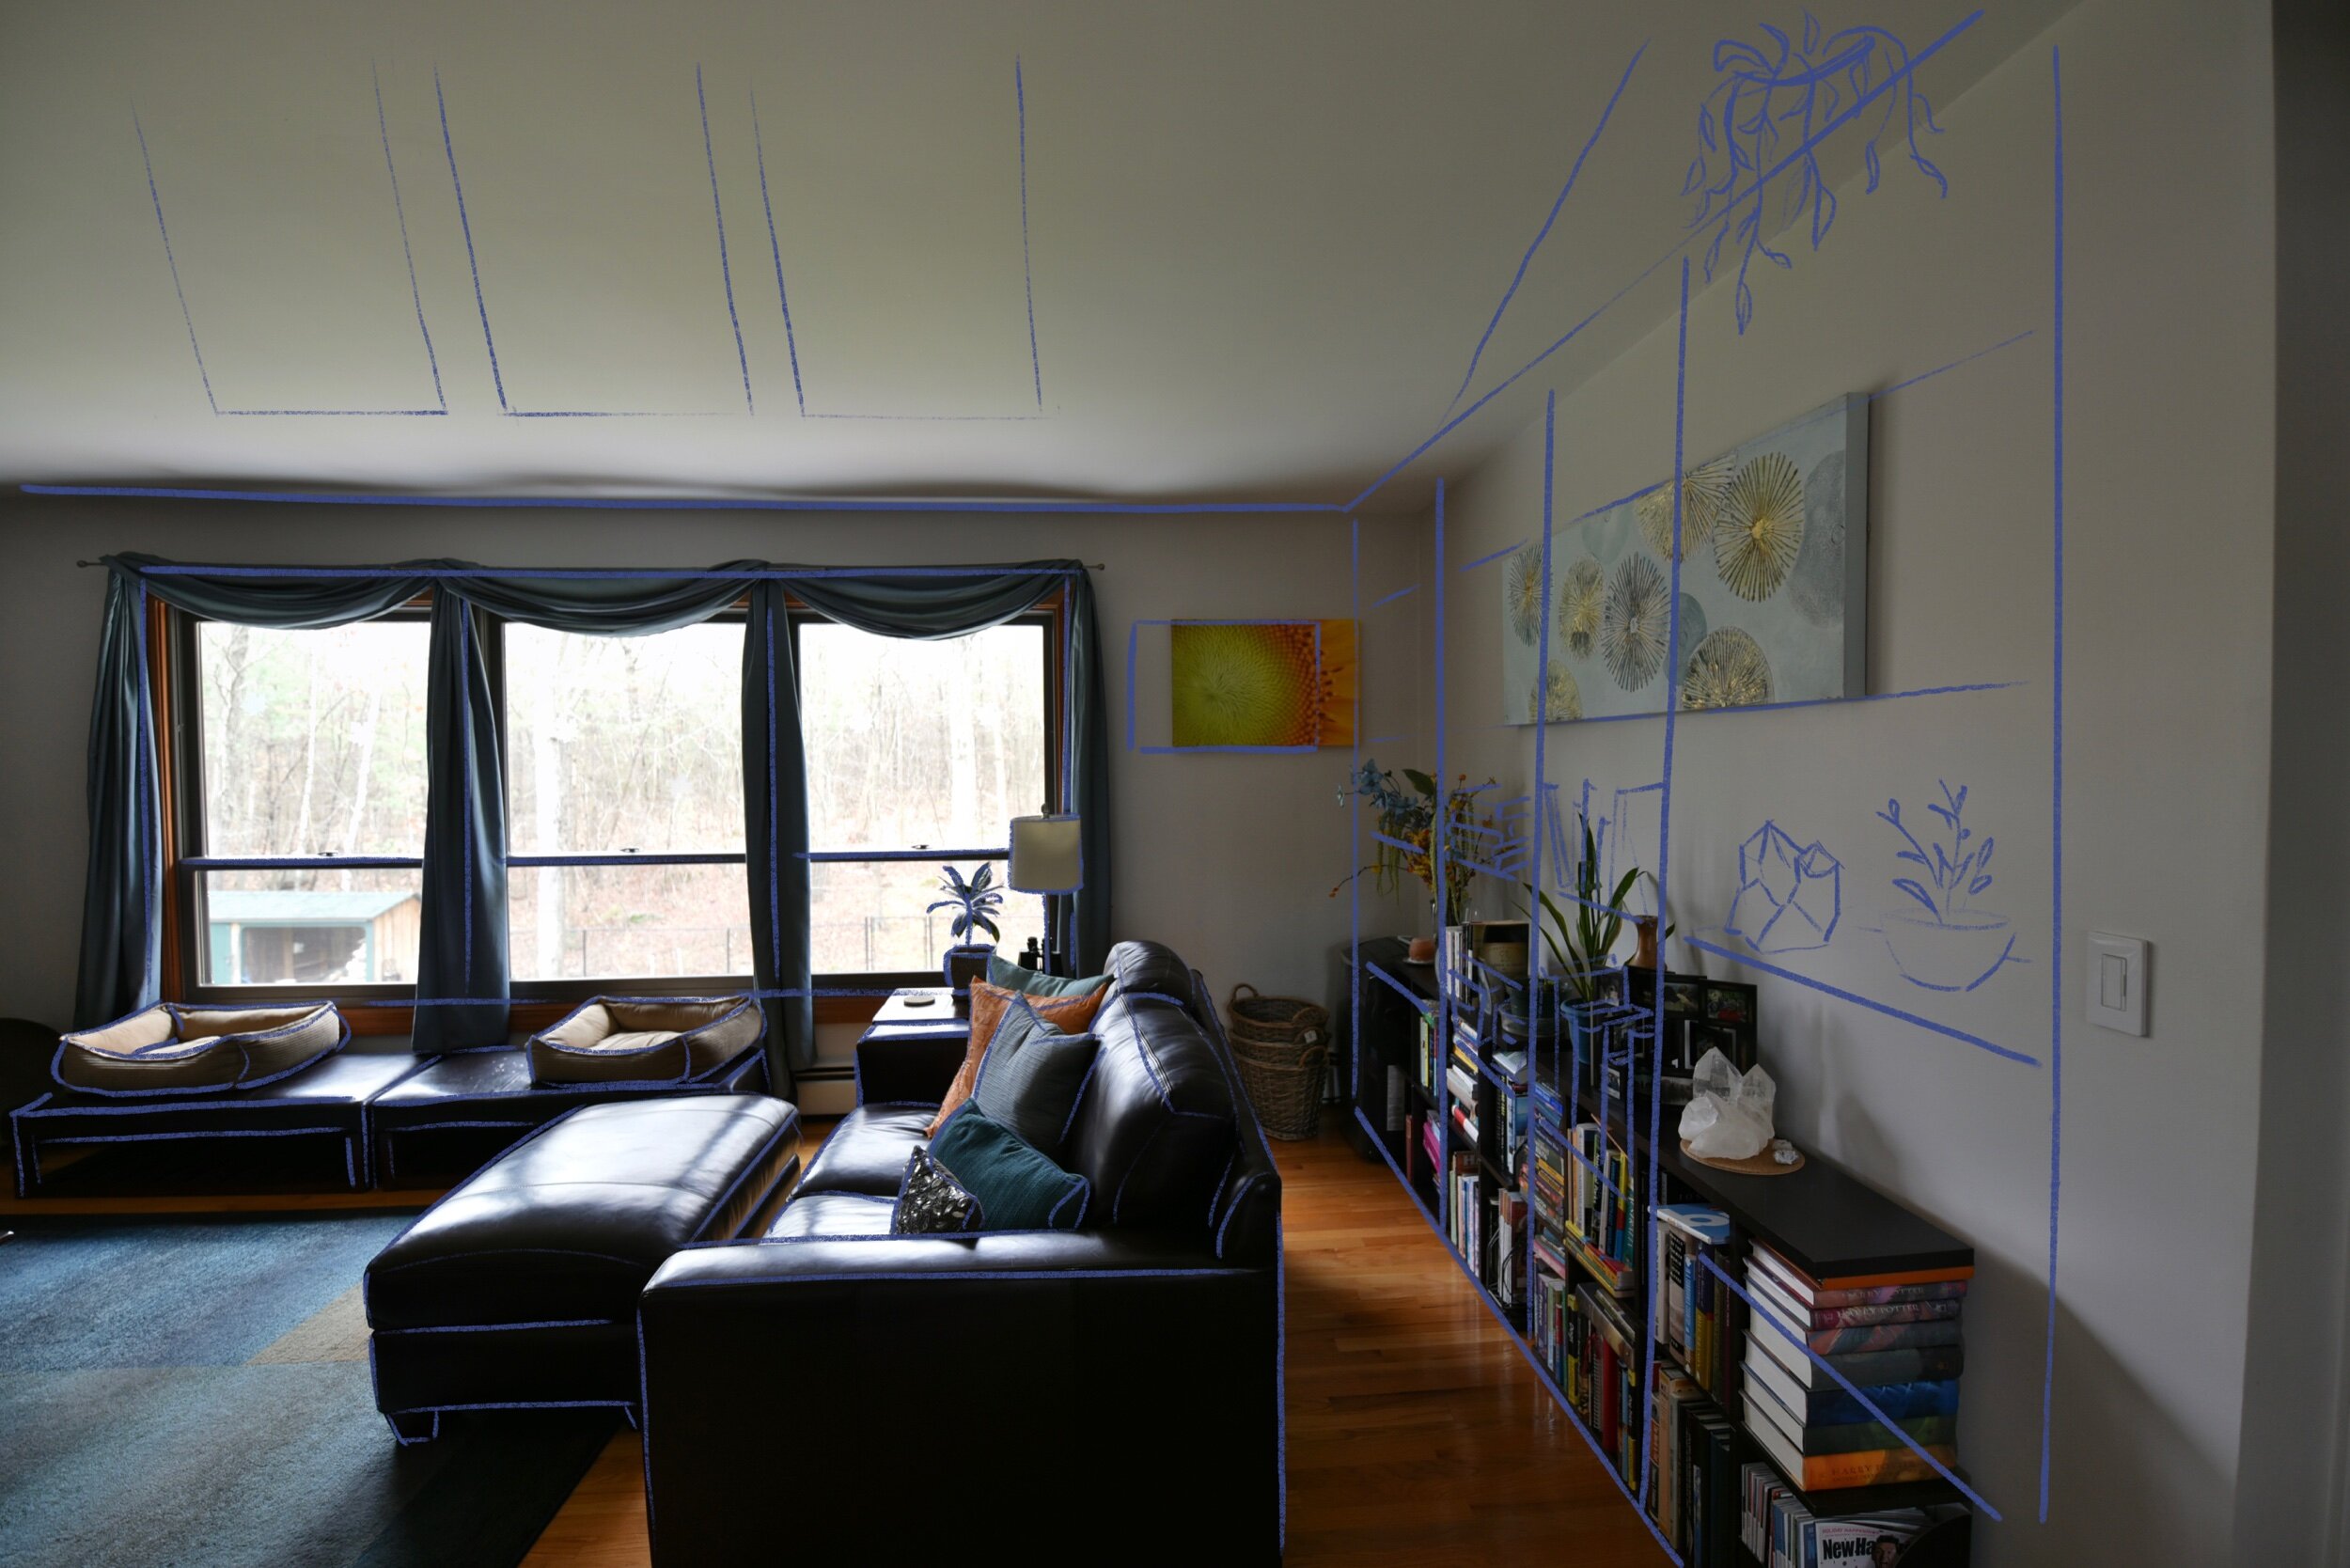
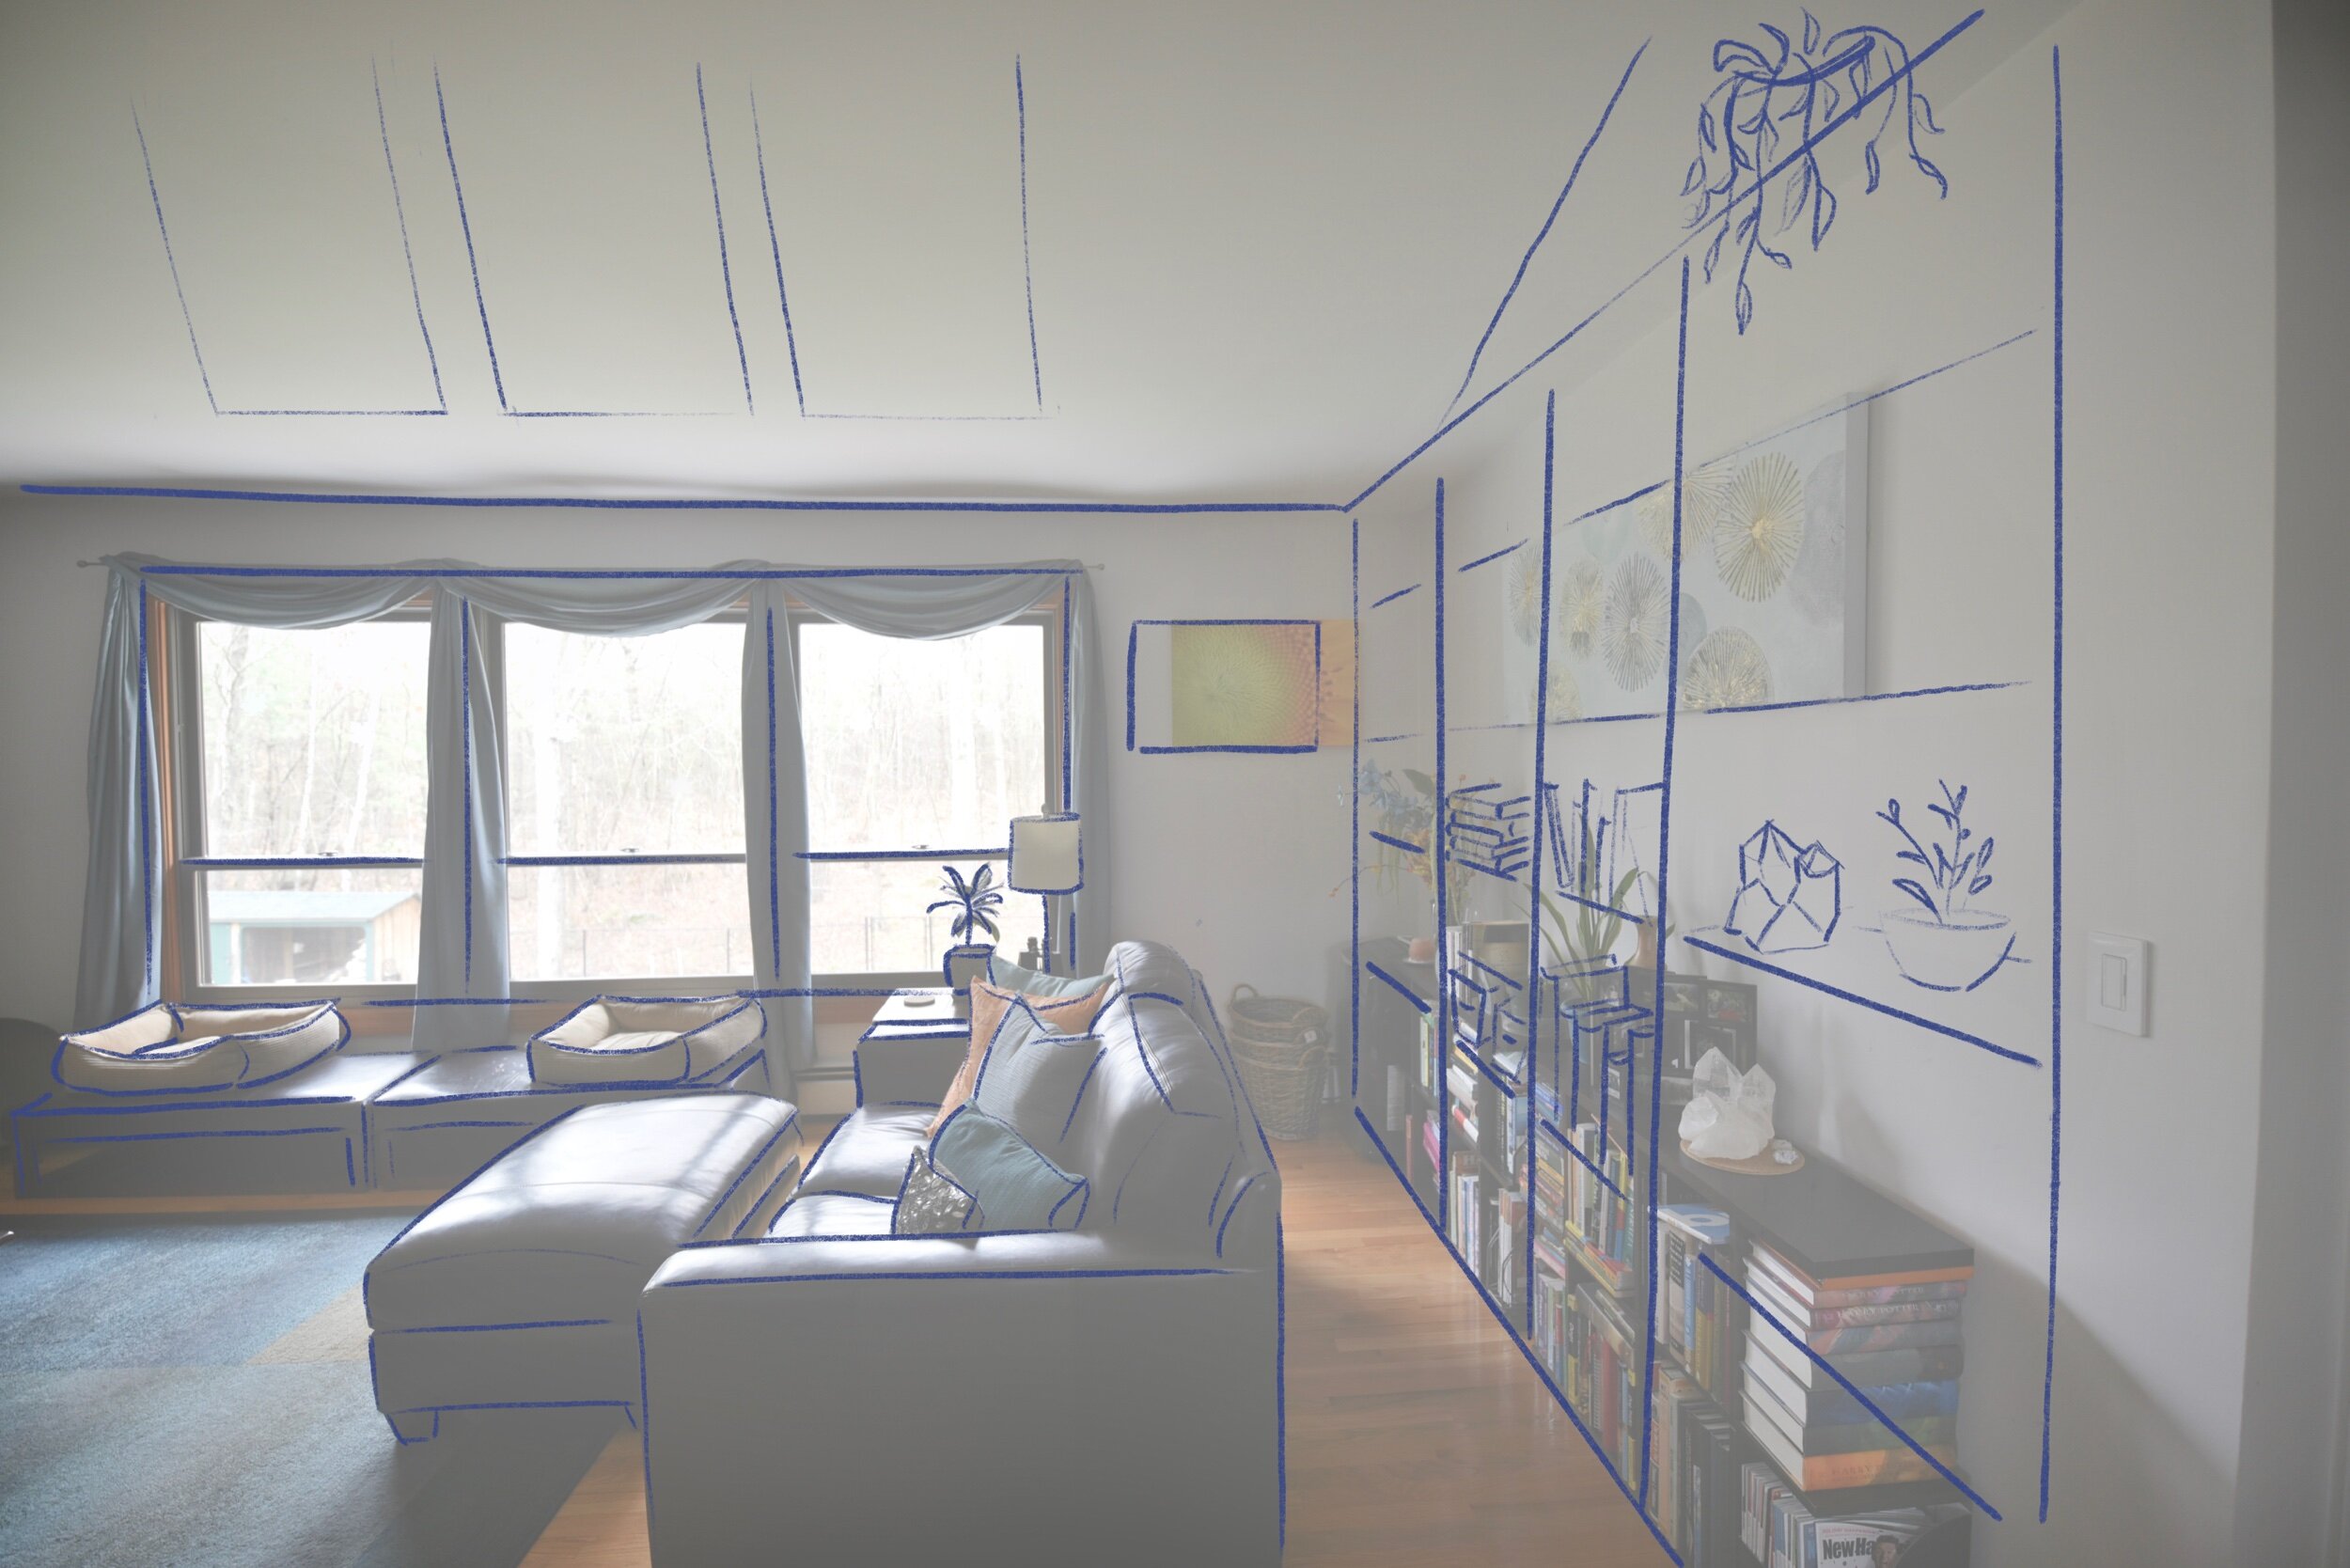
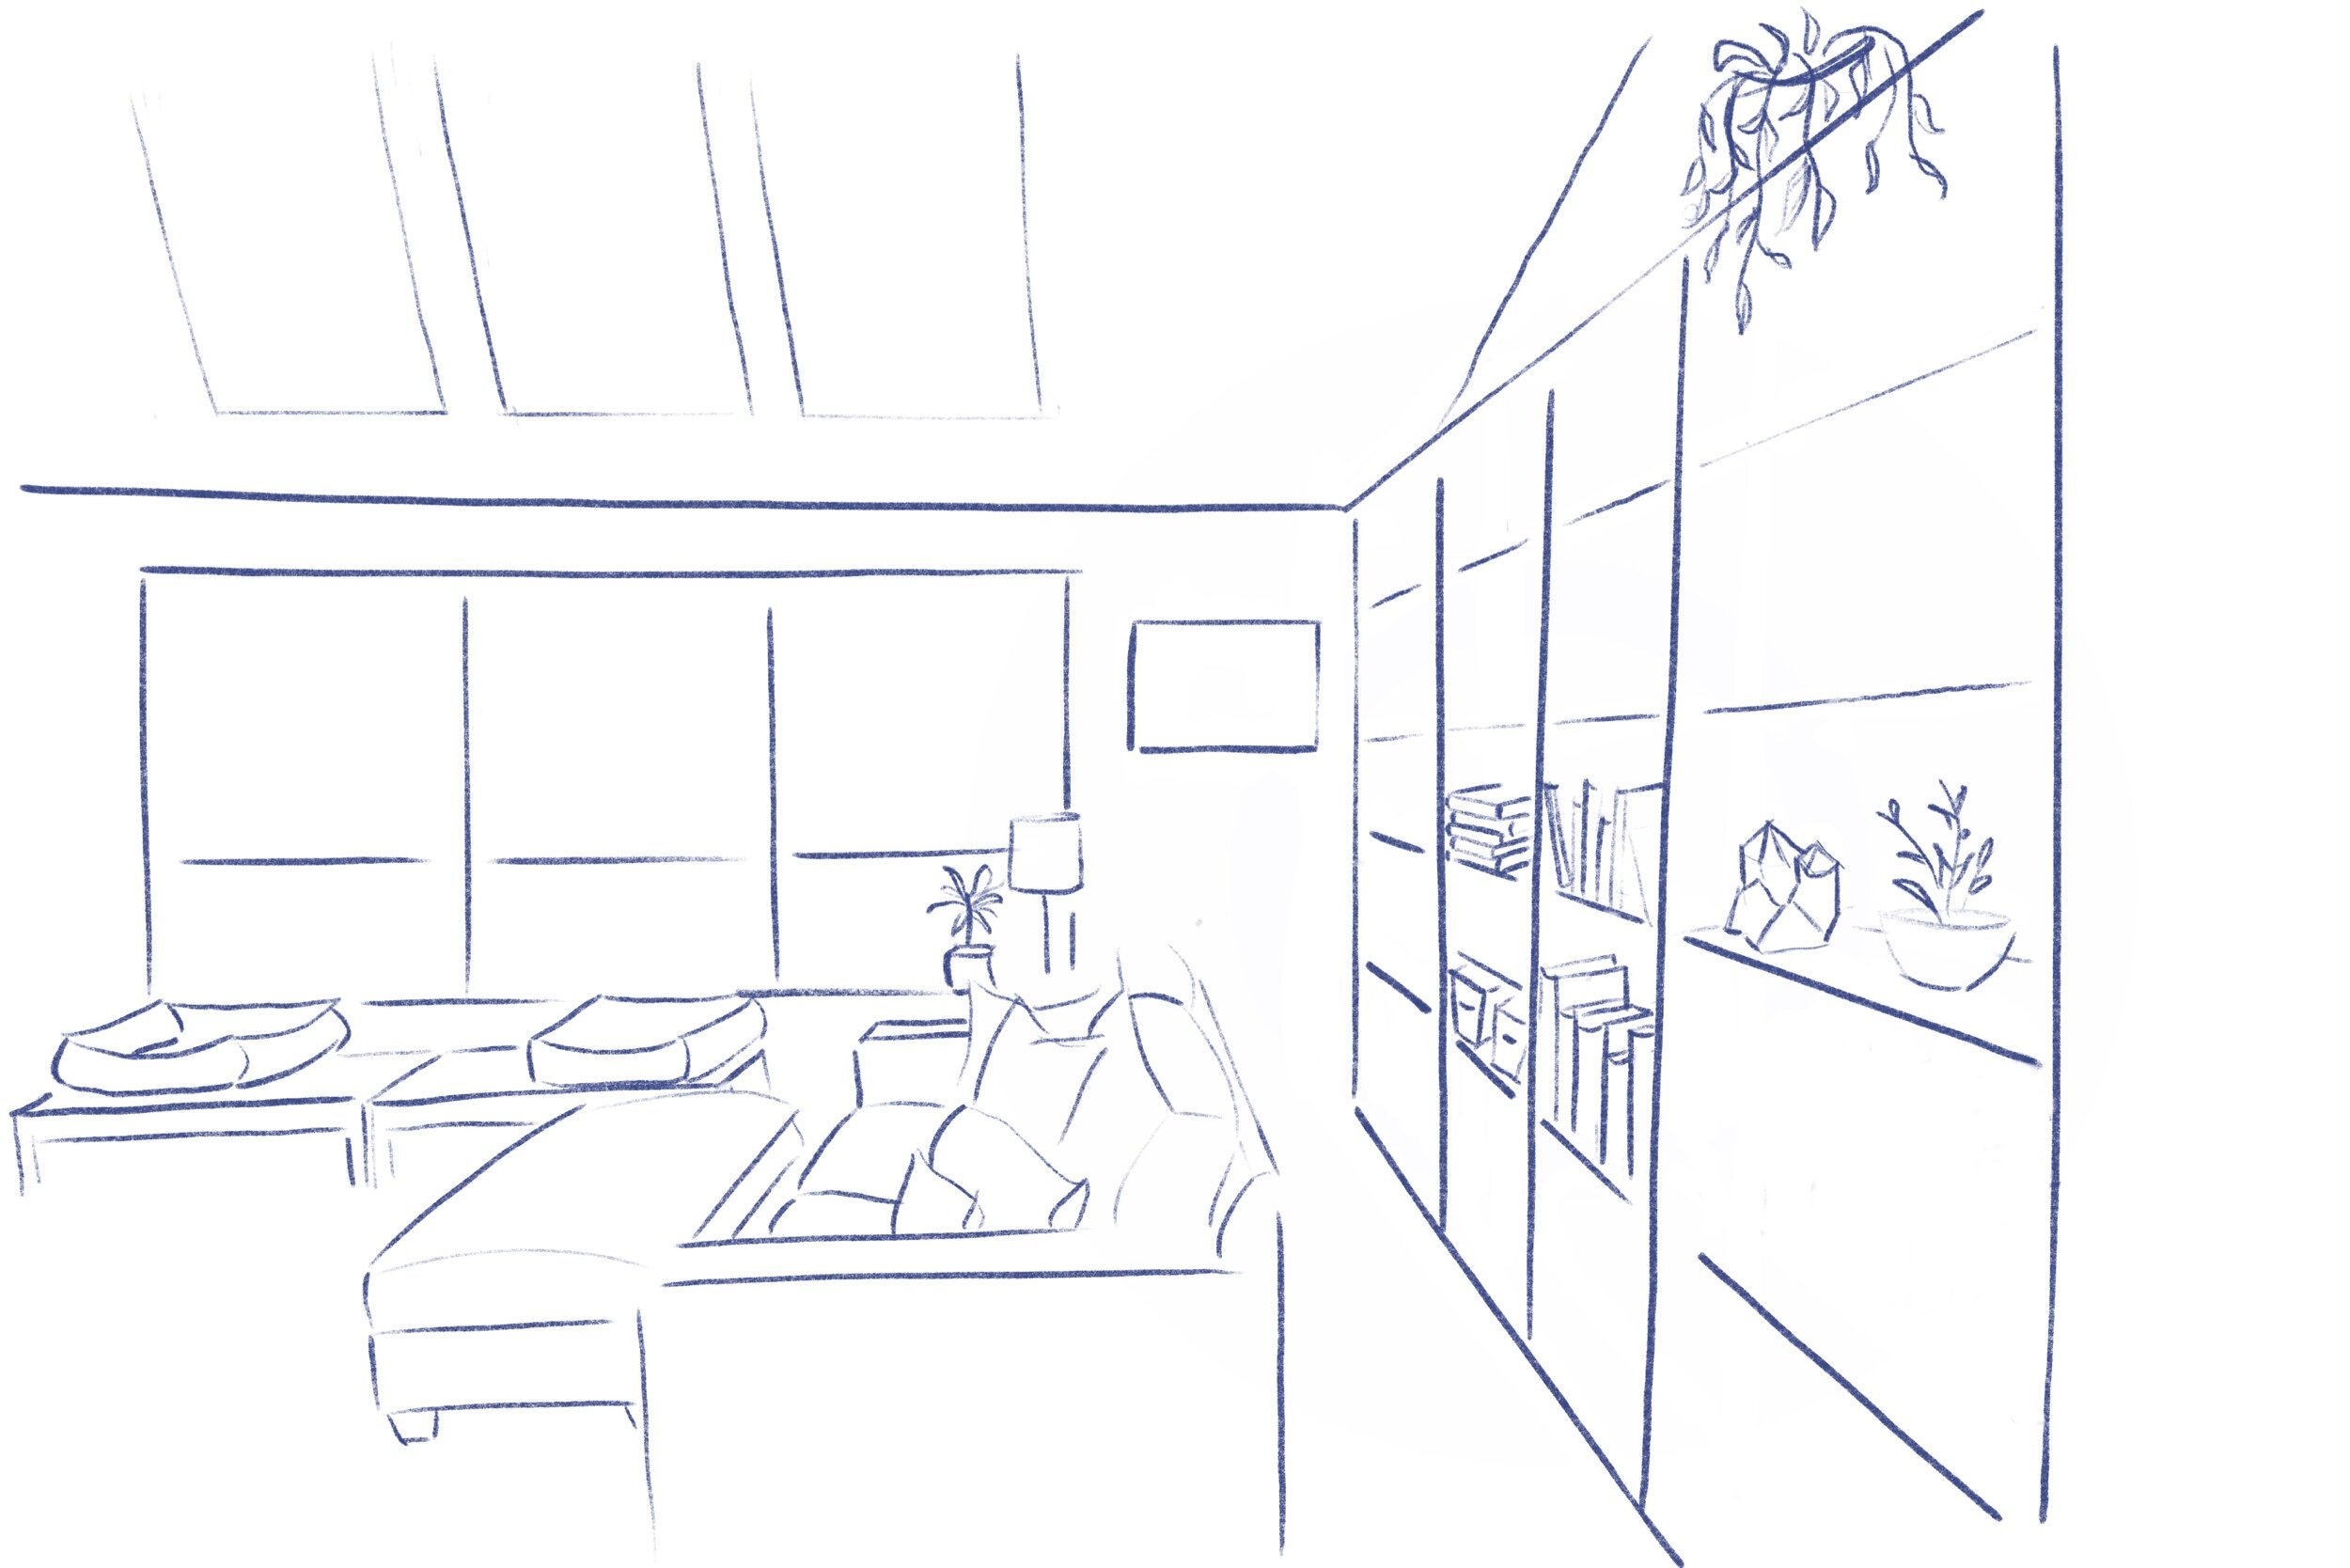
The back wall of the living room with sketch overlay of floor-to-ceiling bookshelves. (Also sketched is the fantasy vaulted ceiling with skylights, but that’s a project for another time.)
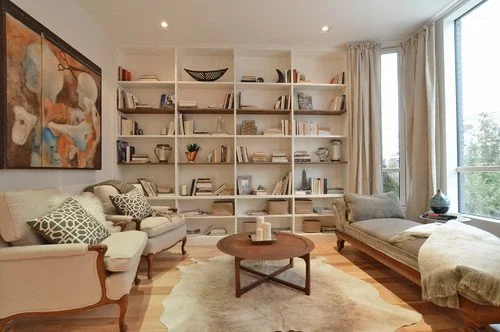
Inspiration Photos
Ideas that might work… keeping it simple, so the shelves disappear and allow the contents to be featured. I like the idea of lighting, but not enough to wire every shelf.
Tutorials
I’m not blazing new trail here, so I looked online to find tutorials. Here are some of the ones I leaned on:
The Family Handyman: How to Build a Built-in Bookcase - I used this design for the boxed vertical supports, since the thickness gives the unit more substance. It also gives me space at the top to add picture lights.
Darbin Orvar: Built-in Bookcases and Cabinet Construction (part 1 and part 2) - I’ll use her approach of using the pocket hole jig to attach the shelves.


3D Model
I decided I wanted uniform, fixed shelves with picture lights across the top. I used Home Designer Suite to create the design. The wall is 126” wide. I’m planning on five 24-inch-wide sections, with the extra few inches used to accommodate the radiator and wiring on the left.
Side note: I had originally planned on installing a picture light at the top of each column. However, my chosen fixtures jumped in price by $50 each, so I reconsidered. Now that I see the completed project, I like it better without.


Getting Started
To prep the wall, I needed to remove the floor moulding and move the existing light switch to the inside of the stairwell. If I’d known how easy this part was, I’d have moved the switch years ago.


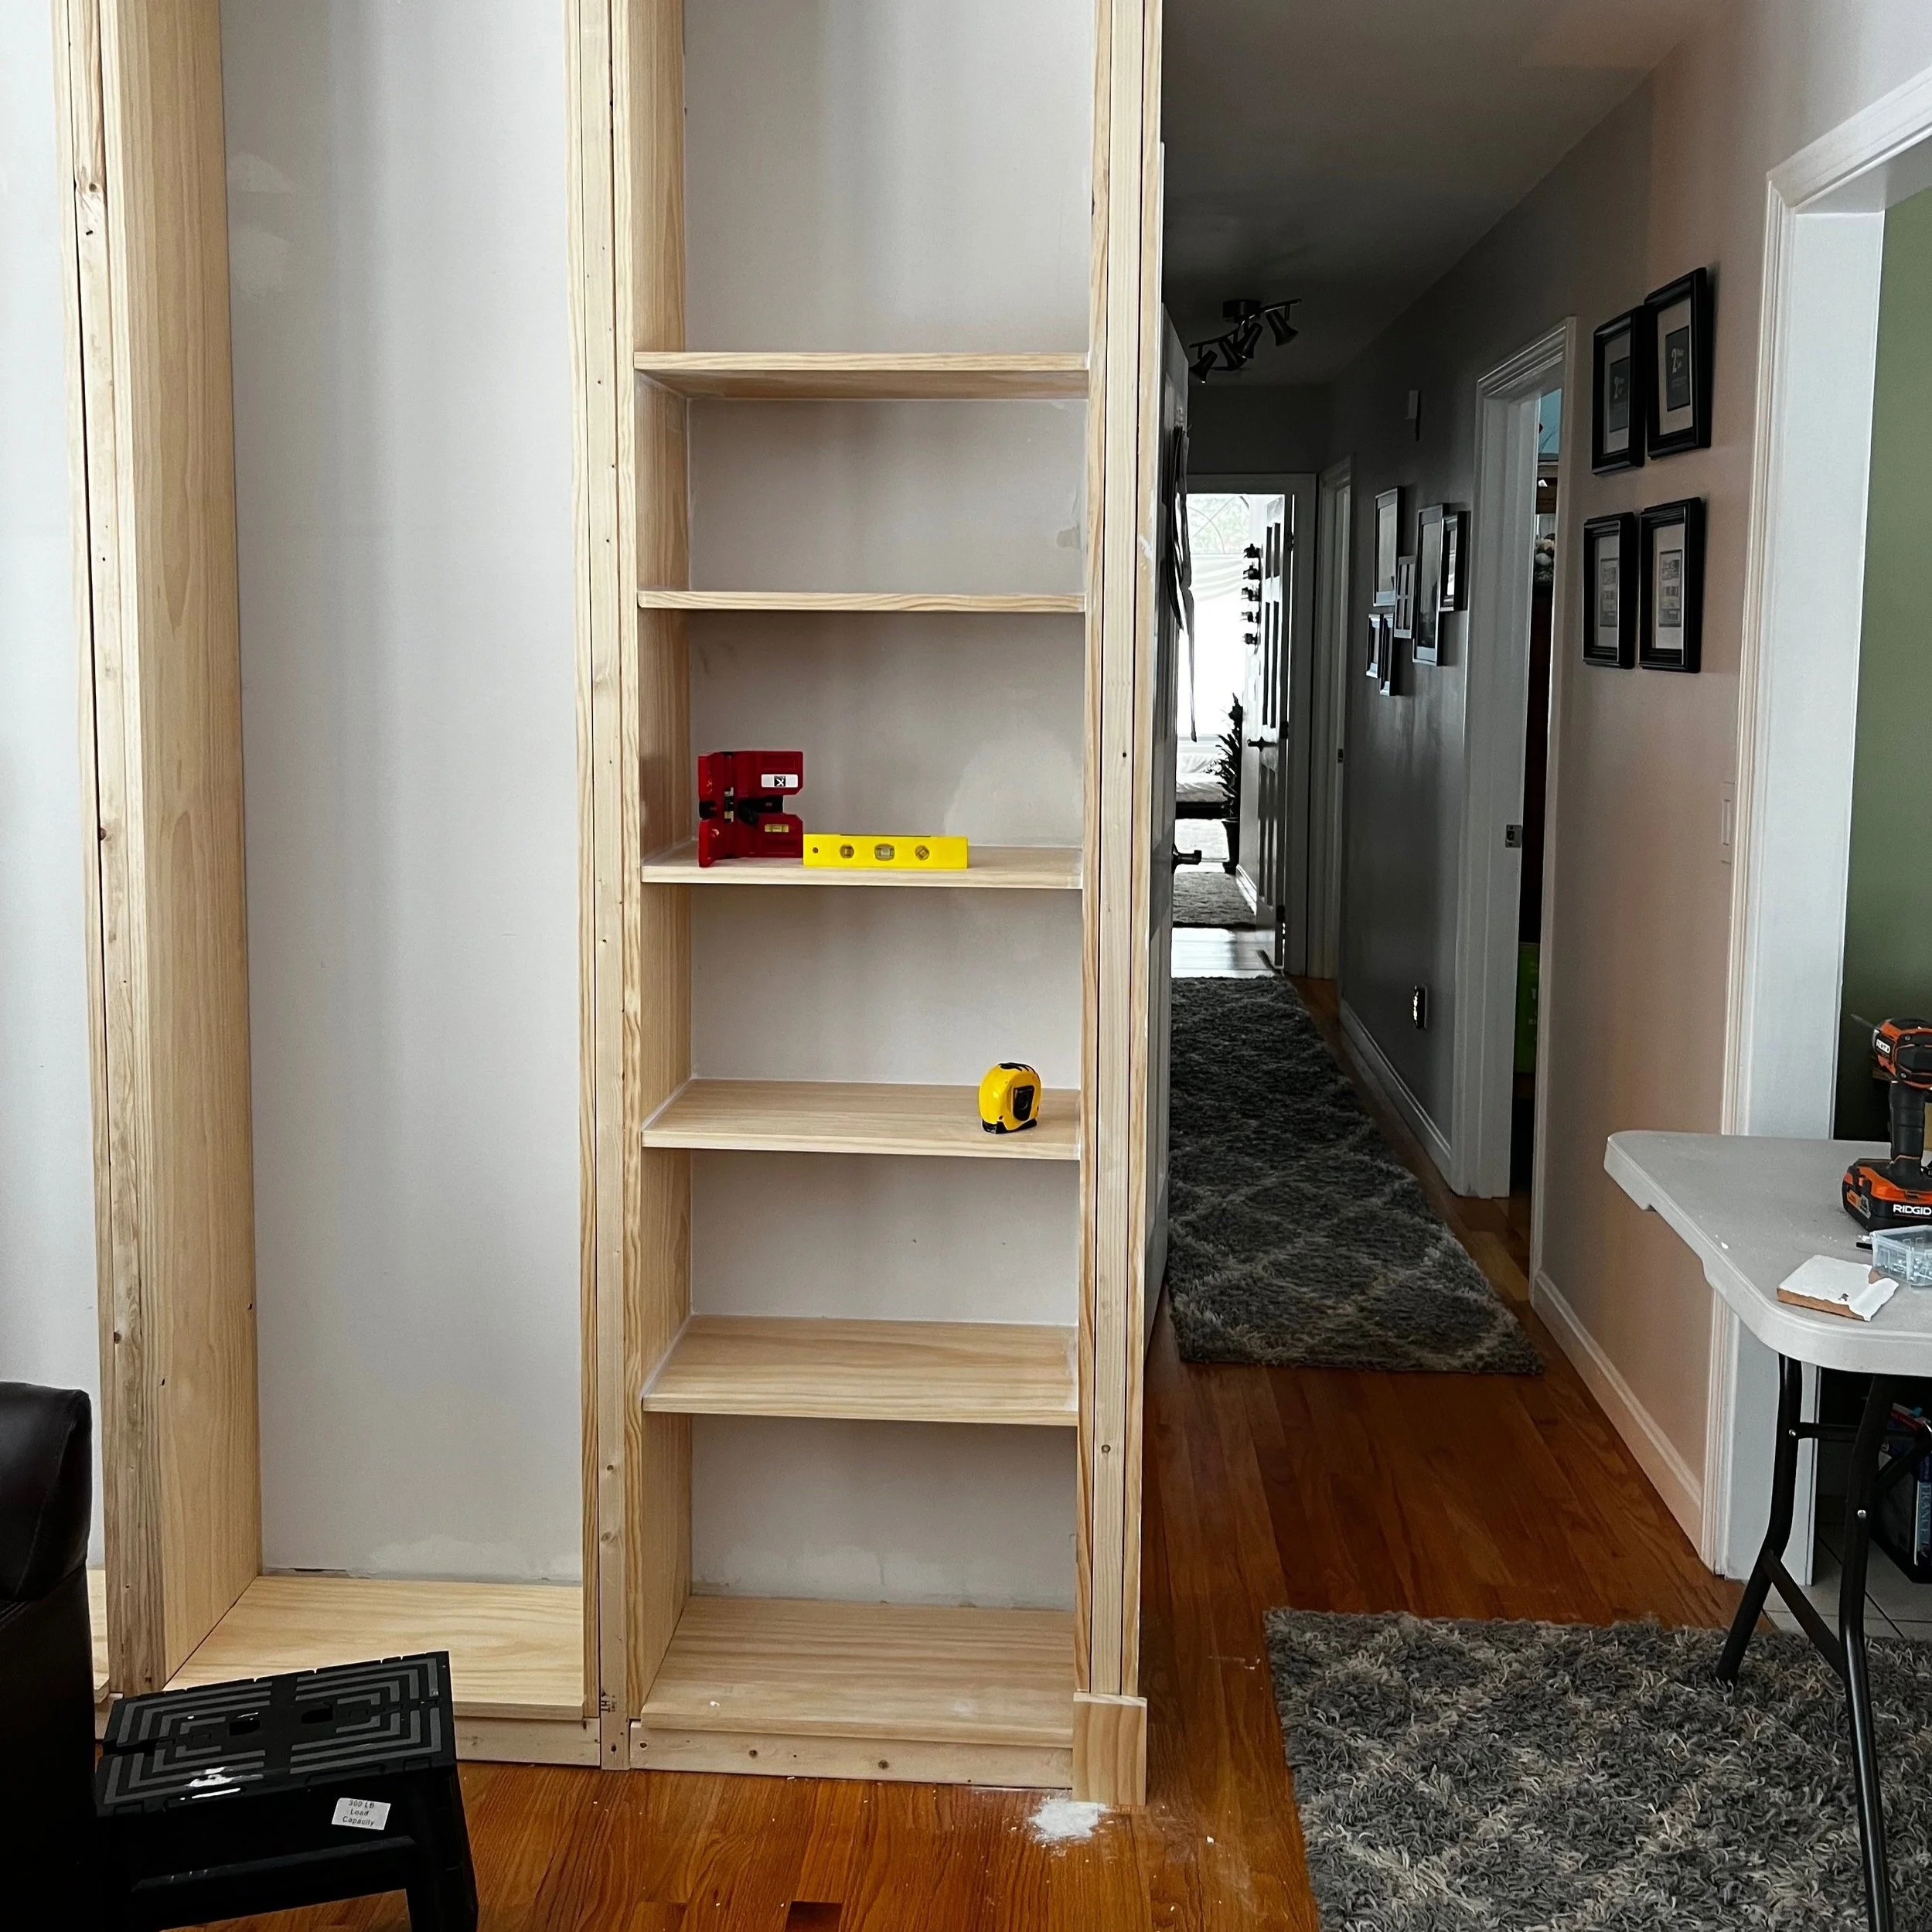
Since my vertical supports do not align with the wall studs, I installed a header board where the ceiling meets the wall. From there, I screwed in the vertical support spacers at 24” intervals.
I built up a platform to raise the bottom shelf up off the floor. The bottom shelf needed to be at least as high as the top of the floor moulding. I then started making sandwiches of the 2x2” supports and the 1x12” select pine boards, and screwing them to the pieces already attached to the wall.


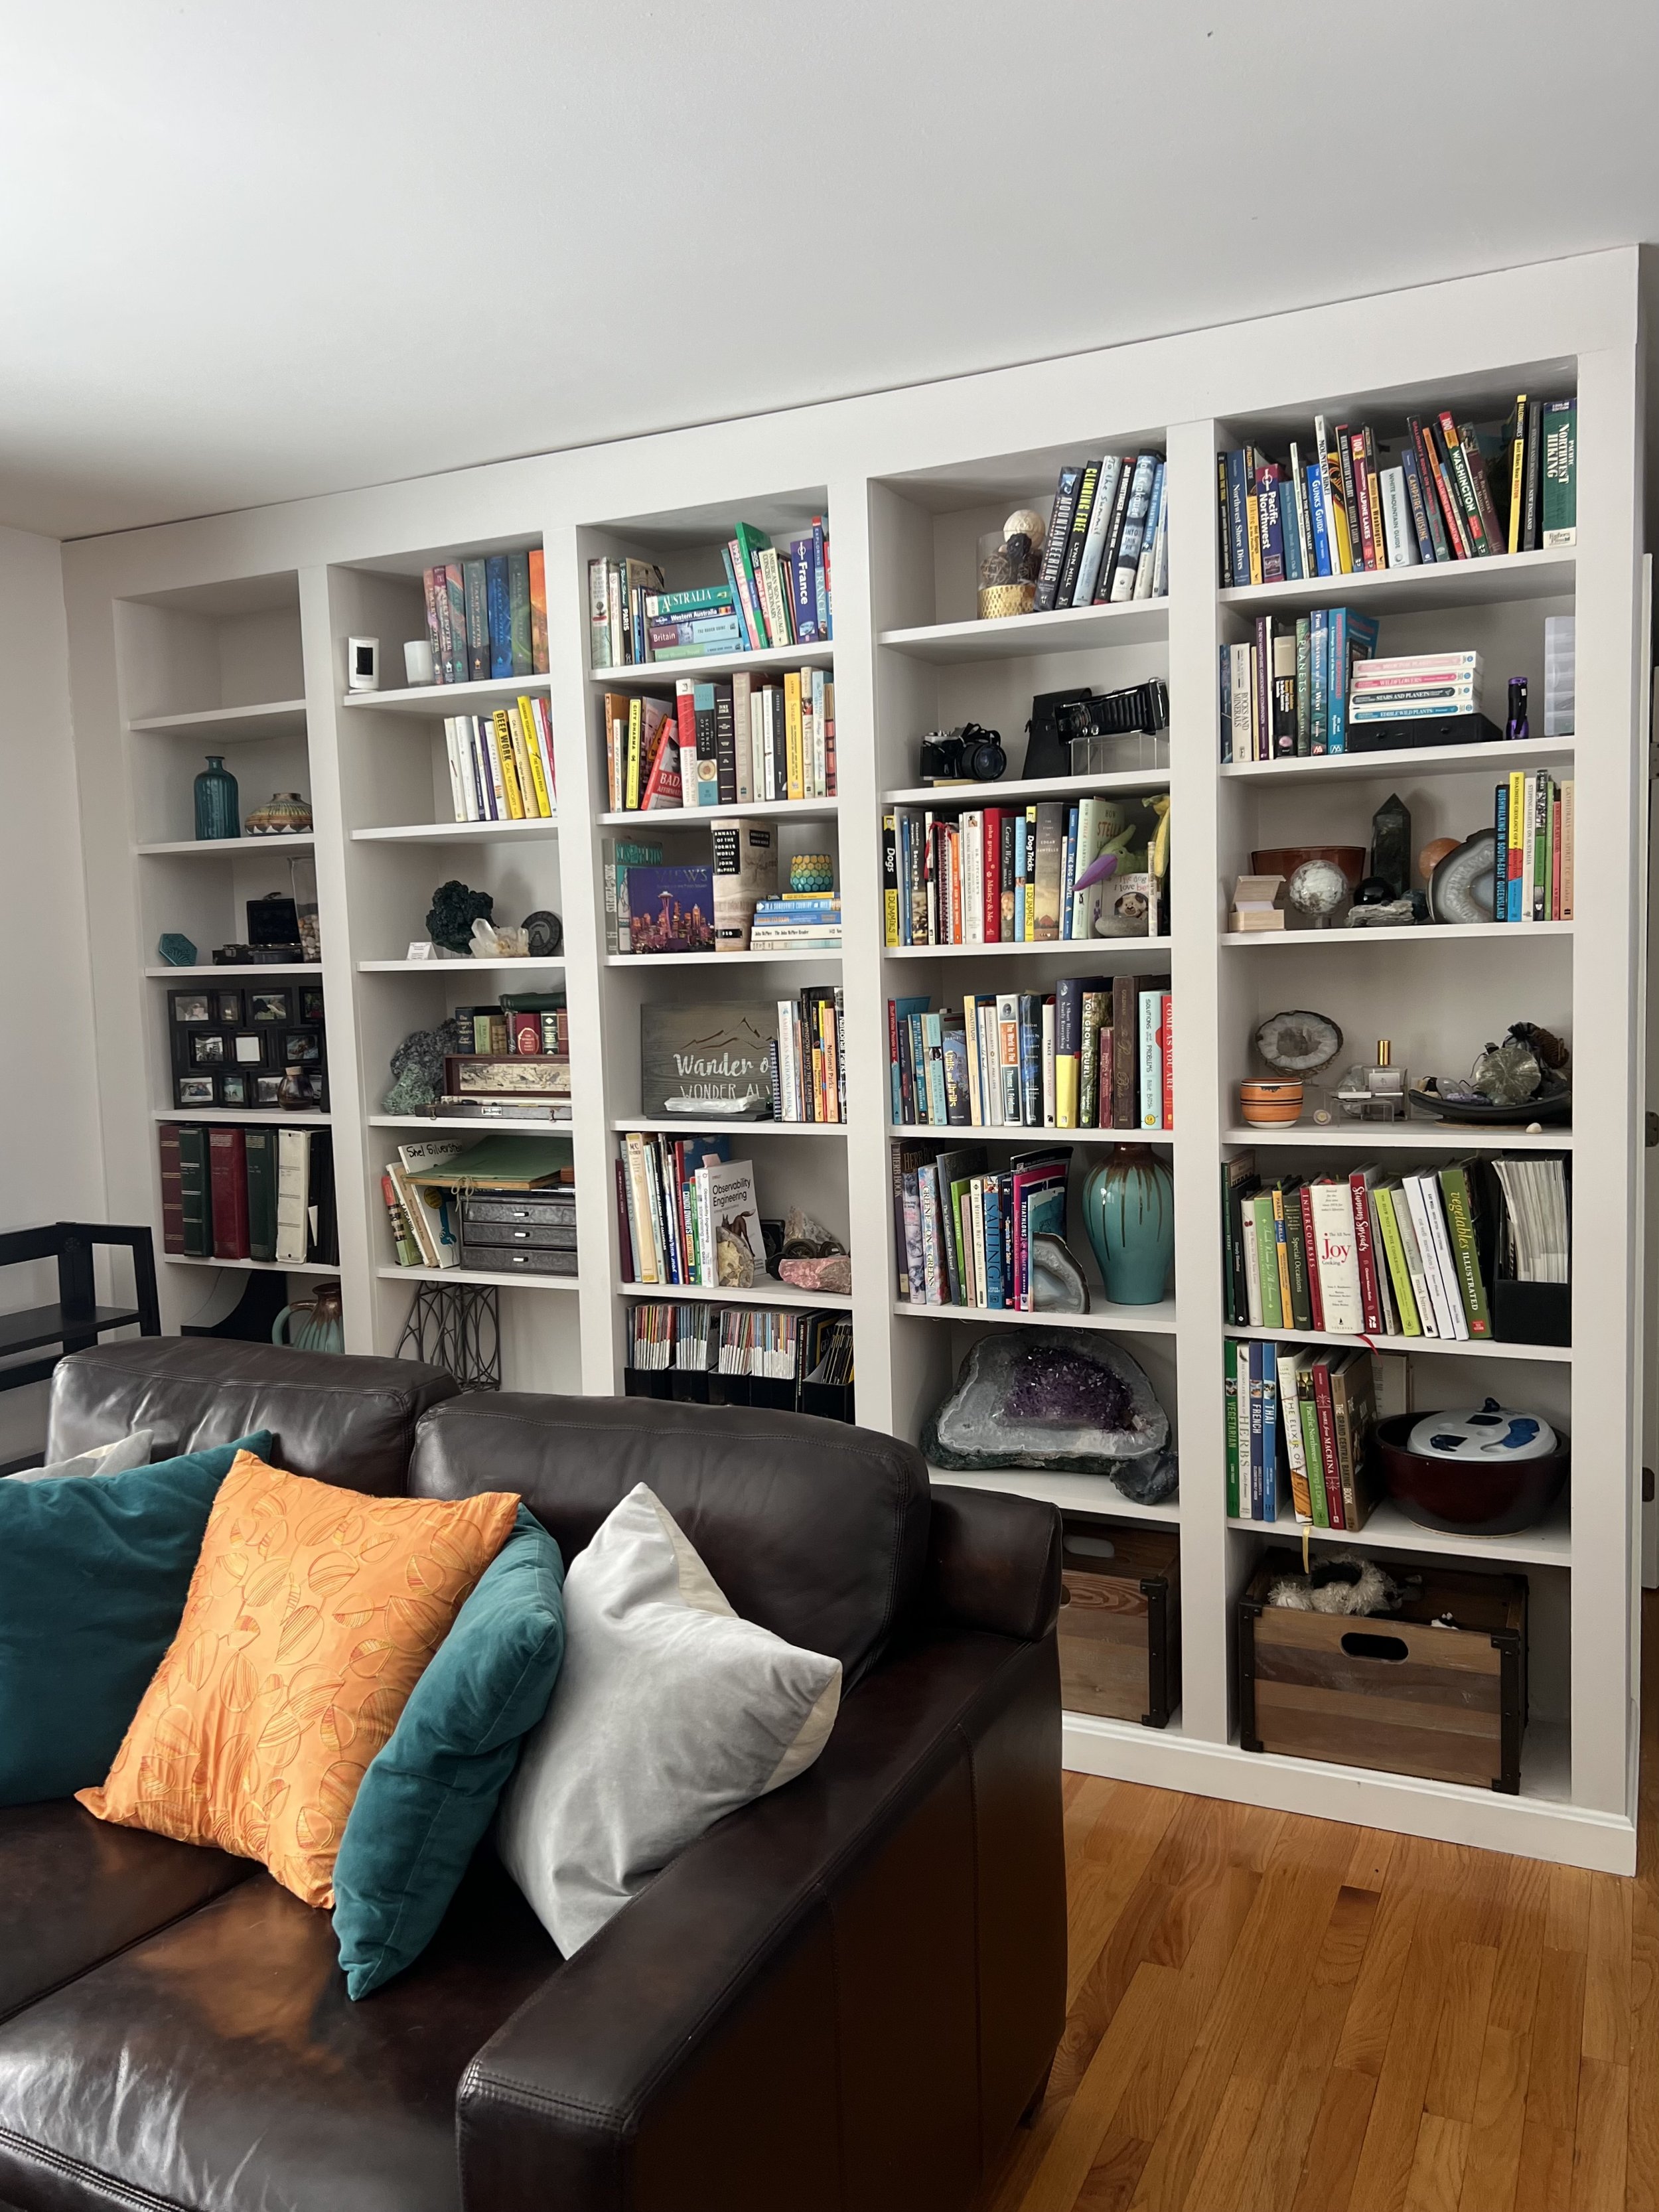
Next: Shelves and shelves and shelves. Forty, to be exact… cut from 1x12” select pine boards and pre-drilled using a pocket-hole jig. Measured and leveled and squared again and again and again. Once they were perfectly aligned, I spackled the holes.
From bottom to top, the spacing measures 15”, 12”, 12”, 12”, 10”, 10”, 10”.


I mudded over the exposed end using joint compound, going slowly with thin layers to avoid cracking and sinking. I sanded between each layer, creating a nightmare of dust in my house… but I’m hoping it’ll be worth it. I added plain vertical trim to hide the sandwich-edge of each vertical support, and a horizontal piece across the top. The bottom will get floor moulding to match the rest of the house.
At this point I also got antsy to start painting. I know, I know… probably a bit premature. But it was fun to start seeing my vision appear. It also helped me see where I needed additional caulk to make up for my less-than-perfect carpentry skills.
I later heard the quote: Do your best, and caulk the rest!


It’s really starting to take shape now that it’s painted with Behr’s Crème de la Crème to match the living room, and loaded with a bunch of my books and knickknacks. I added rustic crates from Plow & Hearth to collect other odds and ends. I’ll have to wait until lumber is back in stock before I can finish the last of the shelves, but for now I’m quite pleased with how it came out.
Next up: clean up the gap where the shelves meet the ceiling, and elsewhere in the room where the ceiling joints have cracked and warped… which of course will lead to a ceiling re-paint!