The Pergola
I have been thinking and imagining a pergola since I fell in love with one I saw during the house-hunting adventures of 2013.

When I moved in, the lower yard had a pile of rocks, an ugly bush causing blackened stains on the siding, path of pavers (removed in this pic leaving grass-less holes) leading half-way into the yard, another bush blocking the windows, glaring white concrete retaining wall, and screen room on stilts.

Patio, furniture set, painted concrete, grill, dining set. To see more about the in-between steps, go read my posts about the herb garden, patio, painted wall, and screen room demolition.

Hole dug for the footings revealed a stepped foundation… perfect for ensuring that the pergola (which will be bolted to the house) is on the same solid ground as the house itself.

Concrete poured in a box shape to level up the footings.

Concrete deck pier supports the post above the ground to prevent the wood from rotting in the wet soil.

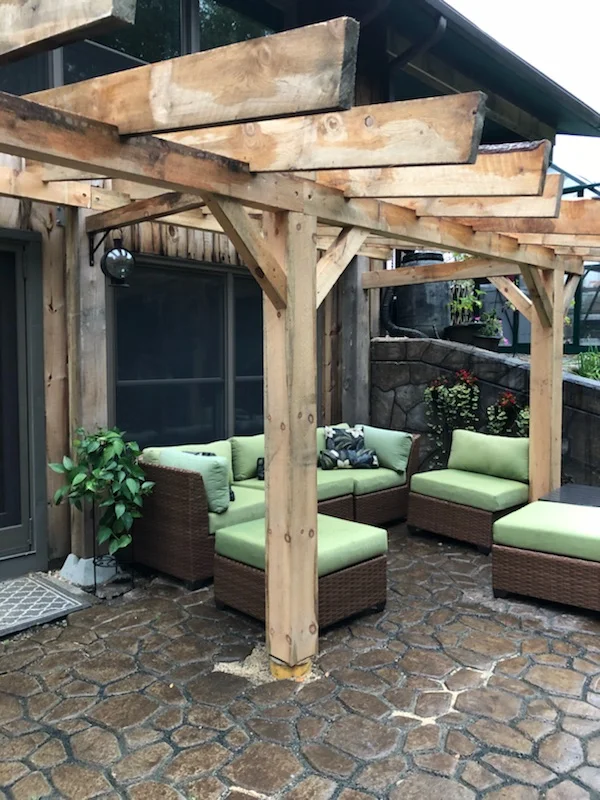
Large 7x7” posts are hand-chiseled down to 4x4” to fit into the concrete pier supports.

The post is bolted into the ledger beam (the supporting member that holds up the floor of my house) with a tempered aluminum Maine Deck Bracket. This will stabilize the post, even though it is not expected that any additional weight load will be added to the ledger. The 7x7 vertical post and 4x6 horizontal beam are dadoed together.


Next came the three front posts… the approach was to use 8” Sonotubes, since we didn’t have to contend with the foundation of the house. The entire outline was done… and then came the ‘oh sh*t’ moment. We had intended to make the pergola overhang the posts by about a foot on each side, for a total width of 22’ feet. As you can see in this picture, the beams don’t stick out past the posts. #%@#%
So, after a restless night’s sleep, Marc suggested a plan. He would replace the beams at the rear, since those were held in by a few bolts that could be easily undone. He cut new, longer beams.
The beams at the front presented a different problem, since the angle brackets had all been custom cut and toe-nailed in. He bought heavy-duty metal brackets (600-lb load rating) and affixed an extension to each end. The 45-degree supports add additional stability. Once all the rafters and decorative flourishes are added, no one will ever notice.

Back replaced with longer beams.

Front extensions.

The center beam is smaller (4x3”) and slightly higher than the outer beams to allow extra head clearance if I want to attach a light fixture someday. The horizontal center beam is cut into the vertical post, and the black metal bracket held the joint together until the rafters could be installed.
Close to done… next week the ends of the rafters will be trimmed and shaped, the patio pavers will be cut to fit around the post holes, and the plexiglass roof will be added.

For now, it’s done enough that I can put my feet up and shop Amazon for cafe-style string lights. (Edison bulbs on the way!)

My back yard setup is taking shape.

Arguably the most important accessory.

Second most important: hanging cooking tools away from curious dog tongues.
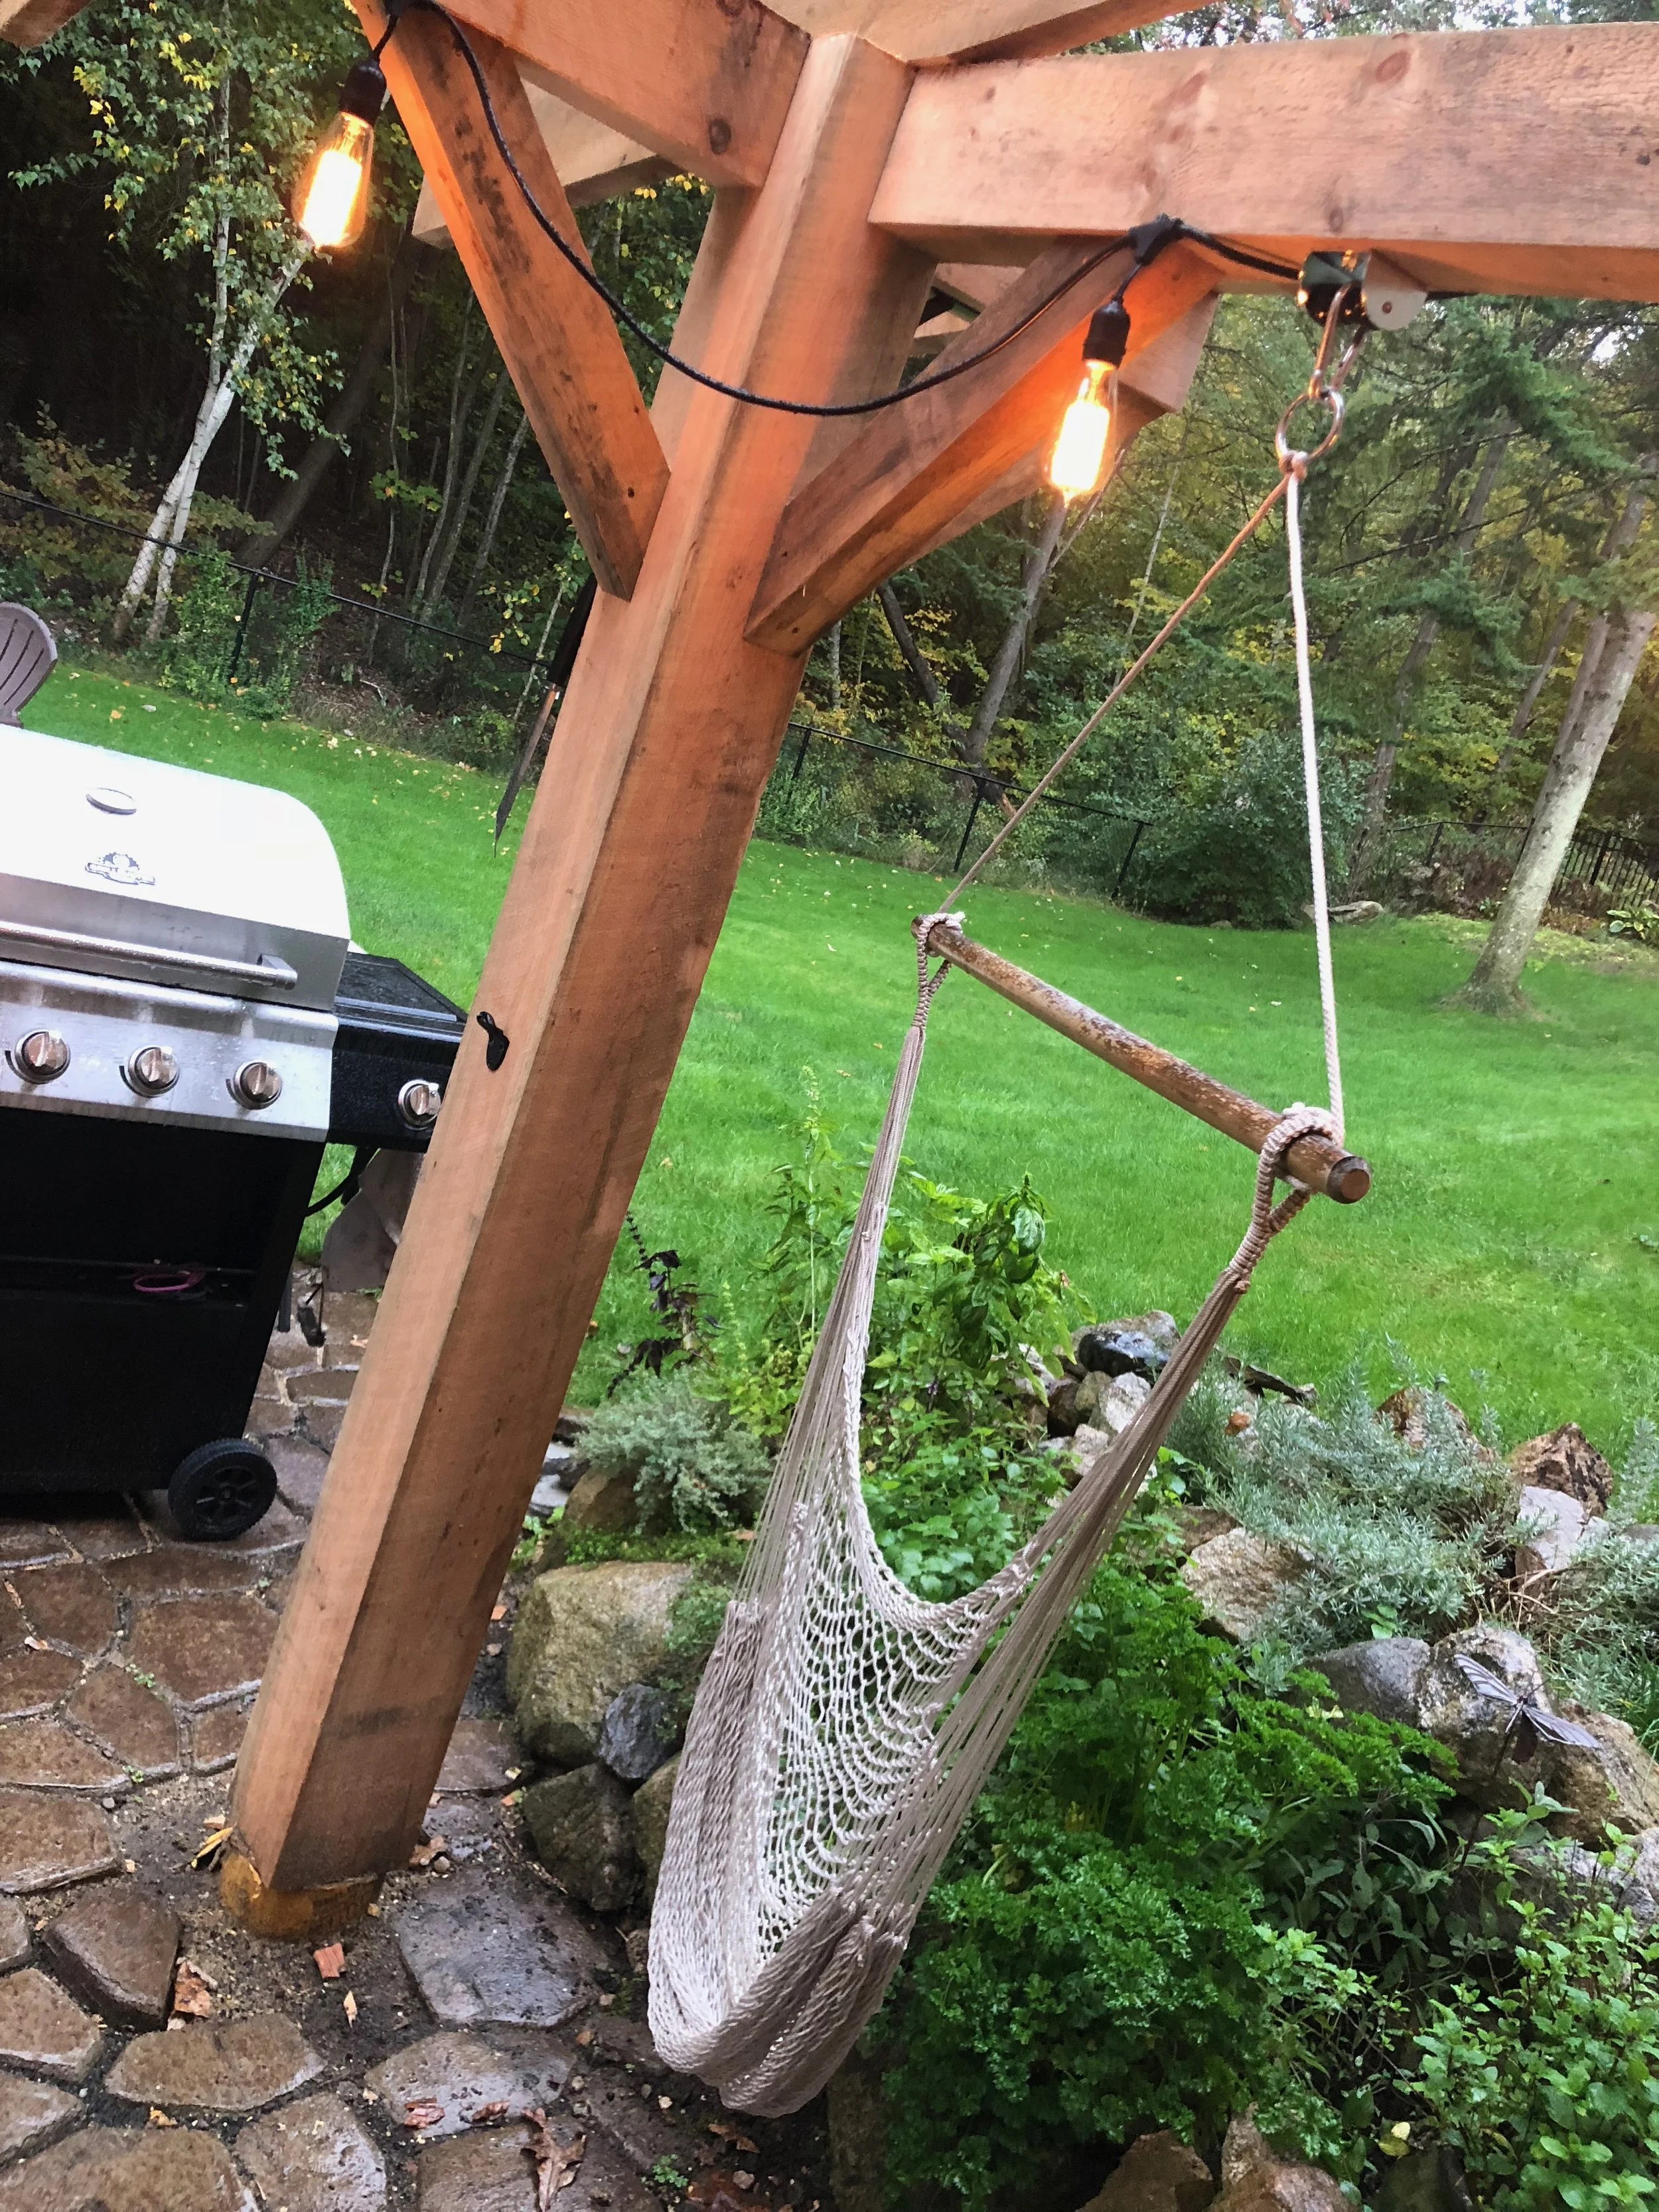
Swing seat (cushions forthcoming)

Fitting patio blocks around the posts and slab.

Front posts have trim to hide the concrete posts.

Edison bulb cafe lighting.

Rafter ends trimmed and shaped
Next it was time to get the clear polycarbonate ordered… giant sheets (6’ x 9’8”) of 1/4” Lexan. Extra strong to hold the weight of snow, and clear to let the morning sun shine into my office.
This introduced a new pain in the butt… apparently ordering 6’ wide sheets of Lexan gets you sheets that are cut at the factory at precisely 6’ and 3/4”. Which means that rafters positioned exactly 24” on-center are now a little too close together. ARGH. Rather than send these giant heavy sheets back to the glass supplier, Marc (my carpenter) grabbed the closest crowbar and yanked out a few rafters and moved them just slightly… so, if you were to climb up there with a measuring tape, you’d find that the span is no longer a perfect 24”, but roughly 25” on one side and 23” on the other. This is the kind of stuff that makes a perfectionist nuts, but I know it’s not going to bother me… until the next time I order 6’ sheets of Lexan from a place that actually knows how to measure.


